|
|

|
Porsche, and the Porsche crest are registered trademarks of Dr. Ing. h.c. F. Porsche AG.
This site is not affiliated with Porsche in any way. Its only purpose is to provide an online forum for car enthusiasts. All other trademarks are property of their respective owners. |
|
|
  |
| Eric_Shea |
 Jun 20 2014, 07:10 AM Jun 20 2014, 07:10 AM
Post
#441
|
|
PMB Performance                Group: Admin Posts: 19,289 Joined: 3-September 03 From: Salt Lake City, UT Member No.: 1,110 Region Association: Rocky Mountains  |
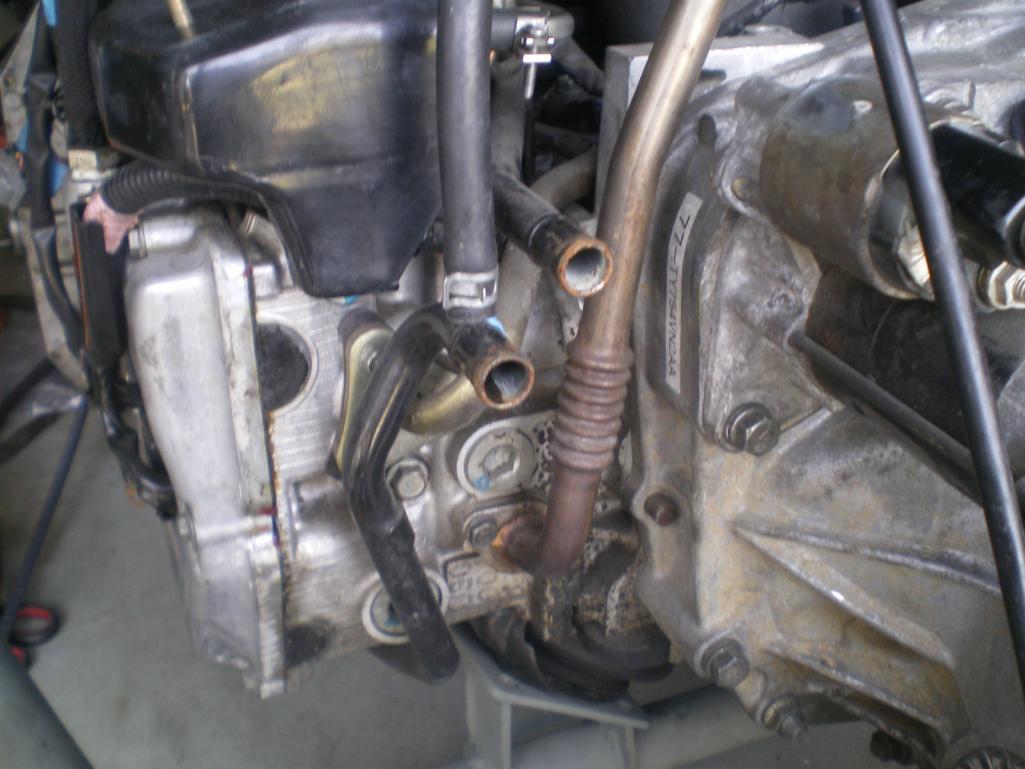
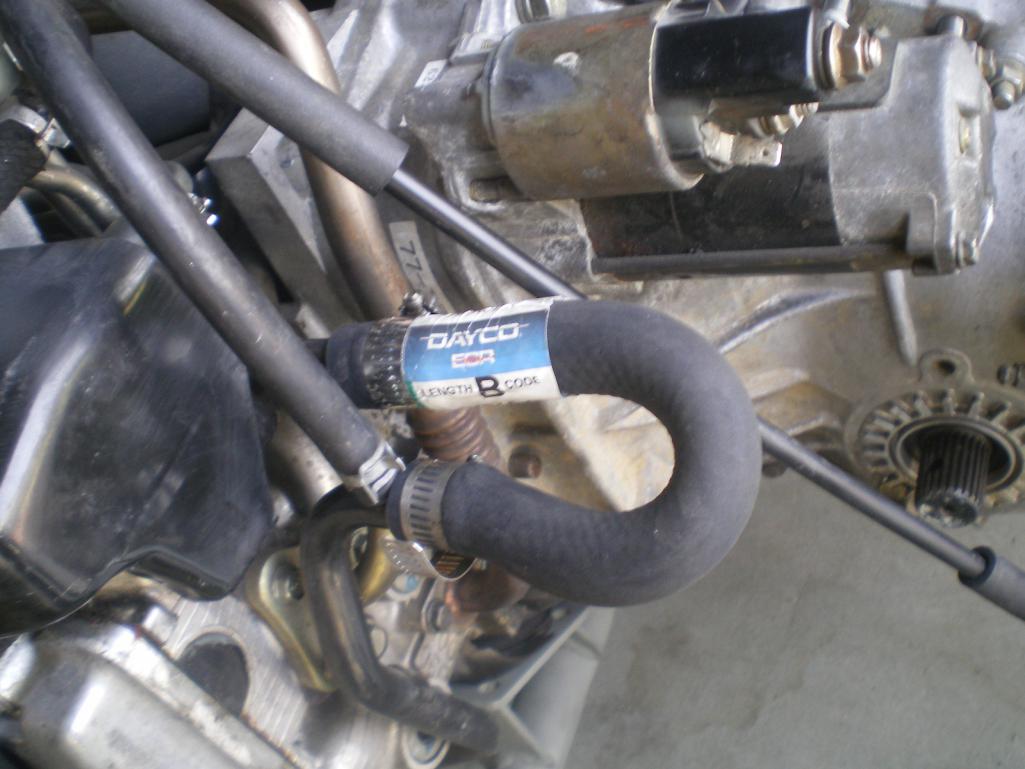
You need the different style clamp for that hose. It is the U-shaped spring clamp that fits over the end of the hard-line not in the groove on the softline. I'm currently in Monterey at parade so I can't readily find a picture for you but there are pictures of that style of clamp here on the site. When I see you shaped it's confusing because you naturally think of the clip that you use it in the picture above. This one is a spring style clamp again, it mounts on the hard-line side and has two legs that press against that body tab.
|
| 76-914 |
 Jun 20 2014, 09:54 AM Jun 20 2014, 09:54 AM
Post
#442
|
|
Repeat Offender & Resident Subaru Antagonist           Group: Members Posts: 13,634 Joined: 23-January 09 From: Temecula, CA Member No.: 9,964 Region Association: Southern California 
|
Thx Erc, I'll get with you next week to clarify. I'll buy those pieces from you if you have them.
|
| 76-914 |
 Jun 23 2014, 09:43 AM Jun 23 2014, 09:43 AM
Post
#443
|
|
Repeat Offender & Resident Subaru Antagonist           Group: Members Posts: 13,634 Joined: 23-January 09 From: Temecula, CA Member No.: 9,964 Region Association: Southern California 
|
|
| rhodyguy |
 Jun 23 2014, 09:57 AM Jun 23 2014, 09:57 AM
Post
#444
|
|
Chimp Sanctuary NW. Check it out.                Group: Members Posts: 22,192 Joined: 2-March 03 From: Orion's Bell. The BELL! Member No.: 378 Region Association: Galt's Gulch |
Tell your new 'apprentice' that in the interest of safety she needs to wear garage 'appropriate' clothing. That would be a pair of coveralls.....
|
| my928s4 |
 Jun 23 2014, 10:17 AM Jun 23 2014, 10:17 AM
Post
#445
|
|
Member   Group: Members Posts: 349 Joined: 18-August 07 From: Spokane, WA Member No.: 8,018 Region Association: Pacific Northwest |
Found this at the local flaps Sat. One side is aboot (I'm practicing my Canadian) 1" longer than the other but it fits well. $9 but what the Hell. 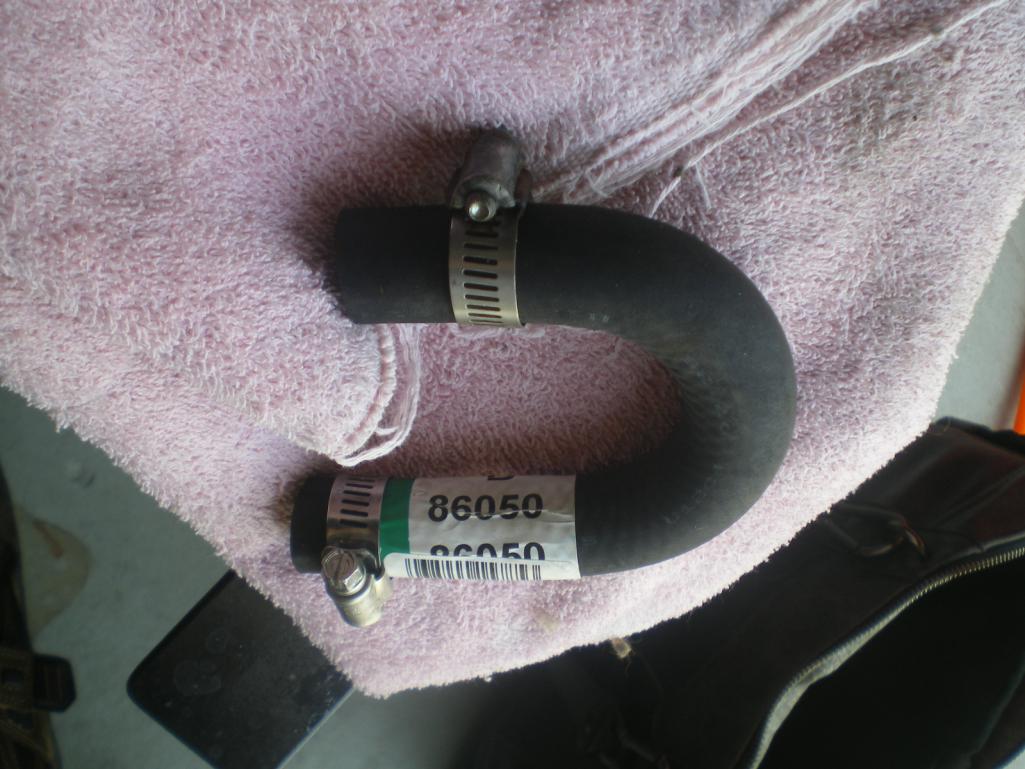 Nice find on the hose!, it was on my todo list to come up with something more elegant than what I had so nice job! Looks to be a heater bypass hose from a 95 Civic. |
| 76-914 |
 Jun 23 2014, 03:28 PM Jun 23 2014, 03:28 PM
Post
#446
|
|
Repeat Offender & Resident Subaru Antagonist           Group: Members Posts: 13,634 Joined: 23-January 09 From: Temecula, CA Member No.: 9,964 Region Association: Southern California 
|
Tell your new 'apprentice' that in the interest of safety she needs to wear garage 'appropriate' clothing. That would be a pair of coveralls..... Yea, we already had "that little talk". Awkward but you can't be too careful today. In my book, her Dad should have been here during those times and he wasn't. I did use the "safety approach". She dropped out for several days but showed up again yesterday. (IMG:style_emoticons/default/dry.gif) As far as the hose goes, thank the kid waiting on me. Most wouldn't give you the time of day but he went in the back and emerged with this after 10 min's. FWIW, I read that the flow cannot be impeded and should always be full flow on this heater loop. |
| 76-914 |
 Jul 5 2014, 12:36 PM Jul 5 2014, 12:36 PM
Post
#447
|
|
Repeat Offender & Resident Subaru Antagonist           Group: Members Posts: 13,634 Joined: 23-January 09 From: Temecula, CA Member No.: 9,964 Region Association: Southern California 
|
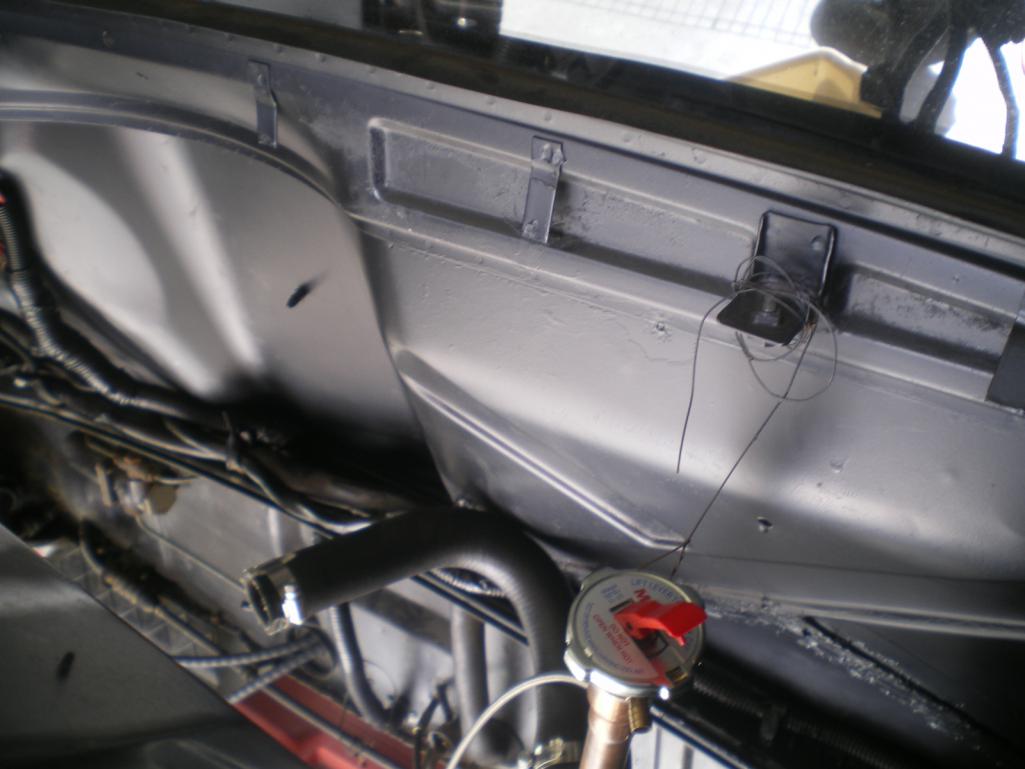
Damn, busier than a one armed cranberry merchant these past few weeks so little to show other than I re-visited the firewall area. I'm beginning think I'm obsessed with this area. (IMG:style_emoticons/default/wacko.gif) The engine compartment had a lot of primer from earlier repairs but I didn't want to shoot paint at this stage so I used that spray dip. Many positives. It easily removes if I want to shoot paint later; no over spray and you can spray right to the edge; insulating qualities between metal and my electrical jungle; some sound deadening. I received the SS metric hardware so I when I re-installed the wiring on the firewall I used all SS. As you can see in one pic the screw heads are inside and set in a puddle of JB Weld. This gives me the clearance on the inside and "studs" in the engine compartment.
 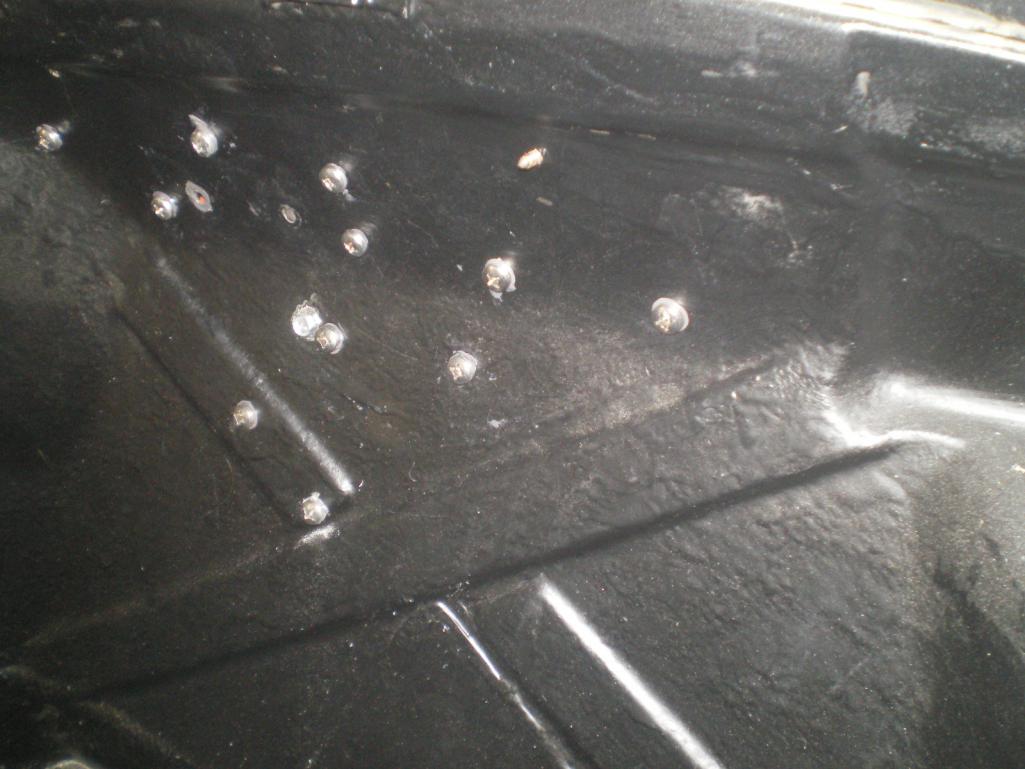 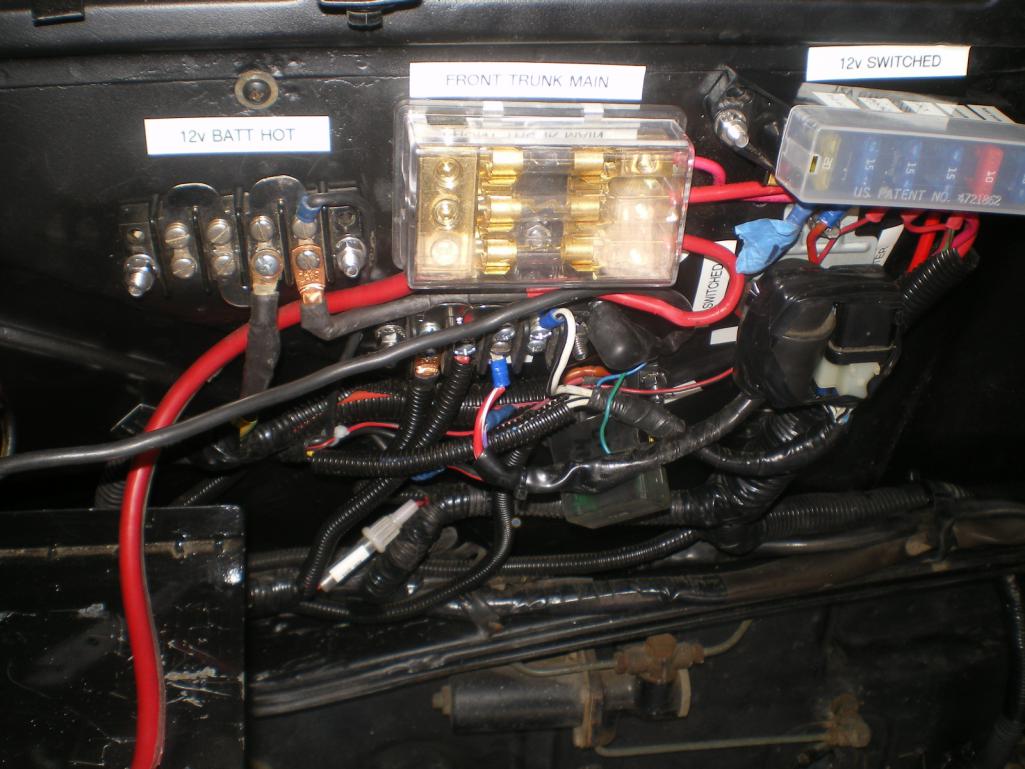 |
| 76-914 |
 Jul 10 2014, 08:44 AM Jul 10 2014, 08:44 AM
Post
#448
|
|
Repeat Offender & Resident Subaru Antagonist           Group: Members Posts: 13,634 Joined: 23-January 09 From: Temecula, CA Member No.: 9,964 Region Association: Southern California 
|
Bare with me. I've reached that point of going back to "complete" items that an organized individual would have already completed. Some of these shots you've seen before. To quote Oat Willie, "Onward thru the Fog!". A free bowl of Chile if you know who he was. (IMG:style_emoticons/default/biggrin.gif)
Put some SS hardware to good use here 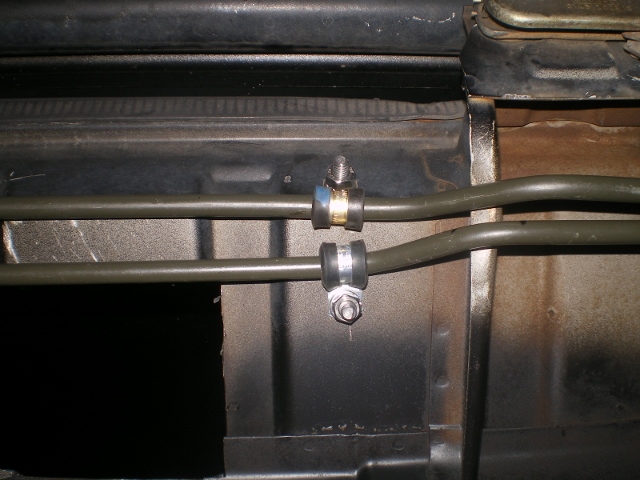 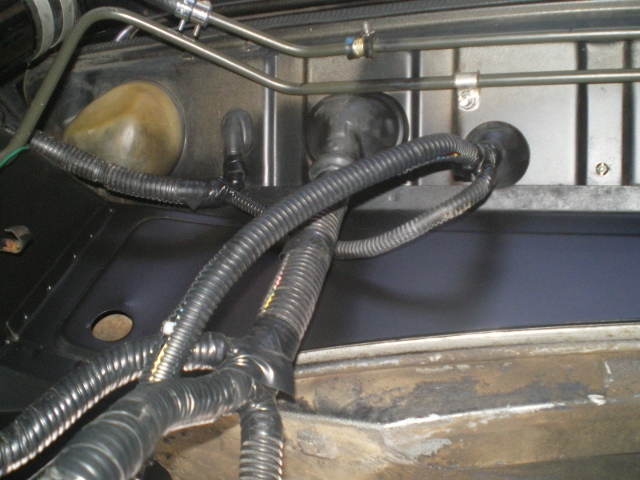 Applied lables indicating all my ground points for the next poor schmuck. 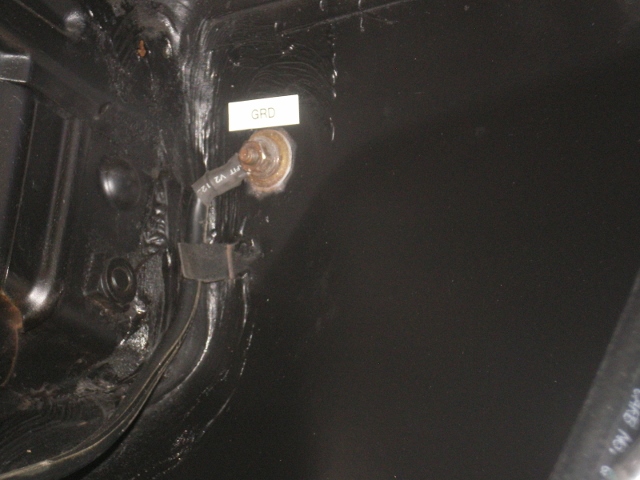 Needed to modify my "K n N" filter to accept the air temp sensor. 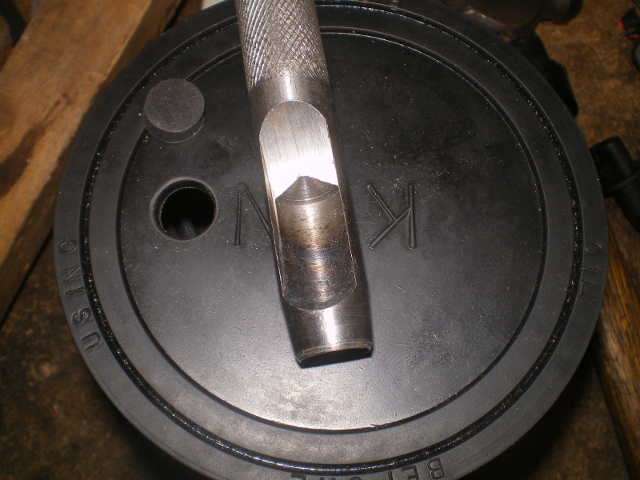 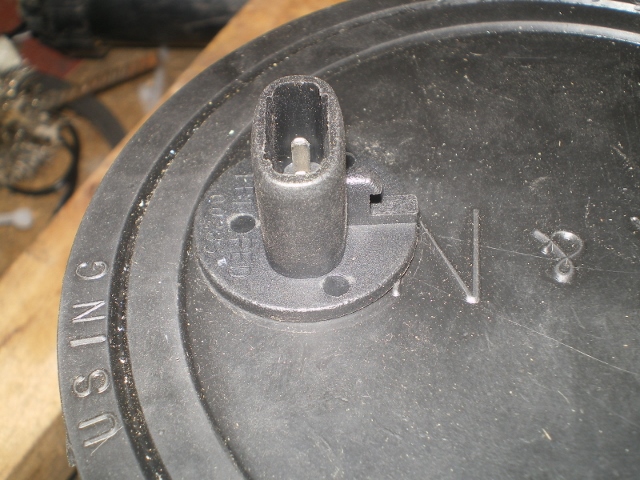 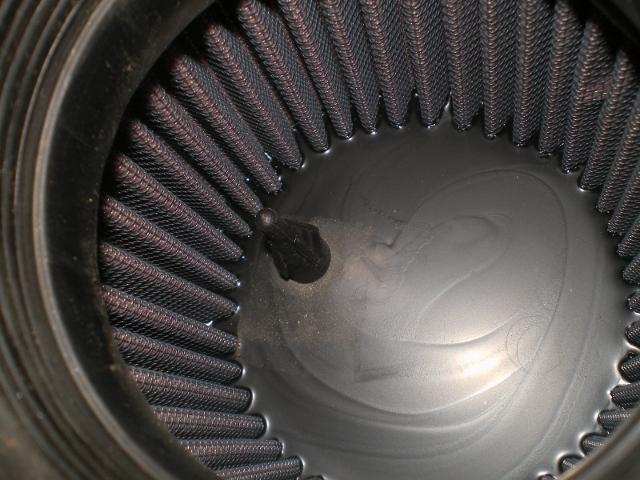 When you've reached the torque value but need another little bit to align the cotter pin, this is it! Smooth as butter and requires no strength. (IMG:style_emoticons/default/biggrin.gif) It's also fast as Hell to remove them this way. If your close and need break yours loose, come on by. I've got pipe wrenches up to 60". (IMG:style_emoticons/default/evilgrin.gif) 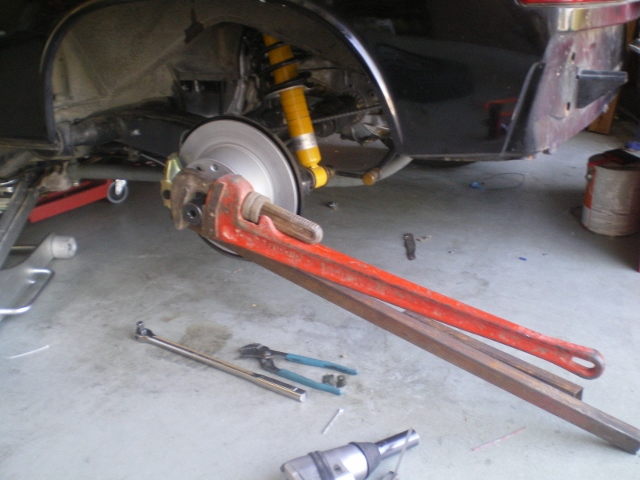 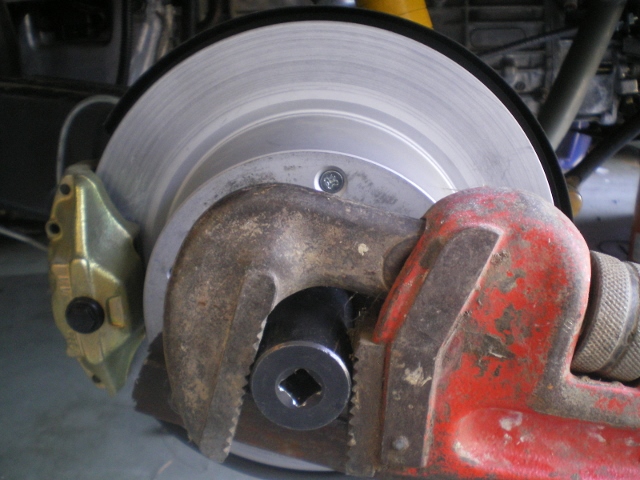 Meet the "new" Hell Hole. If your doing one of these hydraulic conversions you know what I'm talking about. It's a bitch fitting that clevis, spacer and cotter pin. And if you've done it more than once you feel my pain. (IMG:style_emoticons/default/dry.gif) I'm good with the outcome, though. The large fender washer between the floorboard and return spring, compresses the rubber washer against the floorboard for an air tight seal. Didn't plan that, just fell in my lap. (IMG:style_emoticons/default/rolleyes.gif) The bolt access hole above it still needs a snap in cover. (IMG:style_emoticons/default/dry.gif) 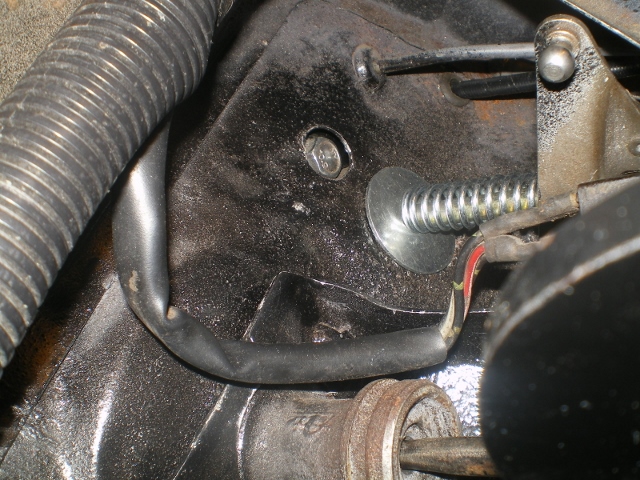 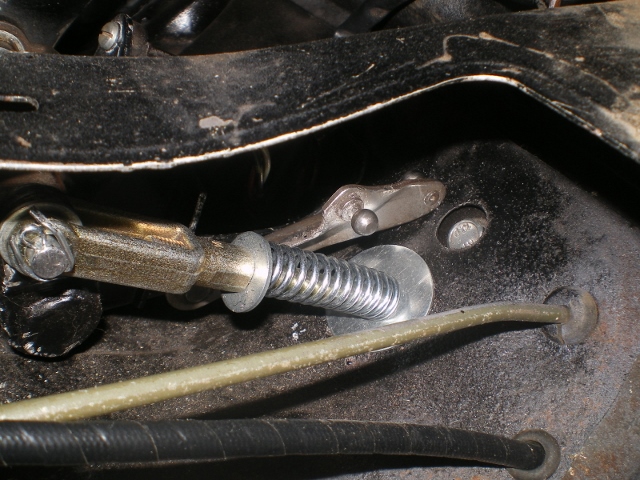 I hope that I didn't jump the gun and throw this Dynamat in too early. I'm going to try it w/o any on the firewall, first. If it's noisy I'll add some but I don't have an air cooled engine w/ carbs so I should be alright. 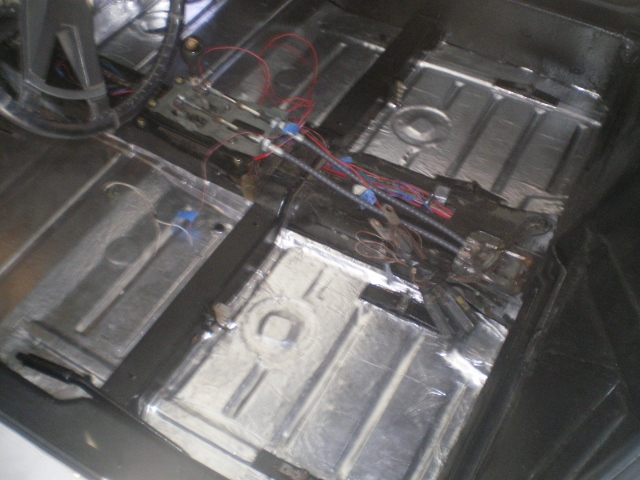 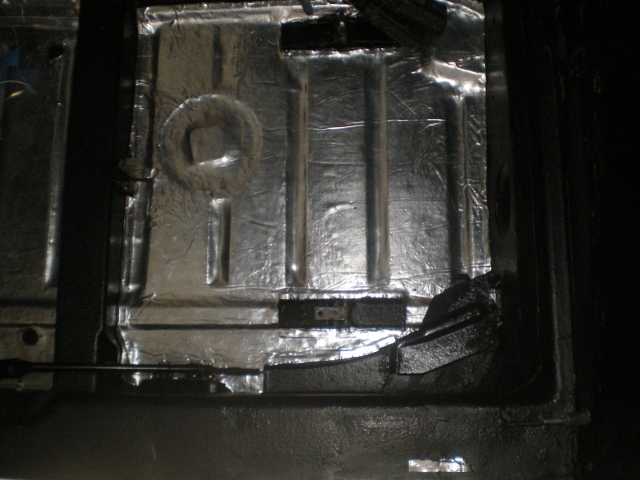 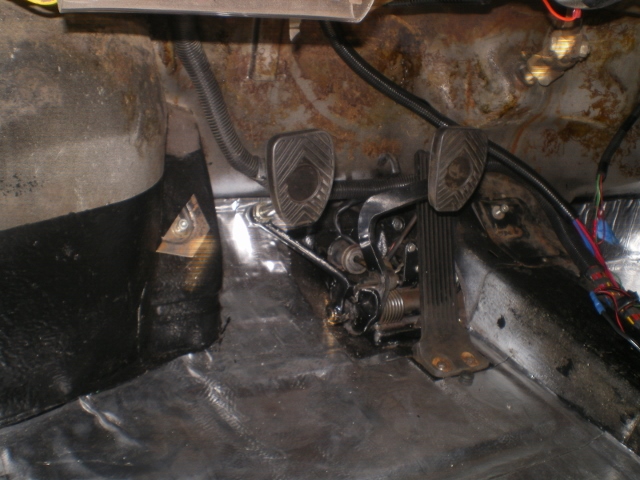 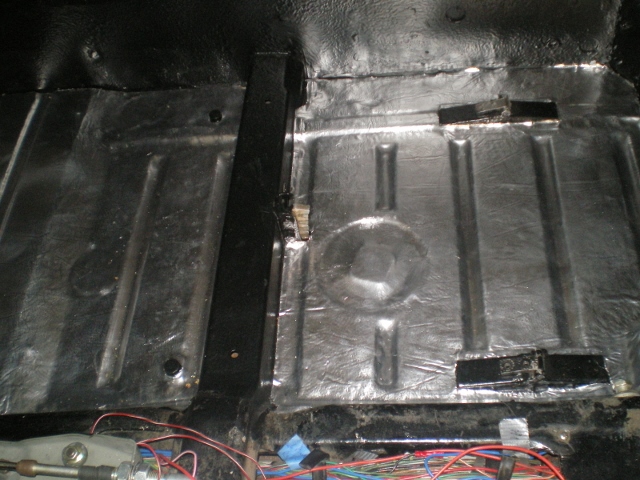 Short of paint and removing the white plastic cups for a "return air", the rear trunk is a "wrap". The one harness laying in the right rear corner is for the 3rd or rear 02 sensor. This may get 86'd. From what I'm reading this does not effect the tune and is basically there as "reporting device" used when it is smogged; which it won't be! Also, I 86'd the 2 covers I made for the starter and clutch slave and replaced them with one large black metal box which I made . As it turned out the clearances weren't large enough (in my mind) with the 2 individual covers. This will give me a service access for future repairs, too! As it sits, the roof will still fit in the trunk! (IMG:style_emoticons/default/piratenanner.gif) 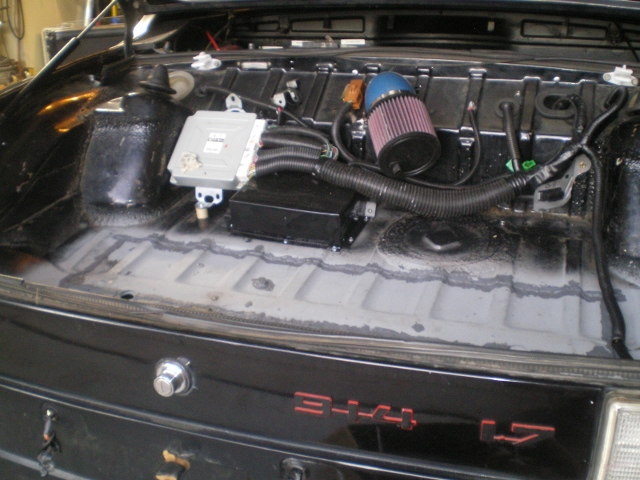 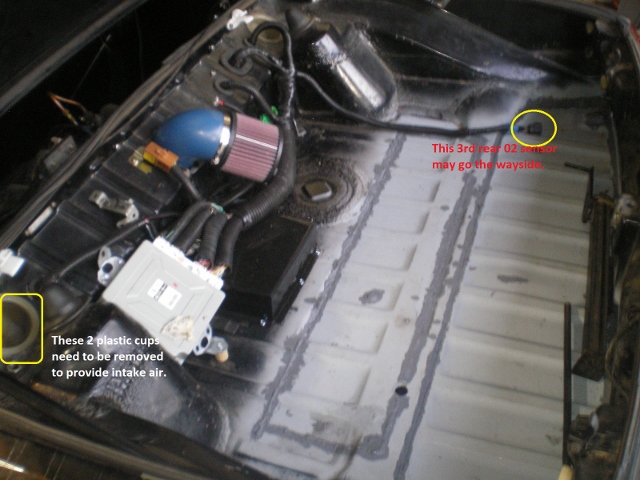 Next up.......... a foolish attempt to design and construct an exhaust system. It will be aluminized steel rather than SS. Many reasons for now and I may go SS later when I learn to weld SS. (IMG:style_emoticons/default/beerchug.gif) |
| rnellums |
 Jul 10 2014, 09:03 AM Jul 10 2014, 09:03 AM
Post
#449
|
|
Professional Enthusiast    Group: Members Posts: 1,646 Joined: 26-November 09 From: Littleton, CO Member No.: 11,072 Region Association: Rocky Mountains |
My Lord do I envy the cleanliness of your harnesses! Mine is still hanging together by alligator clips!
|
| Chris H. |
 Jul 10 2014, 09:40 AM Jul 10 2014, 09:40 AM
Post
#450
|
|
Senior Member     Group: Members Posts: 4,048 Joined: 2-January 03 From: Chicago 'burbs Member No.: 73 Region Association: Upper MidWest 
|
Looking good Kent! I was just about to ask you how the hell to use that spring you sent me... (IMG:style_emoticons/default/biggrin.gif) Great idea! I'll put that in today. I was getting a little "snapping" sound from the grommet moving in and out of the hole but that washer will stop that from happening. Can't wait to take the thing apart again (IMG:style_emoticons/default/headbang.gif) . The front of the center tunnel is sharp ain't it? And you can't use gloves or you'll keep dropping the clevis pin right? Oh well, it'll be great when it's all done.
HUGE updates coming on my end...although my wiring looks a lot more like Ross's than yours. I'll try to update it by tomorrow. |
| ruby914 |
 Jul 10 2014, 12:35 PM Jul 10 2014, 12:35 PM
Post
#451
|
|
Senior Member    Group: Members Posts: 720 Joined: 26-April 09 From: Hawthorne, Ca Member No.: 10,305 Region Association: None |
Kent,
You clean up well. (IMG:style_emoticons/default/smile.gif) Love the use of the rubber boots at the fire wall. (IMG:style_emoticons/default/beerchug.gif) Where are you with your axles? I have my axles and get ready to send them out to http://www.dutchmanaxles.com/services I will send them a CV ID spline for final fitment and have Sawtooth's drawing for referance. I think it was Sawtooth that used 18"overall, so I added that to my printout of his drawing. I recall you had a problem with length. Did you go with 18" and one was too long, one too short? After axles, that's it, trany swap weekend. (IMG:style_emoticons/default/aktion035.gif) Edit: I checked the axles that I have and I will have a hard time cutting 16 3/8" down to 18" long (IMG:style_emoticons/default/blink.gif) Edit #2 The best I can tell this 30 spline count can most likely be found on the 02-early 04 WRX (STI only). They may be on some older (hard to find) heavy load applications like an 04 legacy TT. They also seemed to be far more common on JDM models. Edit #3 After getting my axles back from resplining and removing 30 mm. I found, I was sold something other than 914 axles. (IMG:style_emoticons/default/mad.gif) 16 3/8 should have been a clue. I was thinking 18" was a typo. (IMG:style_emoticons/default/headbang.gif) I sent the axles that came out of the car to Dutchman. Removing 30 mm looked good to me. That came out to about 19 1/8". Attached thumbnail(s) 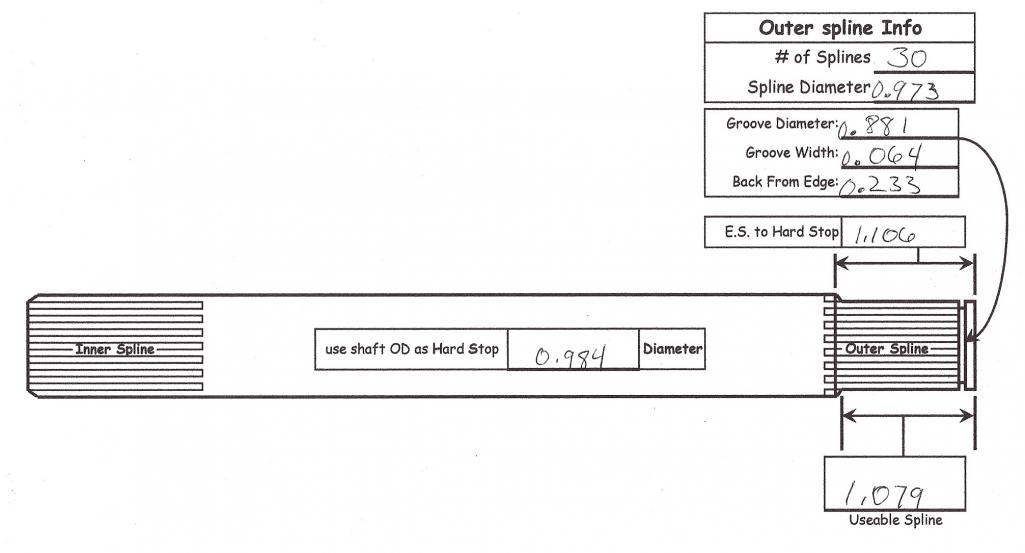
|
| 76-914 |
 Jul 13 2014, 08:51 PM Jul 13 2014, 08:51 PM
Post
#452
|
|
Repeat Offender & Resident Subaru Antagonist           Group: Members Posts: 13,634 Joined: 23-January 09 From: Temecula, CA Member No.: 9,964 Region Association: Southern California 
|
Damn Mike, I missed this entirely. Now I understand your text msg. (IMG:style_emoticons/default/chair.gif) Sorry man, but you have the info, now. My axles are on and fit. The difference is in the CV's. Two different brands and while yes, the final E-E measurements are the same the cupped end that goes adjacent to the tranny hub varies. So, I connect the R side 1st then the L side. They should have everything on file @ Dutchman. Look back in this thread and you will see where I marked the take off on a piece of blue tape on the axle. You can remove another mm to be safe. Talk to Travis @ Dutchman
My exhaust system is ordered and parts should arrive this week. 4 different warehouses are shipping to me so it may take a few days. In the meantime I decided to install the inserts for the heated seats. I made an offer to an ebay vendor a few weeks back and received a 20% discount. That was even better so I ordered a set for $40 shipped. I won't go thru a step by step of seat covering removal as it is already documented in the Classic thread forum. I will say it is easy and takes about 3 hr's. When complete, each seat has 2 connectors beneath which connect to a harness. That harness has a relay, fuse and Hi/Lo switch. I'll complete the install when the console is back in place. 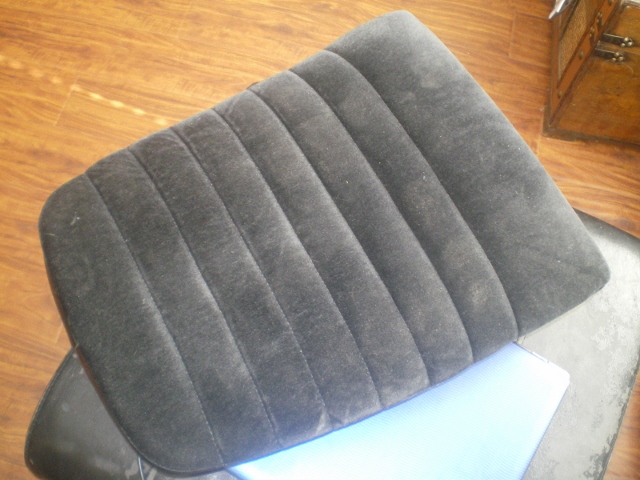 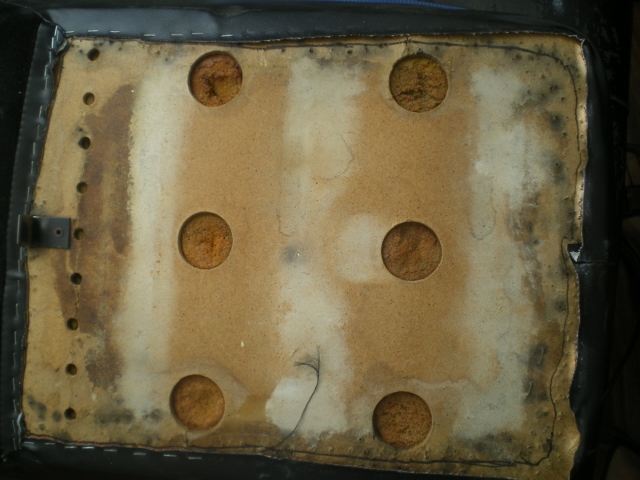 I drew a quick reference line around the materials border before pulling the staples. 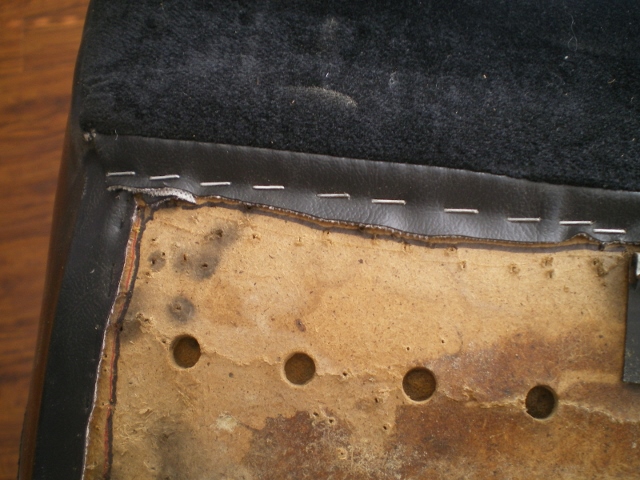 Remove the cover slowly so you don't tear the foam 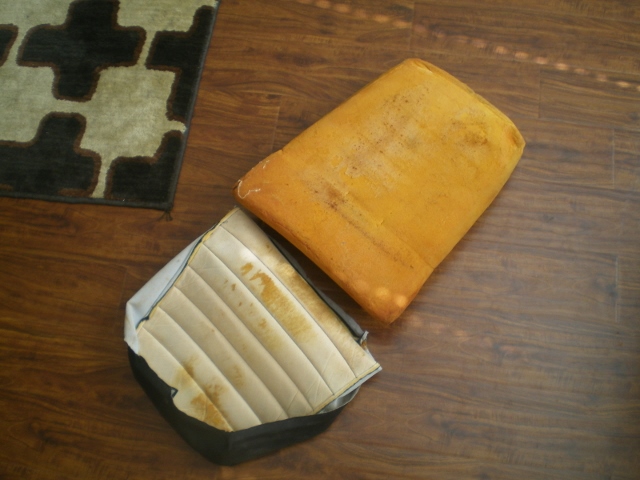 Lay the mat in place and tape it with supplied tape then stick the plug end out the back. 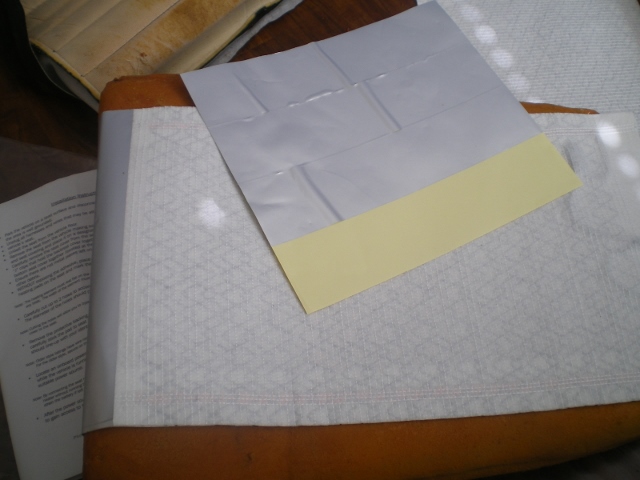 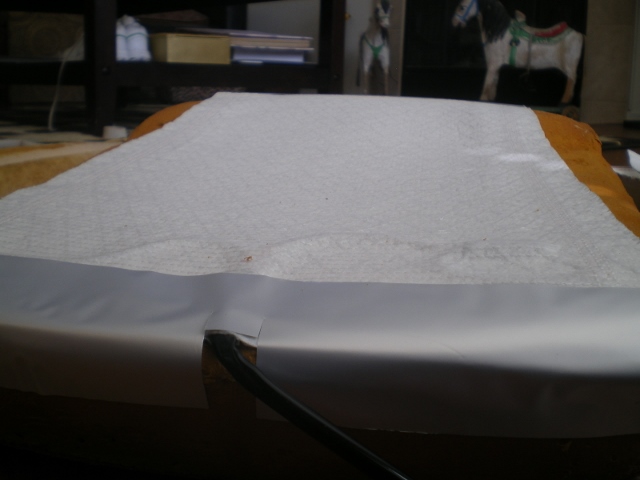 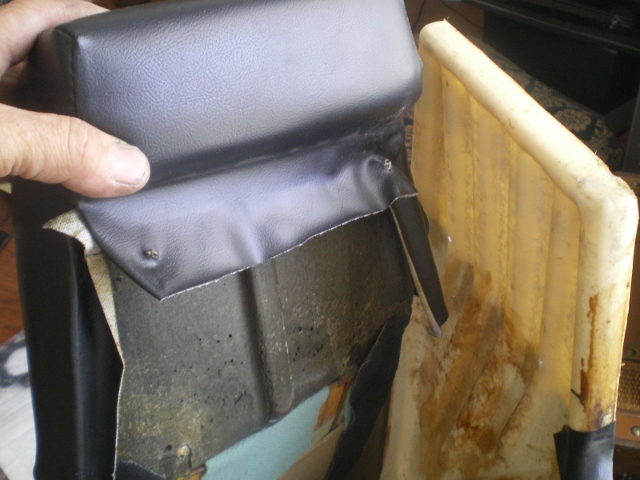 The back piece is identicle to the seat except that it has two adhesives strips to help hold it in place. 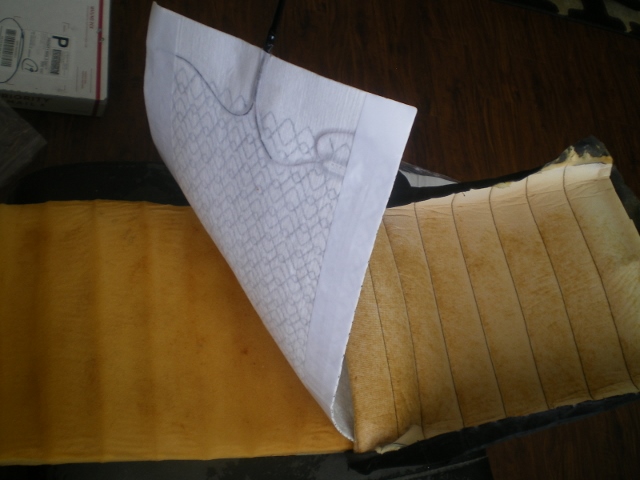 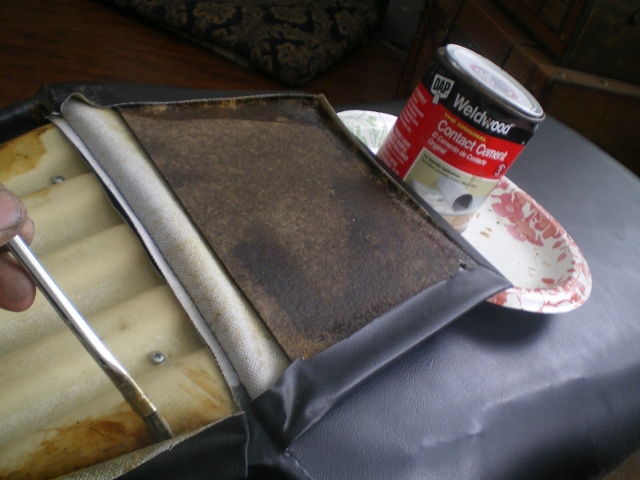 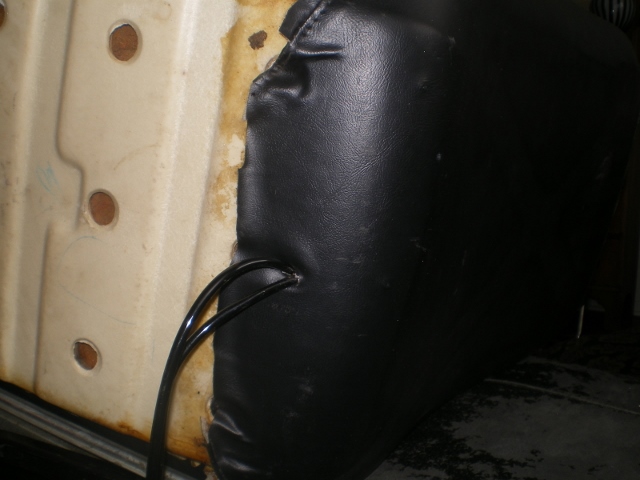 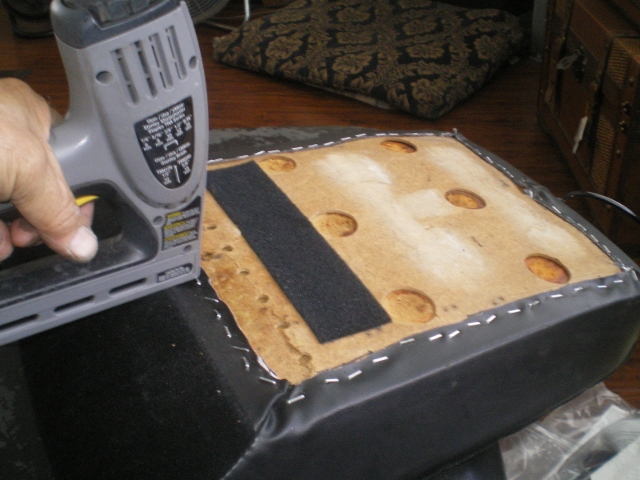 Hopefully the exhaust will be finished in 2 weeks. I took the car off "NonOp" status 2 weeks ago so I'll be able to test drive it when that day comes. (IMG:style_emoticons/default/monkeydance.gif) |
| 76-914 |
 Jul 16 2014, 08:54 PM Jul 16 2014, 08:54 PM
Post
#453
|
|
Repeat Offender & Resident Subaru Antagonist           Group: Members Posts: 13,634 Joined: 23-January 09 From: Temecula, CA Member No.: 9,964 Region Association: Southern California 
|
Moving right along, I think the brake question is answered so I can quit worrying over that . After pm's with Eric I have old style hoses on my '73. Added to the punch list. Remember my fiasco with the gages? They have found a home. (IMG:style_emoticons/default/piratenanner.gif) Ross (Rnellums) has a circuit board so I sent them to him. Or so I thought. Tonite I found the Speedometer in my 914 cabinet. I have no idea what I sent him. (IMG:style_emoticons/default/av-943.gif) (IMG:style_emoticons/default/lol-2.gif) (IMG:style_emoticons/default/laugh.gif) Ross, if you read this I sent you a pm. (IMG:style_emoticons/default/chair.gif) On a brighter note, parts are arriving.
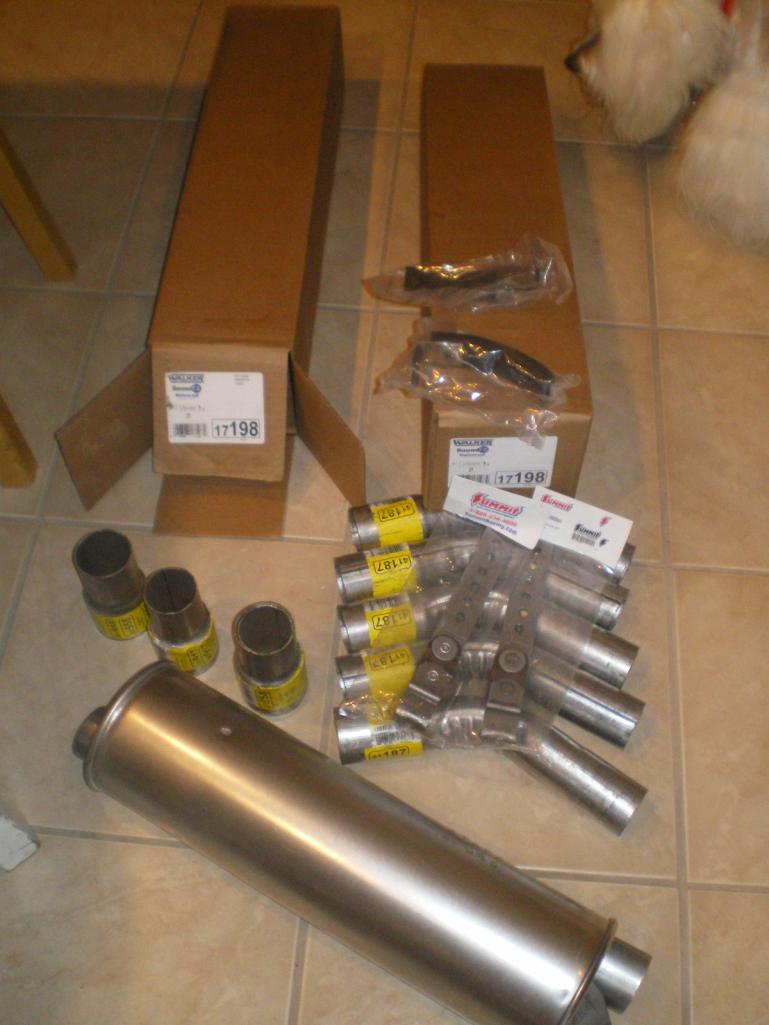 The 7' section of tube arrived this afternoon and the above parts arrived yesterday. I'm still awaiting the 2.5" 90's. The order is being shipped from 4 warehouse locations, GA, OH, NV and I forget the 4th one. (IMG:style_emoticons/default/dry.gif) When the remainder arrive I'll post up the pic's of my exhaust system. And try to show you how this round 2.5" pipe 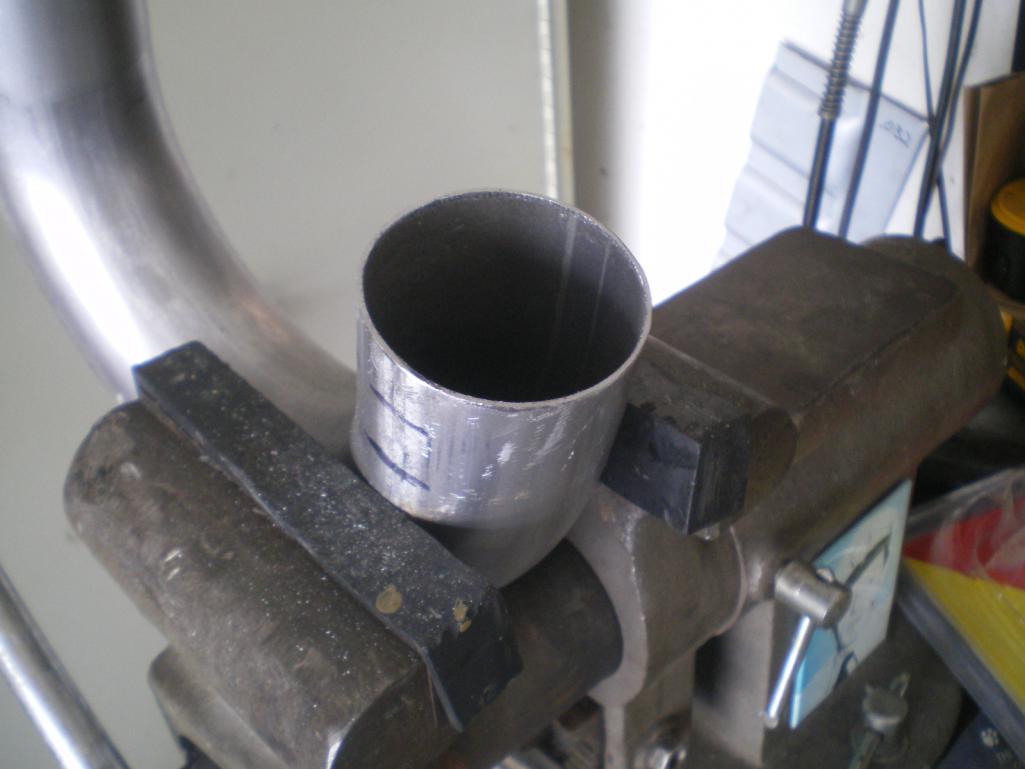 Gets shaped to fit the oval Suby header flange. 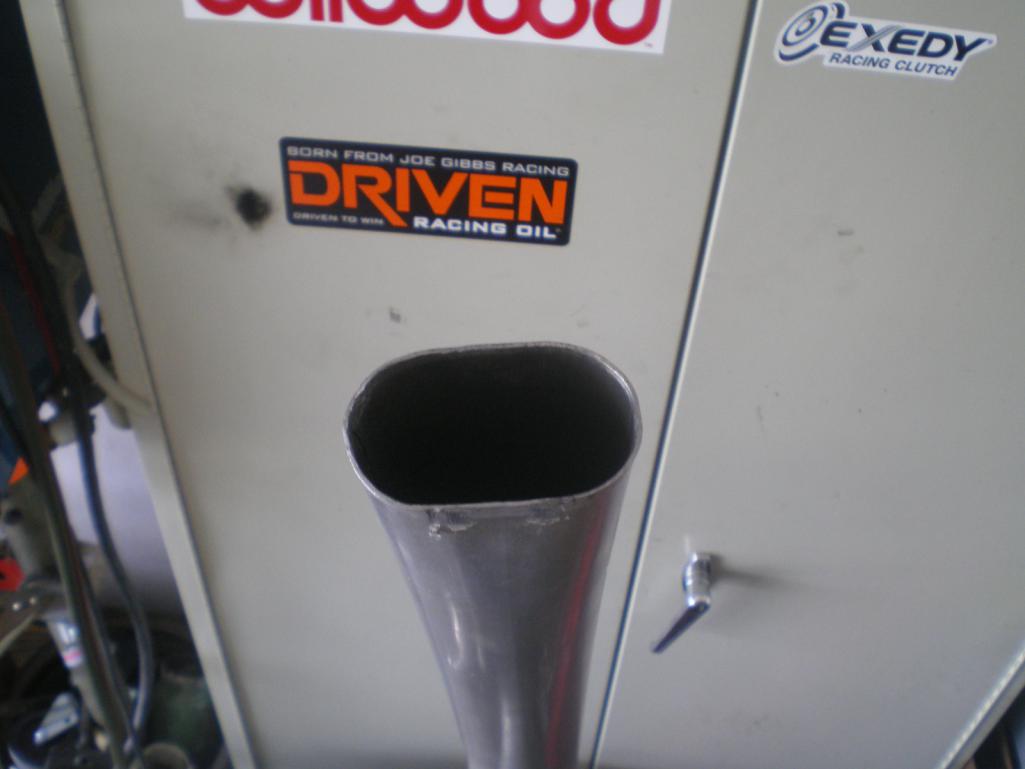 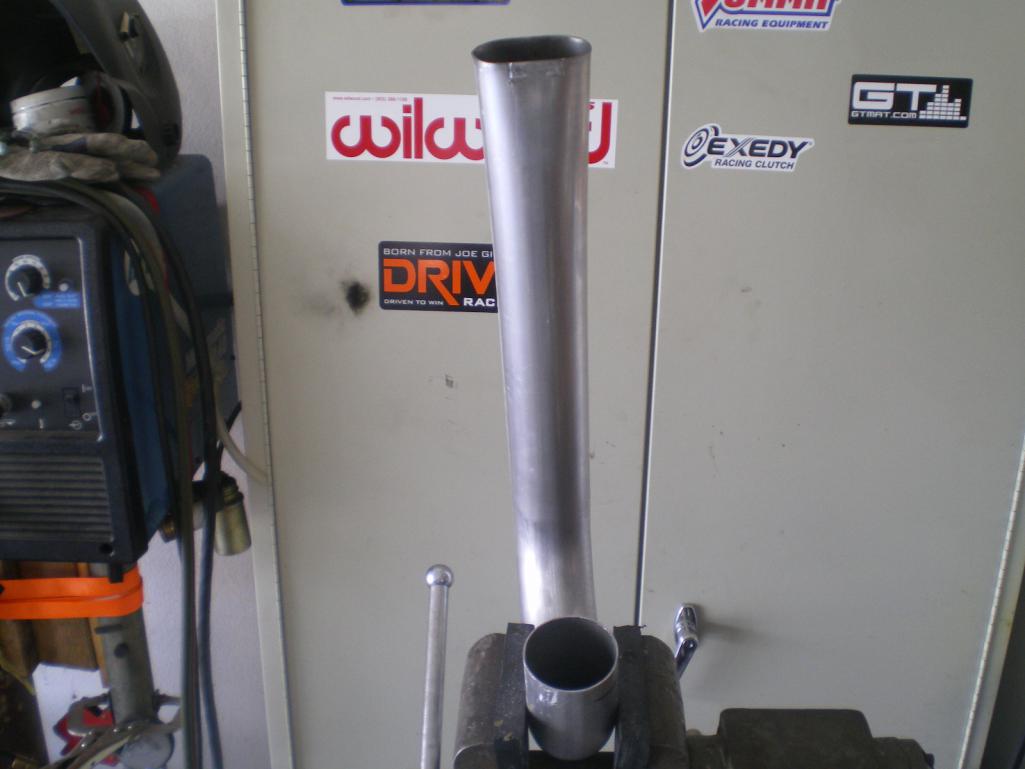 |
| rnellums |
 Jul 16 2014, 11:33 PM Jul 16 2014, 11:33 PM
Post
#454
|
|
Professional Enthusiast    Group: Members Posts: 1,646 Joined: 26-November 09 From: Littleton, CO Member No.: 11,072 Region Association: Rocky Mountains |
I have a feeling that this is going to be way more official than my jury roped setup! Keep it up!
|
| rnellums |
 Jul 19 2014, 08:31 PM Jul 19 2014, 08:31 PM
Post
#455
|
|
Professional Enthusiast    Group: Members Posts: 1,646 Joined: 26-November 09 From: Littleton, CO Member No.: 11,072 Region Association: Rocky Mountains |
How is the exhaust coming?
|
| 76-914 |
 Jul 19 2014, 10:07 PM Jul 19 2014, 10:07 PM
Post
#456
|
|
Repeat Offender & Resident Subaru Antagonist           Group: Members Posts: 13,634 Joined: 23-January 09 From: Temecula, CA Member No.: 9,964 Region Association: Southern California 
|
Yours is inventive and might be the way to go. Who knows what will work (IMG:style_emoticons/default/confused24.gif)
I started to layout the exhaust system and immediately found the mufflers were too long. In fact I needed to rethink the situation in order to fit any mufflers in there. I found some 14" long mufflers that I'll use but for now I did what I could. The EZ30D has an oval exhaust outlet on the header and then transitions to round. Bob (bigkat83) had told me how this is done so this is it. I used a 2.5" 90 for this transition piece. Because of my limited space front to rear I needed to have that 90 turn at a 45 degree angle, outwards from the engine rather than straight back. So I drew this circle with marks every 45 degrees then placed the vertical part over it and traced those marks onto the tube. 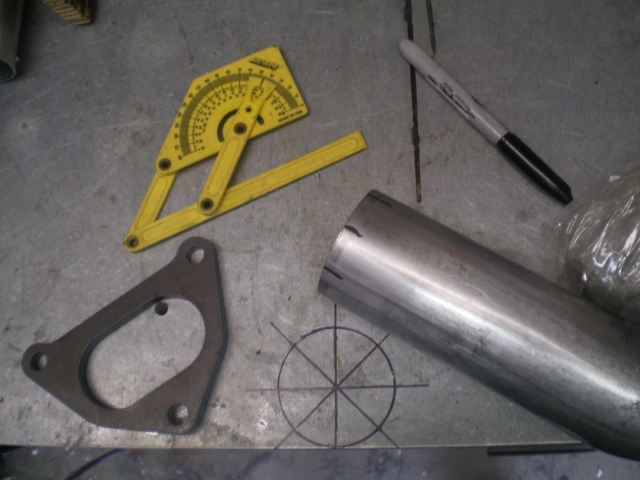 Then placed that piece in the vise and began compressing it slowly. Using those marks you can index the 90 on a 45 degree angle before squeezing. Every so often I hit the ends with the ball end of the hammer to help elongate the tube and rounding the end. 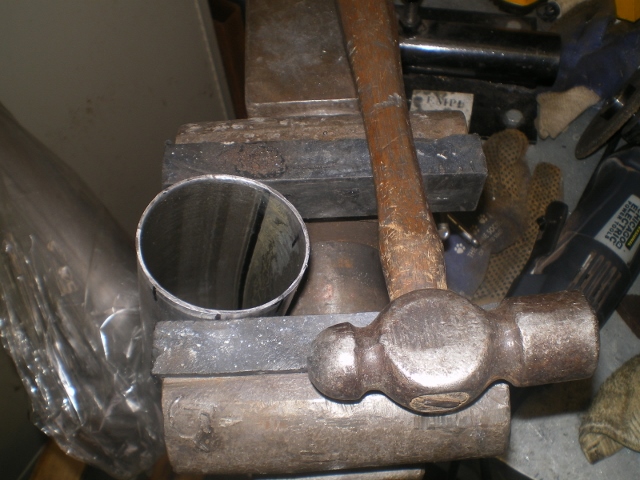 After a few minutes it looked like this 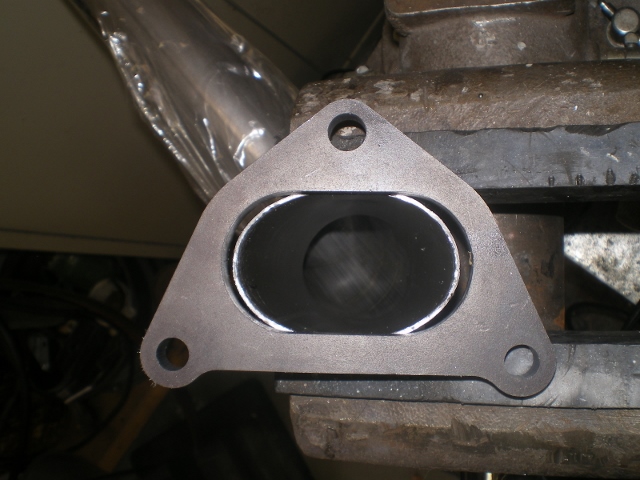 Then I beveled and polished the bottom edge of the flange 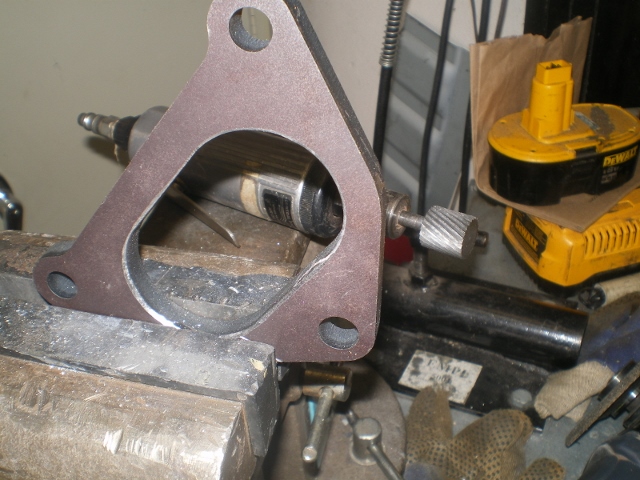 Then tap the flange over the tube slowly working it down with the hammer. 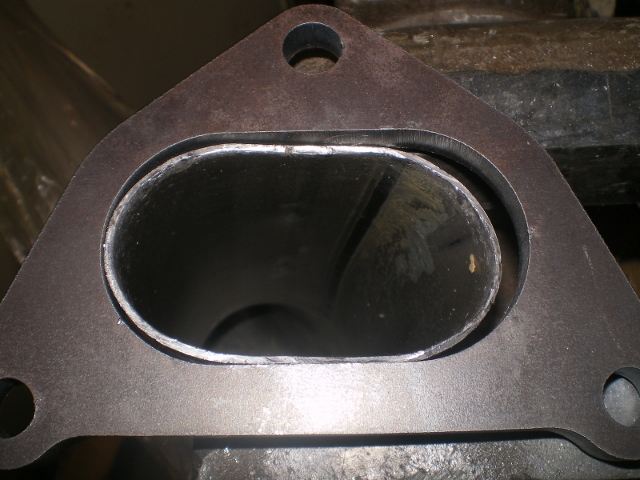 Until it looked like this 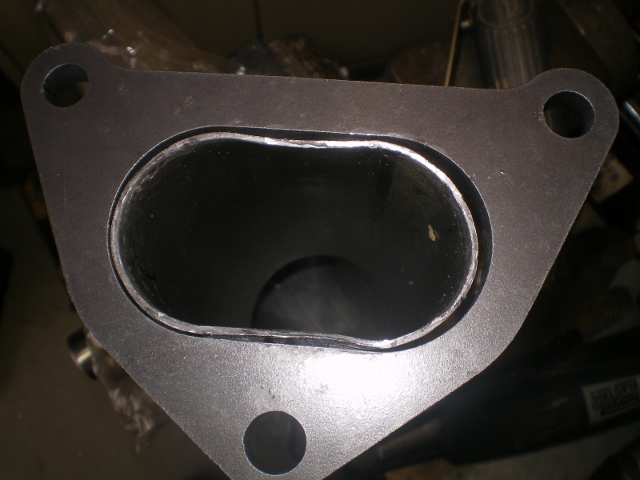 Without the flange 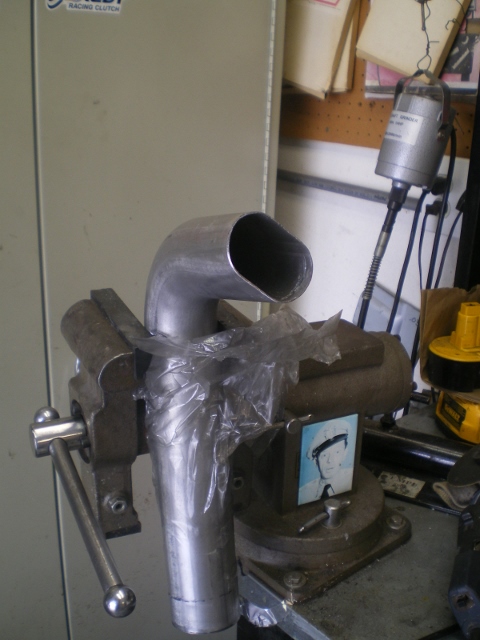 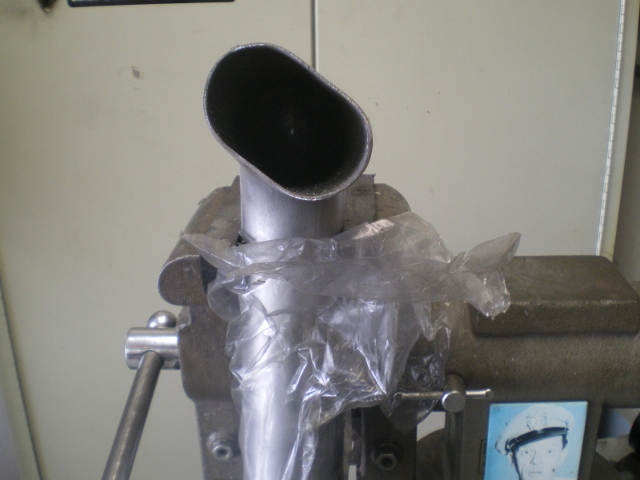 A test fit up 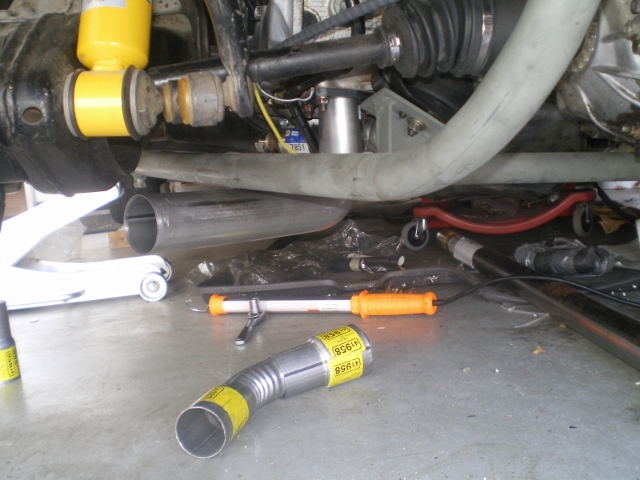 Horizontal piece of 2.5" 90 is cut to length and reduced to 2" w/ a 45 degree turn 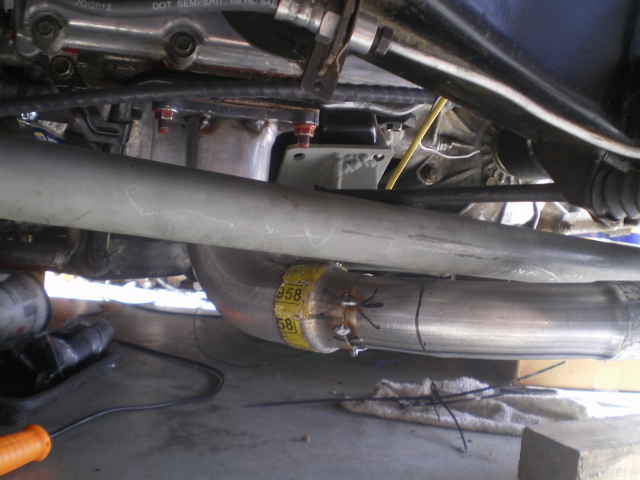 Beginning to line up 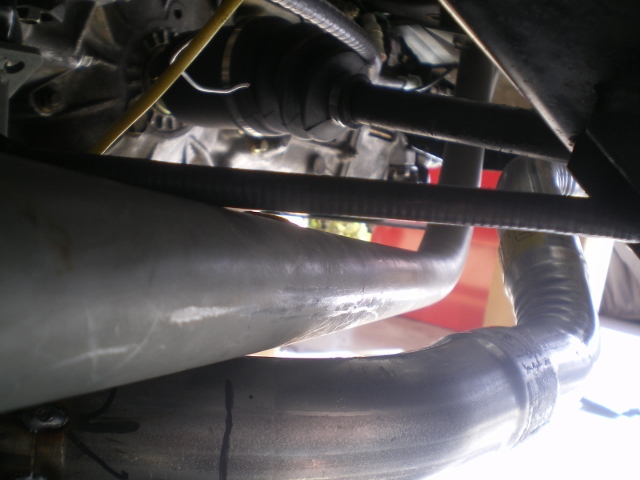 Some different views. Oddly enough I should not need any tube. Just these fittings and a muffler. (IMG:style_emoticons/default/rolleyes.gif) I tacked up the first few pieces but left the last 2 45 degree bends until the muffler is fitted. I think I should gas weld it so the welds aren't as brittle. (IMG:style_emoticons/default/welder.gif) FWIW, it's 16ga Aluminized Steel, not SS. And the tube at the end will be replaced with a muffler. The section of tube is handy for lining up your fittings, though. 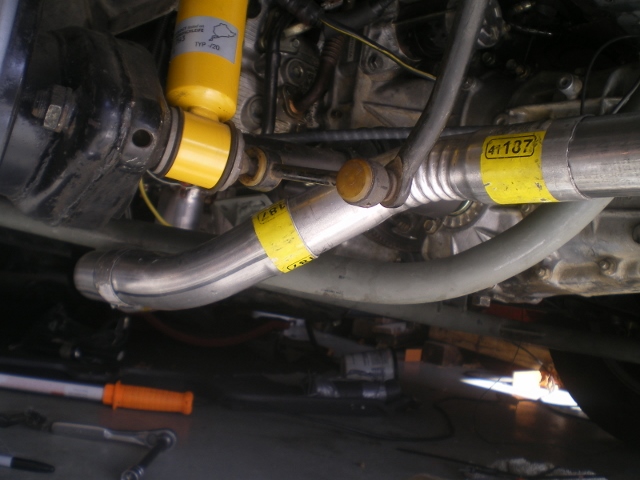 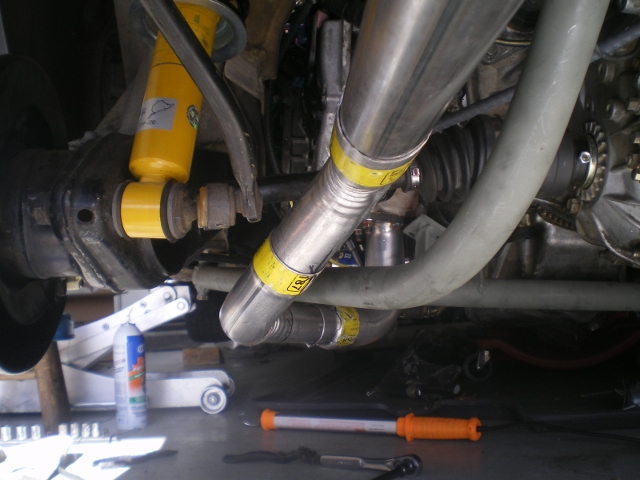 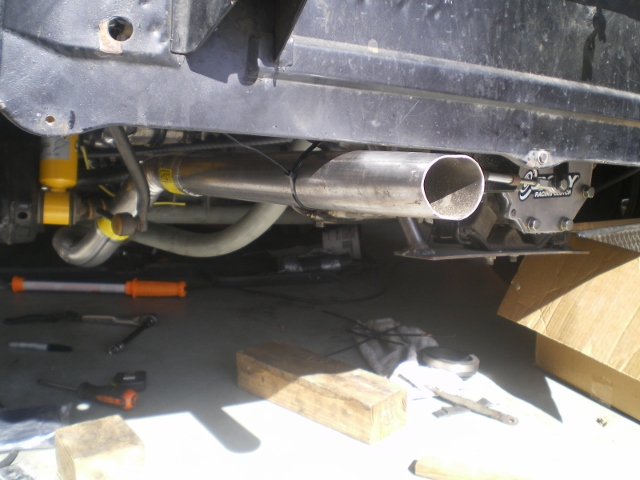 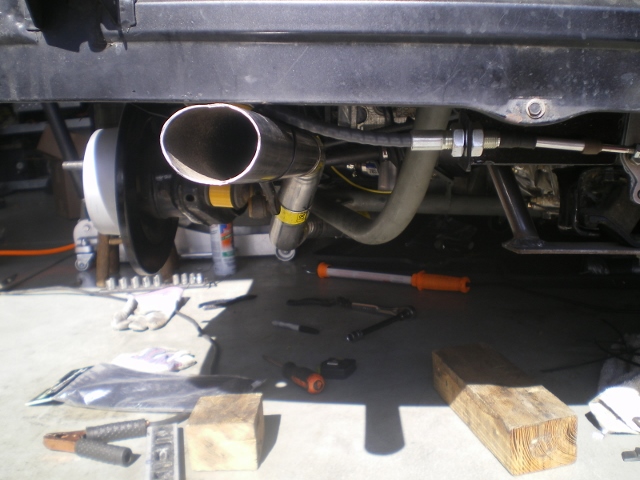 |
| Mike Bellis |
 Jul 19 2014, 10:15 PM Jul 19 2014, 10:15 PM
Post
#457
|
|
Resident Electrician      Group: Members Posts: 8,346 Joined: 22-June 09 From: Midlothian TX Member No.: 10,496 Region Association: None 

|
Why reduce the exhaust? The turbo will be happier with a bigger exhaust.
I'm crazy and ran a full 4" exhaust... (IMG:style_emoticons/default/happy11.gif) |
| rnellums |
 Jul 19 2014, 11:54 PM Jul 19 2014, 11:54 PM
Post
#458
|
|
Professional Enthusiast    Group: Members Posts: 1,646 Joined: 26-November 09 From: Littleton, CO Member No.: 11,072 Region Association: Rocky Mountains |
That looks awesome. and it looks like you will have plenty of ground clearance!
|
| mgp4591 |
 Jul 20 2014, 05:10 AM Jul 20 2014, 05:10 AM
Post
#459
|
|
914 Guru      Group: Members Posts: 5,482 Joined: 1-August 12 From: Salt Lake City Ut Member No.: 14,748 Region Association: Intermountain Region 
|
Why reduce the exhaust? The turbo will be happier with a bigger exhaust. I'm crazy and ran a full 4" exhaust... (IMG:style_emoticons/default/happy11.gif) Has he got a turbo on the EZ30? (IMG:style_emoticons/default/confused24.gif) |
| 76-914 |
 Jul 20 2014, 08:19 AM Jul 20 2014, 08:19 AM
Post
#460
|
|
Repeat Offender & Resident Subaru Antagonist           Group: Members Posts: 13,634 Joined: 23-January 09 From: Temecula, CA Member No.: 9,964 Region Association: Southern California 
|
Why reduce the exhaust? The turbo will be happier with a bigger exhaust. I'm crazy and ran a full 4" exhaust... (IMG:style_emoticons/default/happy11.gif) No turbo (yet) Mike. It would be easier to route the tube if it were Turbo'd. I have a lot of room in front of the engine. In it's factory configuration it ran a 2.5", "2 into 1" or single exhaust system. Outhouse engineering here but I'm hoping I get similar results doing it this way. |
  |
2 User(s) are reading this topic (2 Guests and 0 Anonymous Users)
0 Members:

|
Lo-Fi Version | Time is now: 24th November 2024 - 09:51 AM |
Invision Power Board
v9.1.4 © 2024 IPS, Inc.


