|
|

|
Porsche, and the Porsche crest are registered trademarks of Dr. Ing. h.c. F. Porsche AG.
This site is not affiliated with Porsche in any way. Its only purpose is to provide an online forum for car enthusiasts. All other trademarks are property of their respective owners. |
|
|
  |
| rnellums |
 Dec 25 2015, 01:50 PM Dec 25 2015, 01:50 PM
Post
#681
|
|
Professional Enthusiast    Group: Members Posts: 1,646 Joined: 26-November 09 From: Littleton, CO Member No.: 11,072 Region Association: Rocky Mountains |
I went through all this too. The relatively large single exit limits your mandrel bend angle. I like how you ran the piepes under the axle. Did you run 2" all the way back?
|
| 76-914 |
 Dec 25 2015, 10:40 PM Dec 25 2015, 10:40 PM
Post
#682
|
|
Repeat Offender & Resident Subaru Antagonist           Group: Members Posts: 13,634 Joined: 23-January 09 From: Temecula, CA Member No.: 9,964 Region Association: Southern California 
|
I went through all this too. The relatively large single exit limits your mandrel bend angle. I like how you ran the piepes under the axle. Did you run 2" all the way back? Yeh Ross, it's 2" all the way. .5" clearance between axle and exhaust. I'll probably wrap the u joint and 90 to cut down on heat. |
| rnellums |
 Dec 26 2015, 04:40 AM Dec 26 2015, 04:40 AM
Post
#683
|
|
Professional Enthusiast    Group: Members Posts: 1,646 Joined: 26-November 09 From: Littleton, CO Member No.: 11,072 Region Association: Rocky Mountains |
I had mine internally and externally ceramic coated and it really seemed to help. The pipes hardly seem hot while running and cost <100$ for my entire system.
|
| 76-914 |
 Dec 26 2015, 08:50 AM Dec 26 2015, 08:50 AM
Post
#684
|
|
Repeat Offender & Resident Subaru Antagonist           Group: Members Posts: 13,634 Joined: 23-January 09 From: Temecula, CA Member No.: 9,964 Region Association: Southern California 
|
|
| rnellums |
 Dec 29 2015, 10:40 AM Dec 29 2015, 10:40 AM
Post
#685
|
|
Professional Enthusiast    Group: Members Posts: 1,646 Joined: 26-November 09 From: Littleton, CO Member No.: 11,072 Region Association: Rocky Mountains |
I think the powder coater used Cerakote, I got the satin black coating as the aluminum engine has enough bling by itself!
|
| 76-914 |
 Jan 2 2016, 08:14 PM Jan 2 2016, 08:14 PM
Post
#686
|
|
Repeat Offender & Resident Subaru Antagonist           Group: Members Posts: 13,634 Joined: 23-January 09 From: Temecula, CA Member No.: 9,964 Region Association: Southern California 
|
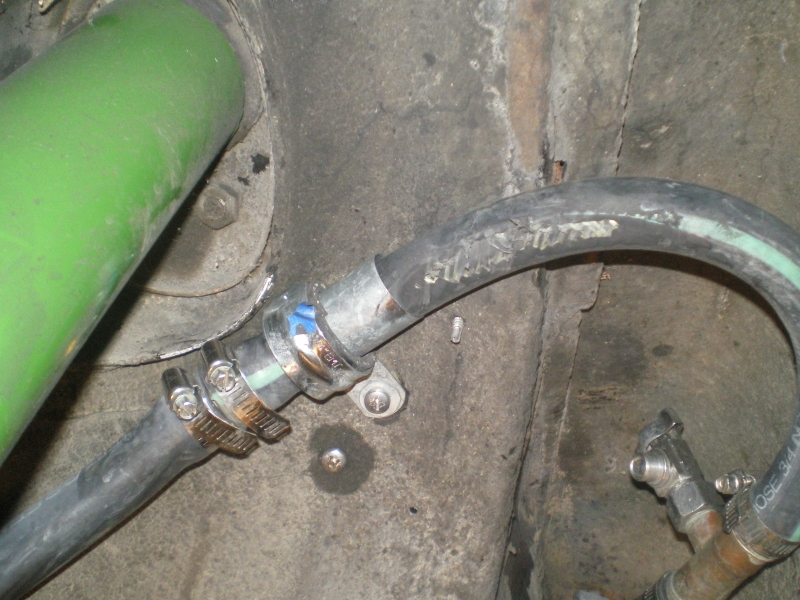
I found this after a New Years Day run in the mountains. It also (IMG:style_emoticons/default/sheeplove.gif) me at WCR and I thought the clamps would stop the rubbing but evidently not.
 Time to stop this (IMG:style_emoticons/default/stromberg.gif) and bring everything inside. I did this on the other side originally. But I got cute with the drivers side and it didn't work so on to (IMG:style_emoticons/default/sawzall-smiley.gif) 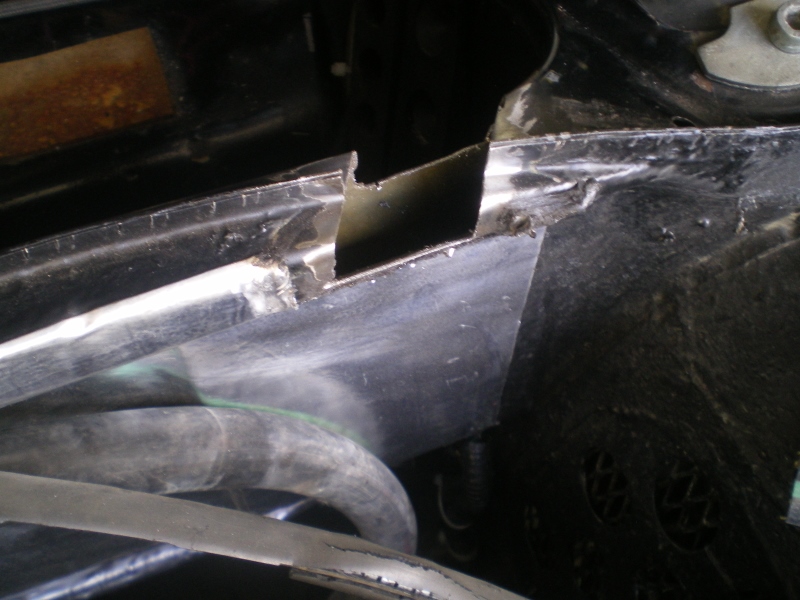 Trim piece and a quick test fit. (IMG:style_emoticons/default/smash.gif) 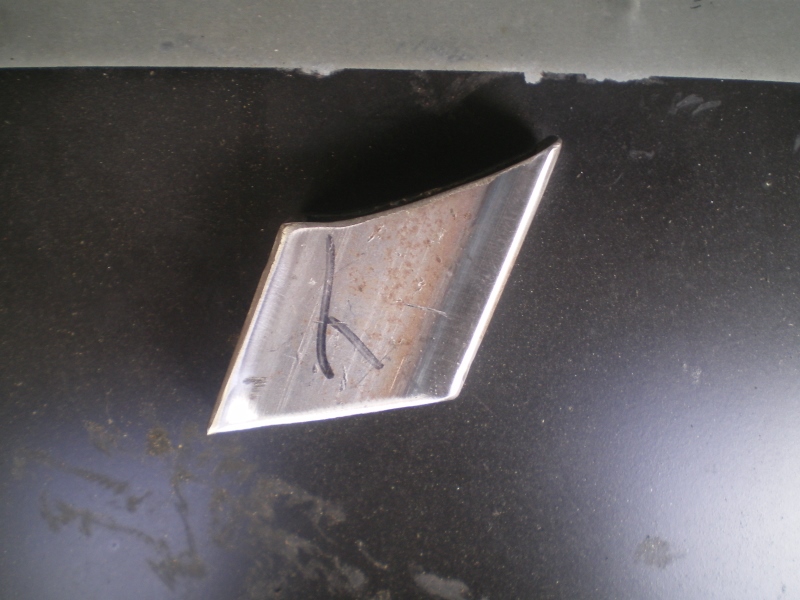 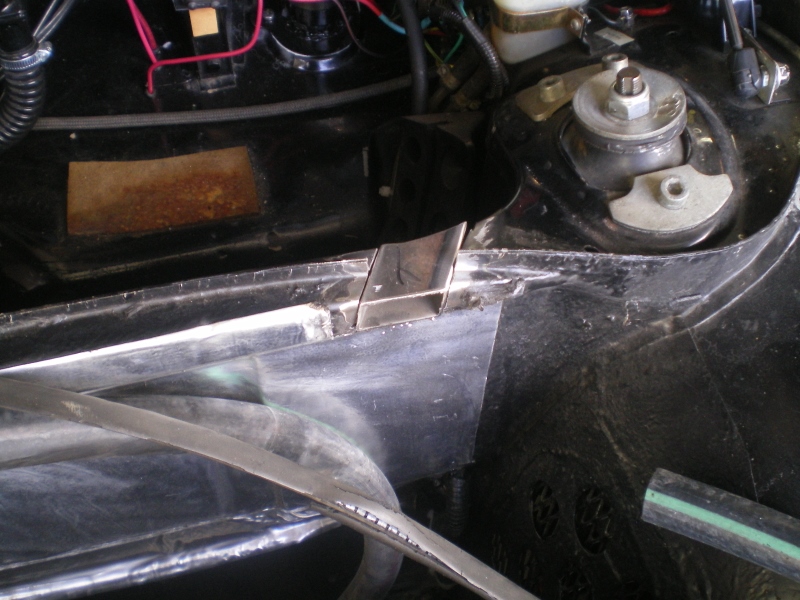 Welded in and painted 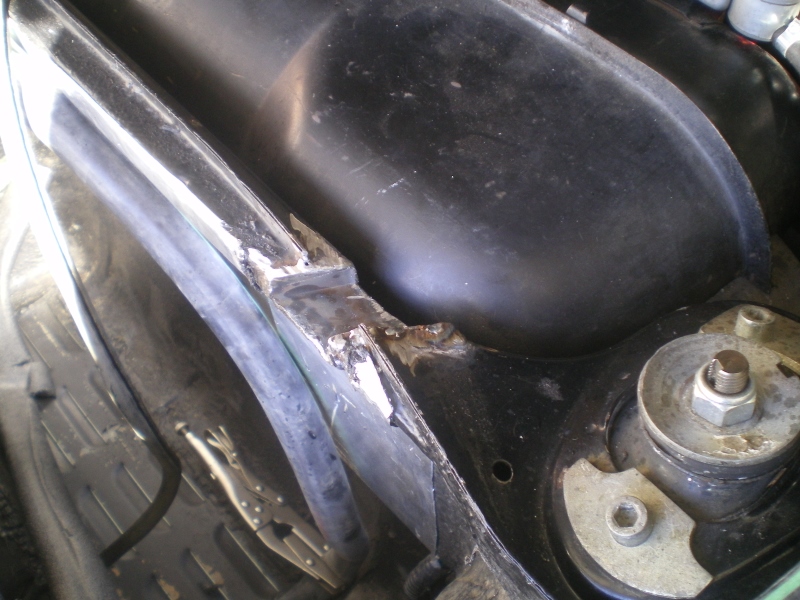 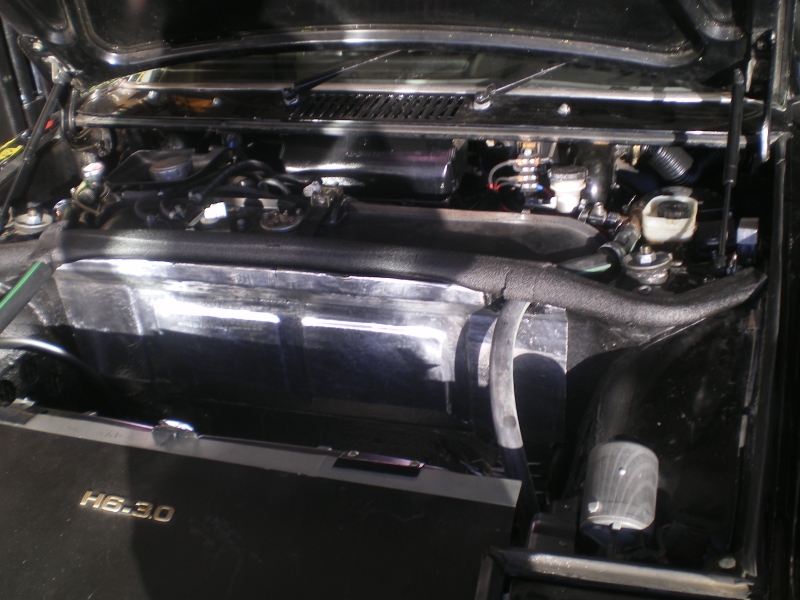 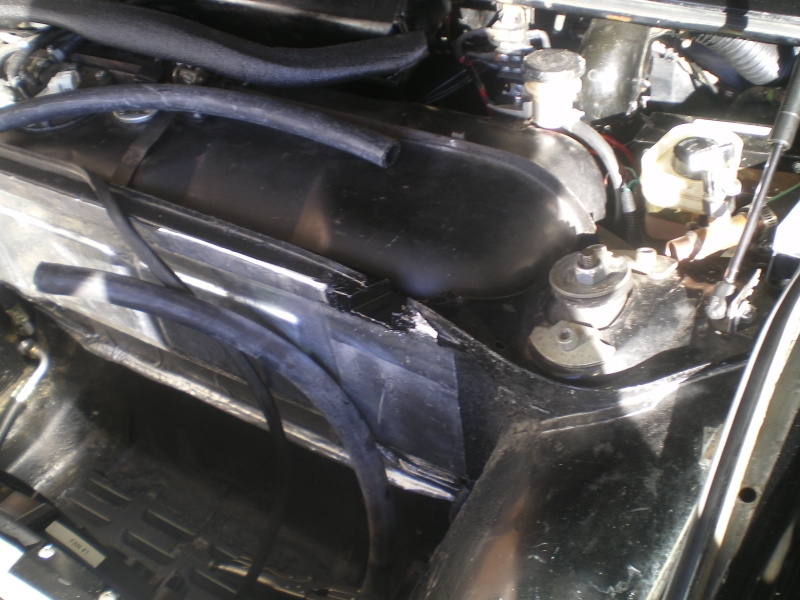 And Presto. I should have done this earlier but some times I convince myself that something is too much of a PITA and prolong the misery. (IMG:style_emoticons/default/shades.gif) 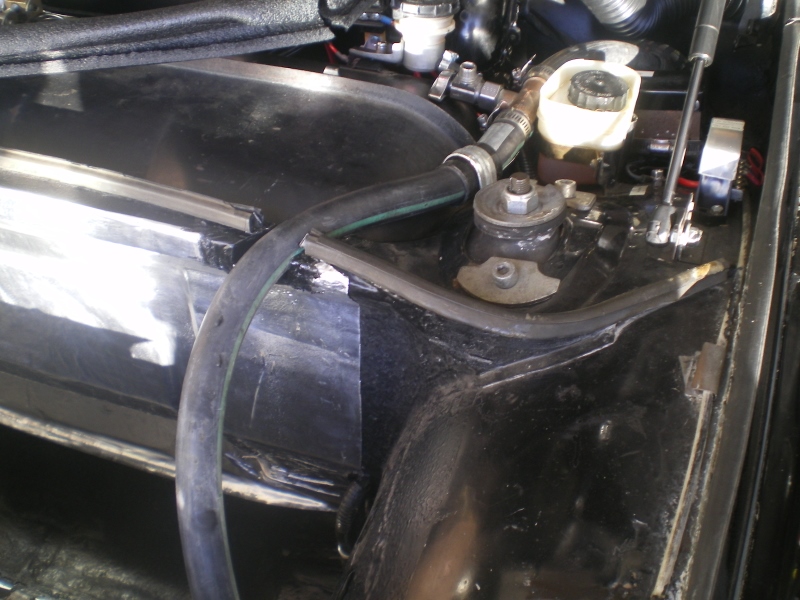 |
| 76-914 |
 Jan 4 2016, 05:25 PM Jan 4 2016, 05:25 PM
Post
#687
|
|
Repeat Offender & Resident Subaru Antagonist           Group: Members Posts: 13,634 Joined: 23-January 09 From: Temecula, CA Member No.: 9,964 Region Association: Southern California 
|
I forgot the member that originally posted on Dallas Coley's work but I sure want to thank him. "That" member, not to be confused with "That guy", recently posted he had Dallas refinish his license plate so I thought "What the Heck" and called Dallas. He said that he could indeed refinish license plate frames so I sent him this one....
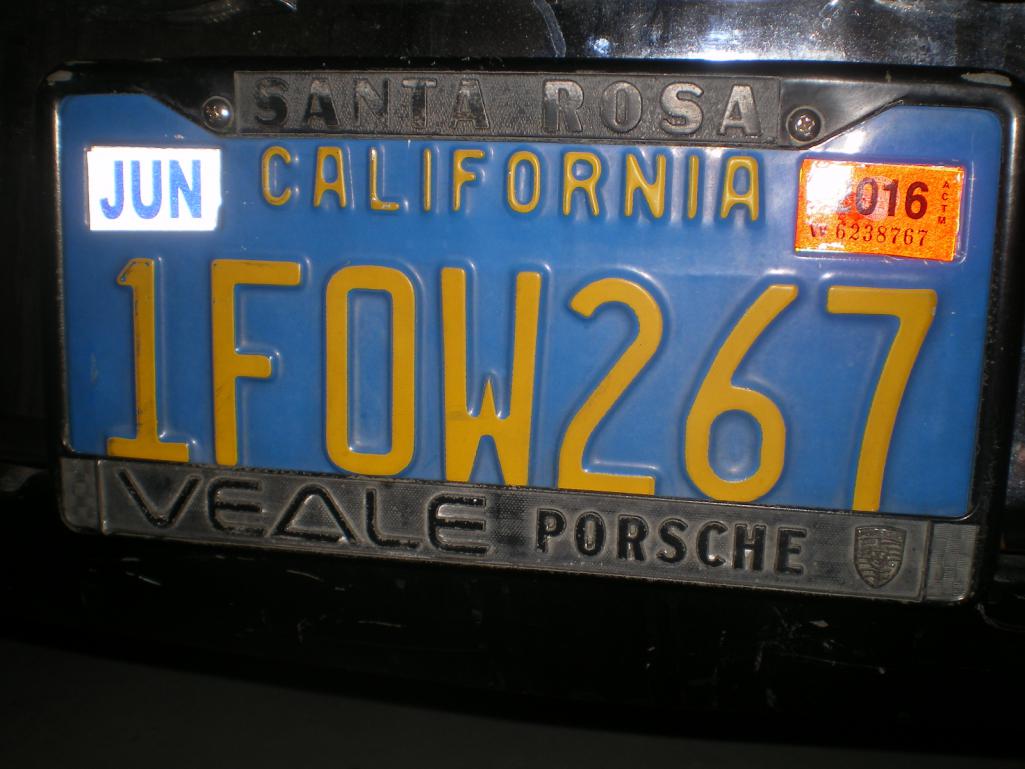 And $70 later (total incl shpg) I receive this, Dallas does good work and for those looking, I'd suggest you give Dallas a try. BTW, he has very good communication skills. 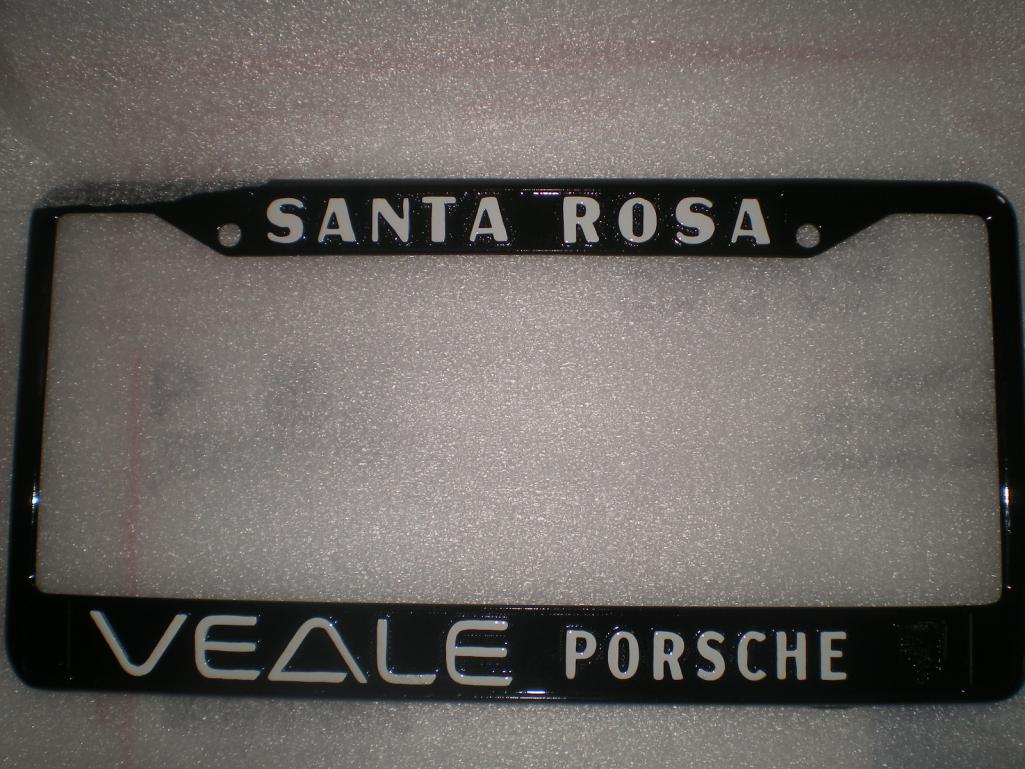 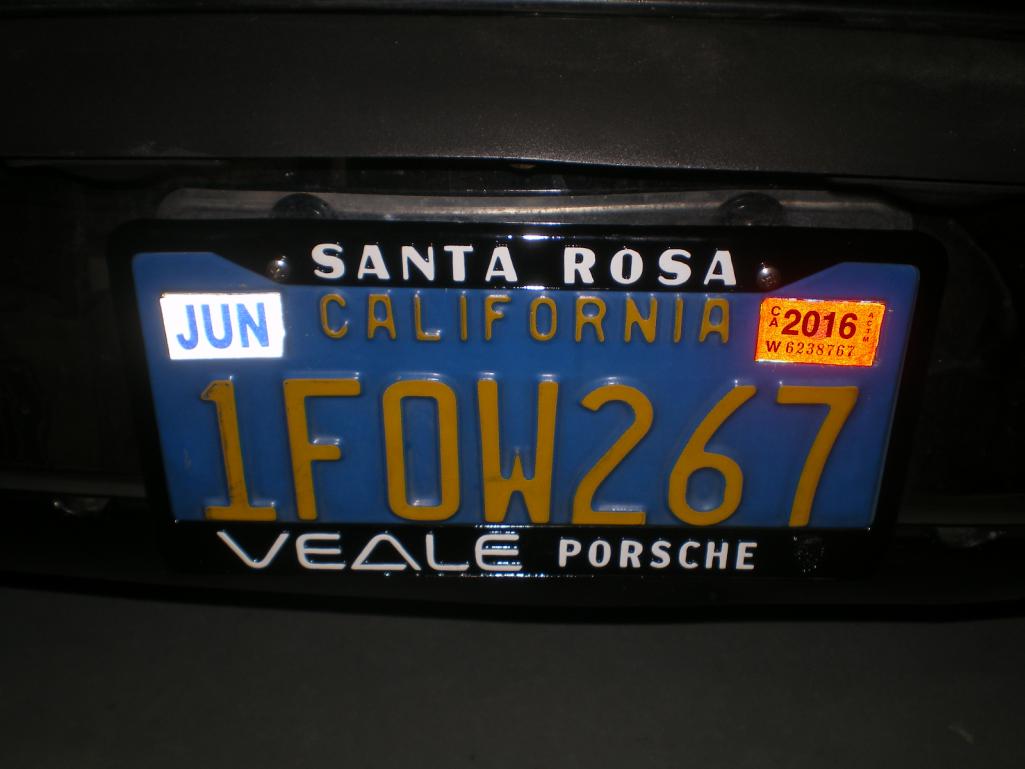 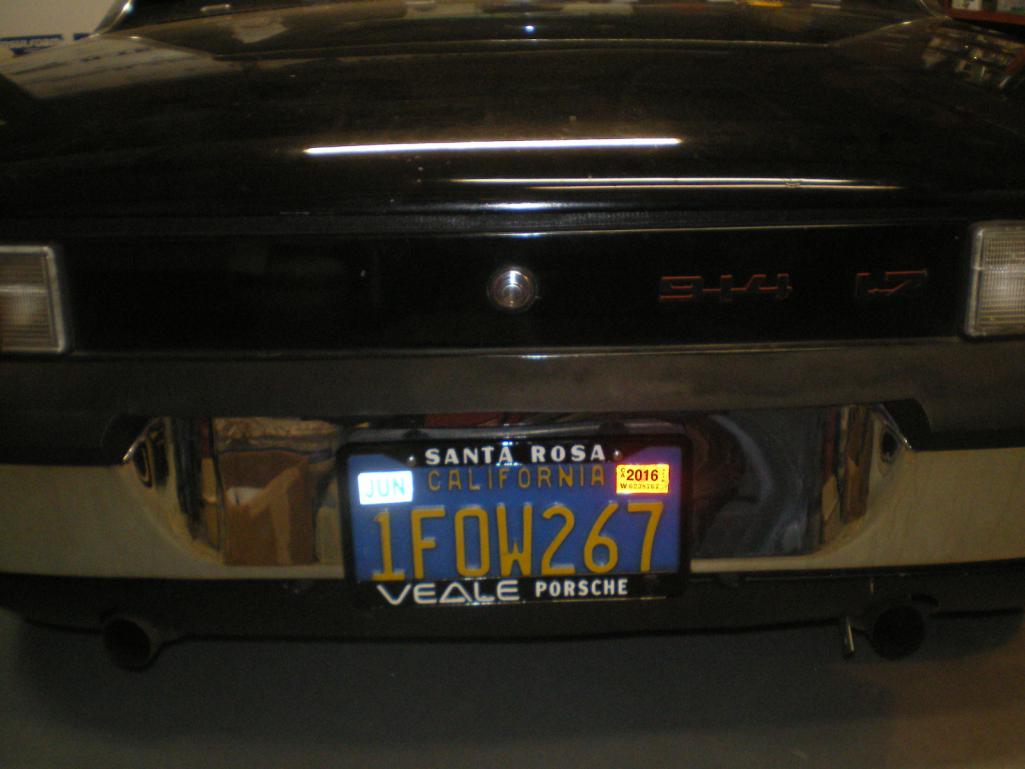 |
| 76-914 |
 Jan 28 2016, 08:58 PM Jan 28 2016, 08:58 PM
Post
#688
|
|
Repeat Offender & Resident Subaru Antagonist           Group: Members Posts: 13,634 Joined: 23-January 09 From: Temecula, CA Member No.: 9,964 Region Association: Southern California 
|
It took about 5 min's to realize I hated my new mufflers. They were almost the opposite of the 4"x10" Glass Packs I had been running. The Glass Packs were loud as Hell when under load but had a sweet note at cruise. The 3 chambered MagnaFlows were quieter under load but louder at cruise + they produced a terrible drone. (IMG:style_emoticons/default/mad.gif) So just for shits and grins I stuck the glass packs inline on the exhaust stub outs. I should have taken a pic. Looked like a Hill Billy mod. (IMG:style_emoticons/default/lol-2.gif) But guess what? It now produced exactly the sound I was looking for but how to do this? (IMG:style_emoticons/default/idea.gif) Bob (BIGKAT) had tried to tell me this a year ago but I didn't think there was room. Once again I was wrong as you can see in these 2 pic's. Just needed to use a couple of 90's, shorten my cable shift mount 1.5" and those glass packs fit right in.
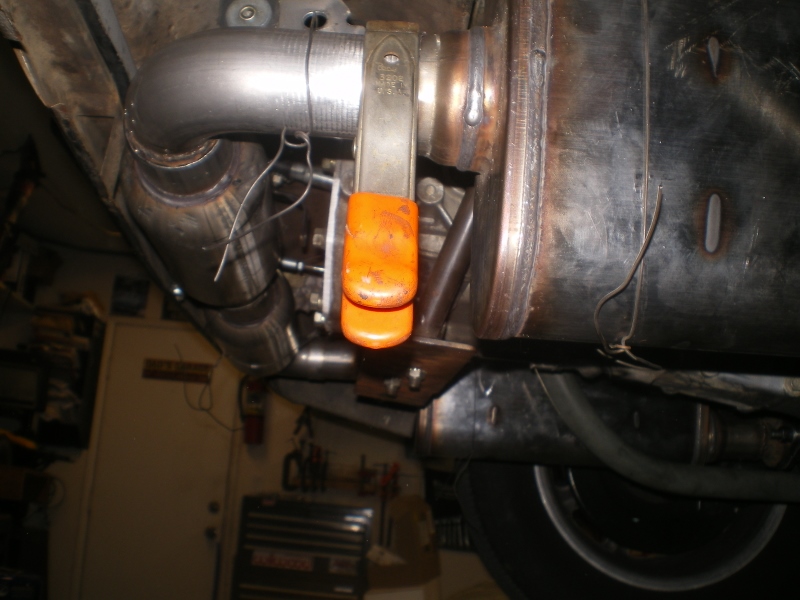 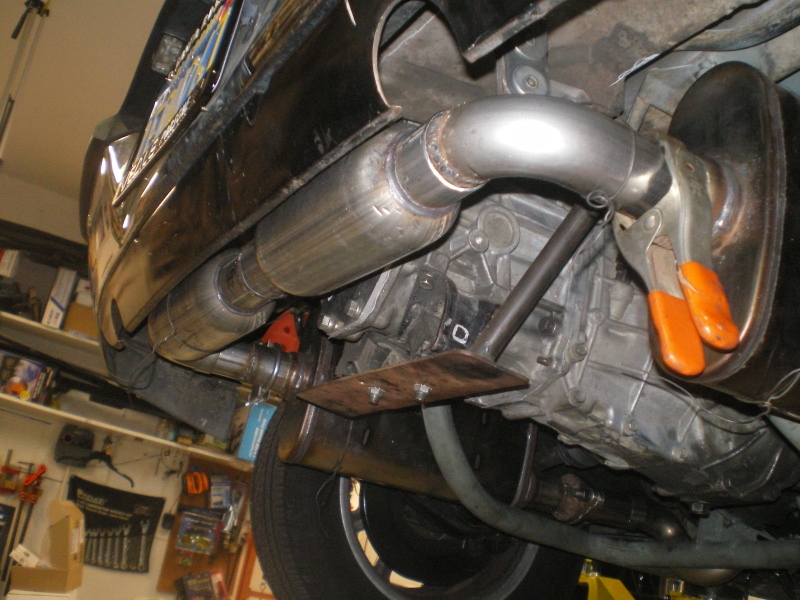 I had to weld in some stub outs after the 2 glass packs were stuck together. 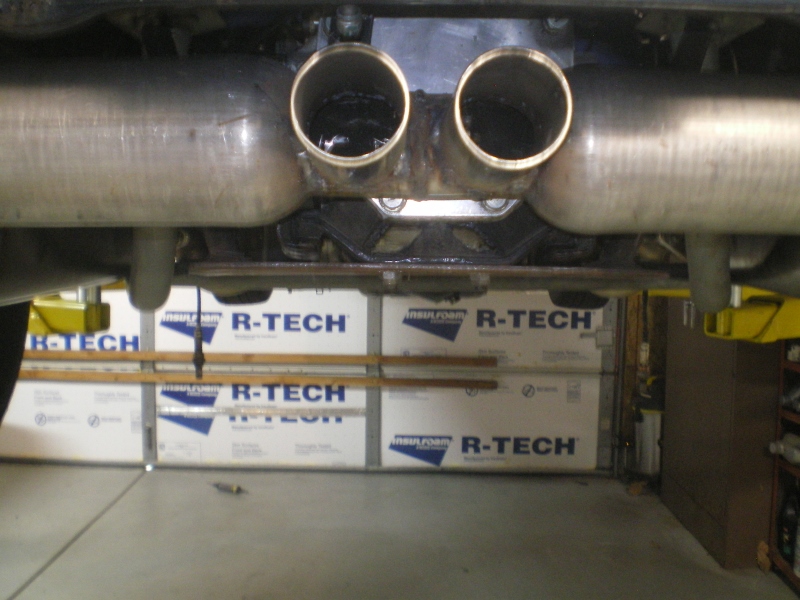 I added anther couple of flange sets so I could remove the new addition to service shifter attach points and cables. 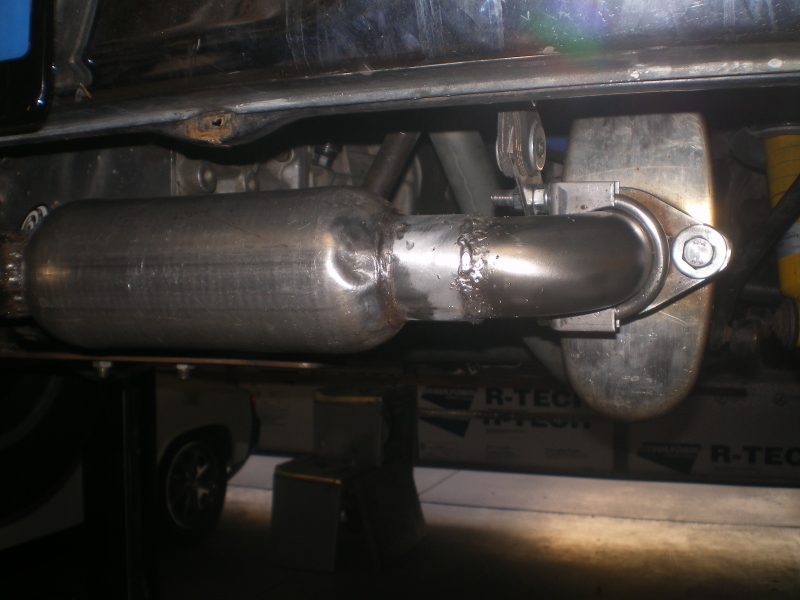 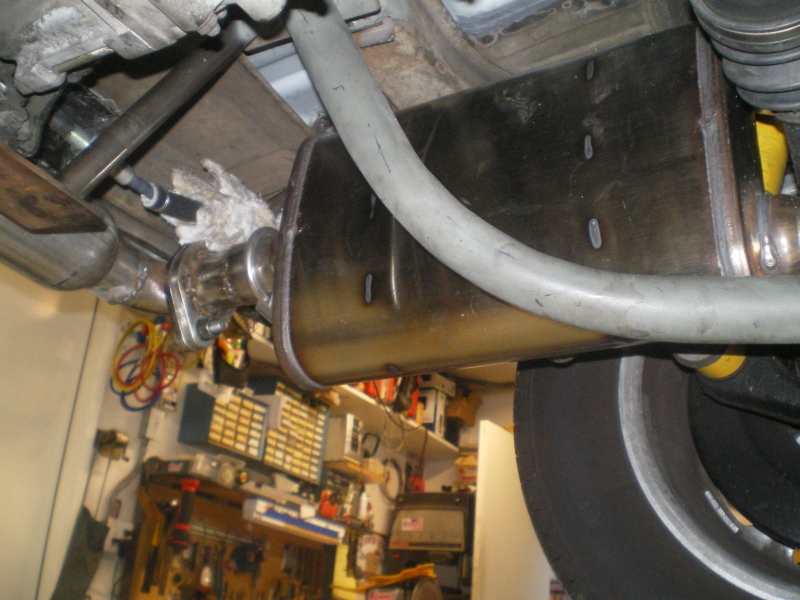 Added a little insulation for heat barrier. 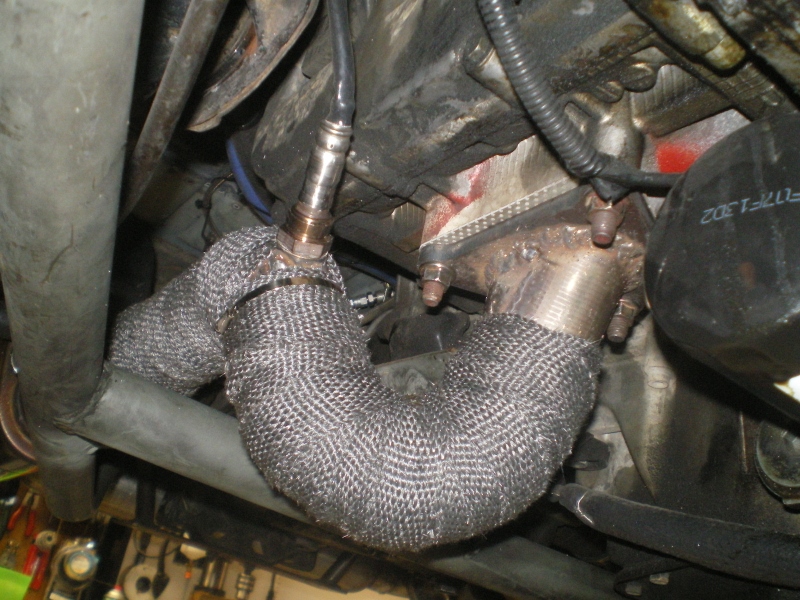 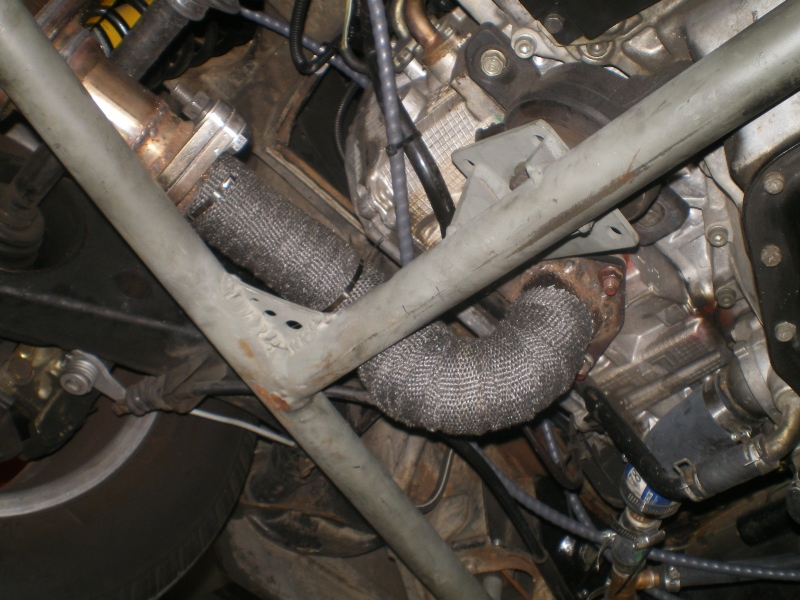 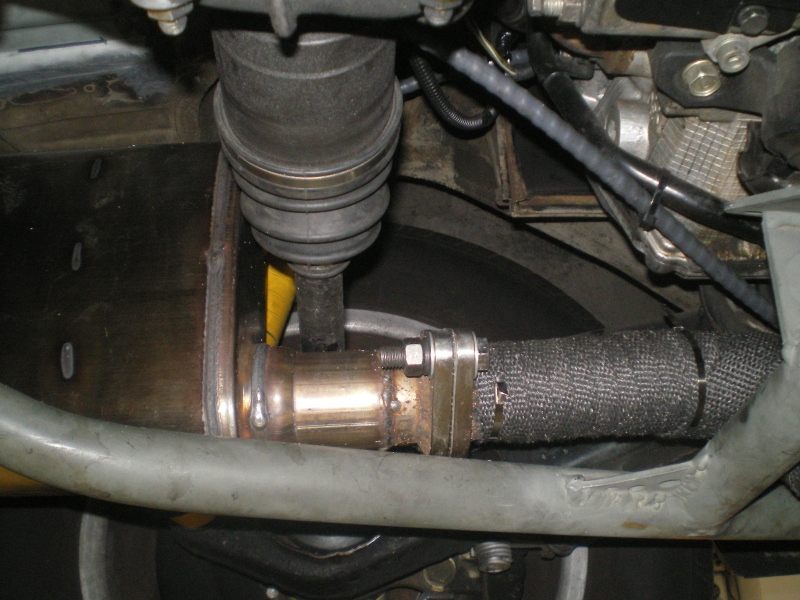 This is what I ended up with and the Dreaded Drone is gone. (IMG:style_emoticons/default/piratenanner.gif) I'm running without a fairing for now but will probably add one later. (IMG:style_emoticons/default/confused24.gif) 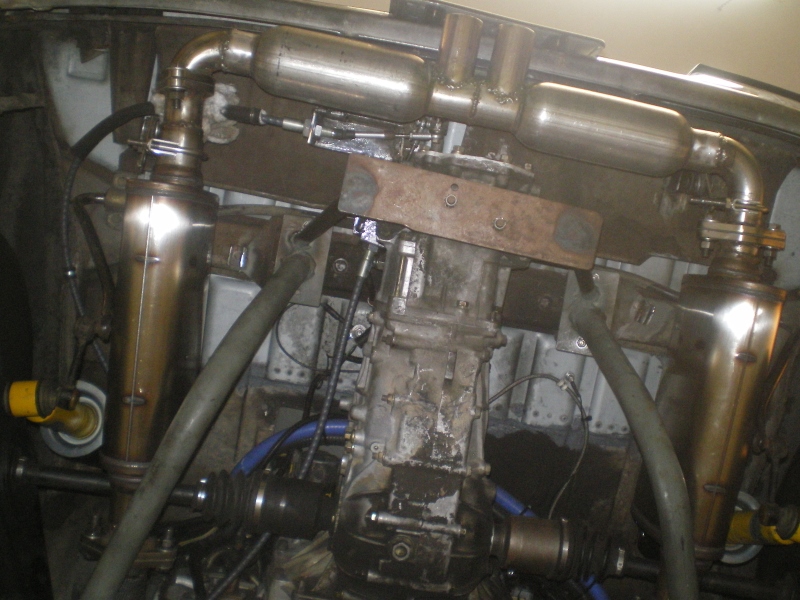 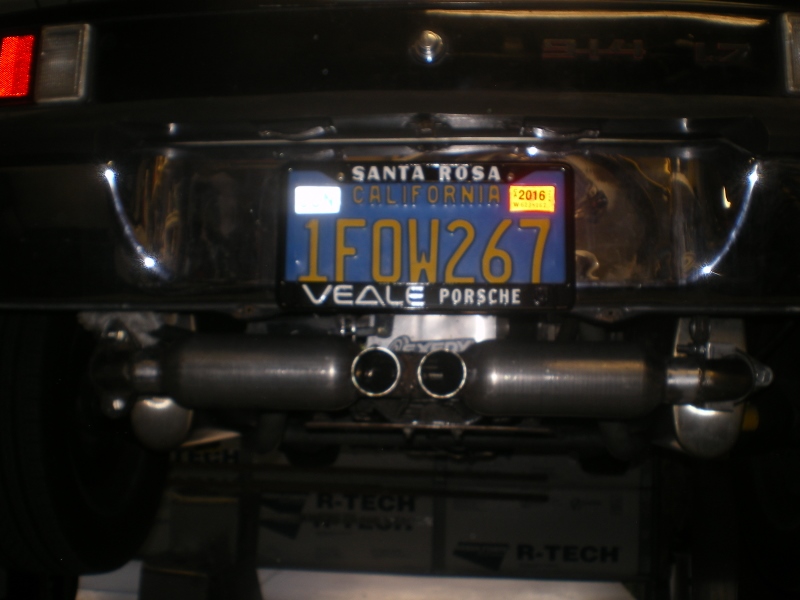 |
| rightpedal |
 Jan 29 2016, 08:12 AM Jan 29 2016, 08:12 AM
Post
#689
|
|
rightpeda;   Group: Members Posts: 60 Joined: 6-September 15 From: annapolis Member No.: 19,133 Region Association: MidAtlantic Region |
I totally dig on the new exhaust. I'm a sucker for the center exit. Summit has a fully welded muffler that I run on everything. Its cheap, sounds good under power, and real quiet in cruse conditions.
They probably cost me a little power over a chambered muffler but I don't really care. http://www.summitracing.com/search/product...-turbo-mufflers Steve |
| rhodyguy |
 Jan 29 2016, 08:31 AM Jan 29 2016, 08:31 AM
Post
#690
|
|
Chimp Sanctuary NW. Check it out.                Group: Members Posts: 22,192 Joined: 2-March 03 From: Orion's Bell. The BELL! Member No.: 378 Region Association: Galt's Gulch |
I wonder what that setup would sound like on a stockish t-4 running heat exchangers. Low cost alternative to the systems currently out there. Looks cool. Looking forward to the YouTube sound bite if you post one.
|
| 914forme |
 Jan 30 2016, 09:01 AM Jan 30 2016, 09:01 AM
Post
#691
|
|
Times a wastin', get wrenchin'!     Group: Members Posts: 3,896 Joined: 24-July 04 From: Dayton, Ohio Member No.: 2,388 Region Association: None 
|
Thank you for the info Kent (IMG:style_emoticons/default/beer.gif) , new setup looks good. So crap, Looks like I'll be running a rear Valance also. Mufflers hand down to far, time to dig mine up, and get to work, just when I thought that area was all done. (IMG:style_emoticons/default/headbang.gif)
I am glad you found a solution to your issue, and where willing to share it once again. |
| thieuster |
 Jan 30 2016, 12:10 PM Jan 30 2016, 12:10 PM
Post
#692
|
|
Member   Group: Members Posts: 447 Joined: 31-January 15 From: 275 mls NW from Stuttgart. Member No.: 18,384 Region Association: Europe |
Any chance of a vid with sound? It looks very, very promising!
Menno |
| 76-914 |
 Jan 30 2016, 04:53 PM Jan 30 2016, 04:53 PM
Post
#693
|
|
Repeat Offender & Resident Subaru Antagonist           Group: Members Posts: 13,634 Joined: 23-January 09 From: Temecula, CA Member No.: 9,964 Region Association: Southern California 
|
Thanks guys. I don't have a GoPro so I stuck my camera on the dash. Sound quality isn't great but it covers most driving styles and you'll get an idea. The top is off so there is wind noise. (IMG:style_emoticons/default/sad.gif) https://www.youtube.com/watch?v=Jh-ClYj9LQ8...eature=youtu.be
|
| euro911 |
 Jan 30 2016, 06:12 PM Jan 30 2016, 06:12 PM
Post
#694
|
|
Retired & living the dream. God help me if I wake up!      Group: Members Posts: 8,858 Joined: 2-December 06 From: So.Cal. & No.AZ (USA) Member No.: 7,300 Region Association: Southern California 
|
Sounds good to me (IMG:style_emoticons/default/smile.gif)
|
| Chris H. |
 Jan 30 2016, 09:19 PM Jan 30 2016, 09:19 PM
Post
#695
|
|
Senior Member     Group: Members Posts: 4,048 Joined: 2-January 03 From: Chicago 'burbs Member No.: 73 Region Association: Upper MidWest 
|
(IMG:style_emoticons/default/thumb3d.gif) Nailed it. WAY quieter than before.
|
| jimkelly |
 Jan 30 2016, 09:24 PM Jan 30 2016, 09:24 PM
Post
#696
|
|
Delaware USA     Group: Members Posts: 4,969 Joined: 5-August 04 From: Delaware, USA Member No.: 2,460 Region Association: MidAtlantic Region |
wow... sounds great!!
|
| mgp4591 |
 Jan 31 2016, 12:24 AM Jan 31 2016, 12:24 AM
Post
#697
|
|
914 Guru      Group: Members Posts: 5,481 Joined: 1-August 12 From: Salt Lake City Ut Member No.: 14,748 Region Association: Intermountain Region 
|
Thanks guys. I don't have a GoPro so I stuck my camera on the dash. Sound quality isn't great but it covers most driving styles and you'll get an idea. The top is off so there is wind noise. (IMG:style_emoticons/default/sad.gif) https://www.youtube.com/watch?v=Jh-ClYj9LQ8...eature=youtu.be From what I can hear it sounds good but you're right, the quality isn't the best. Could you take a shot from the back with you starting up and give us a throttle goose or two?Maybe even hold a higher rpm for a bit at the speed it used to drone on you? |
| rhodyguy |
 Jan 31 2016, 08:33 AM Jan 31 2016, 08:33 AM
Post
#698
|
|
Chimp Sanctuary NW. Check it out.                Group: Members Posts: 22,192 Joined: 2-March 03 From: Orion's Bell. The BELL! Member No.: 378 Region Association: Galt's Gulch |
You should have someone record a drive by @ around 5k rpm. No valance needed. You're a clever fellow. A bit of an extension on the outlets, just short of 'banging your shins', would look good too.
|
| Mr.Nobody |
 Mar 4 2016, 01:03 AM Mar 4 2016, 01:03 AM
Post
#699
|
|
Member   Group: Members Posts: 133 Joined: 24-March 15 From: San Diego, Ca Member No.: 18,557 Region Association: Southern California 
|
Just read through the entire thread. Awesome info. Thanks for documenting everything.
Hope to see the car someday. I'm actually just south of you. I'm in SD, but my 914 is in Fallbrook. Great job on your car (IMG:style_emoticons/default/beerchug.gif) |
| 76-914 |
 Mar 4 2016, 10:57 AM Mar 4 2016, 10:57 AM
Post
#700
|
|
Repeat Offender & Resident Subaru Antagonist           Group: Members Posts: 13,634 Joined: 23-January 09 From: Temecula, CA Member No.: 9,964 Region Association: Southern California 
|
Well thanks but you can ditch what I said about radiators and go this route if you do a conversion. The Sirocco radiator was fine unless you wanted to race uphill in 95F weather, add an AC or tax it in any way. IOW, it was minimal. Given others recent change over to the Celica GT version, I hopped aboard. It is a dual core unit that fits quite well in the space allotted. Price was $167 shipped to my front door. I'm a little skeptical of the fans that came with it but we shall see.
The first step was to build a frame to hold the new radiator and condenser. I won't bore you with the dimensions. 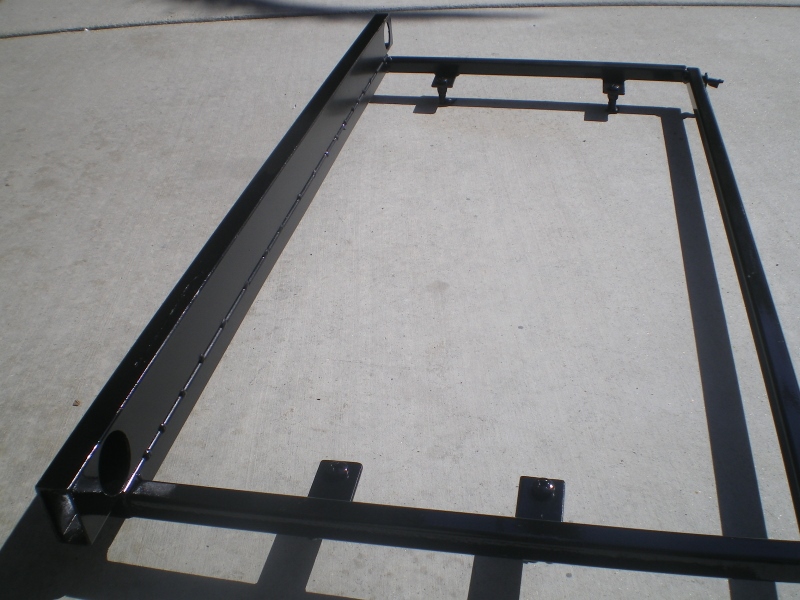 You can see the rubber shocks in place that the radiator sits upon. These were pulled off the donor car 2 years ago, removed from the OEM bracket and added to this steel frame. 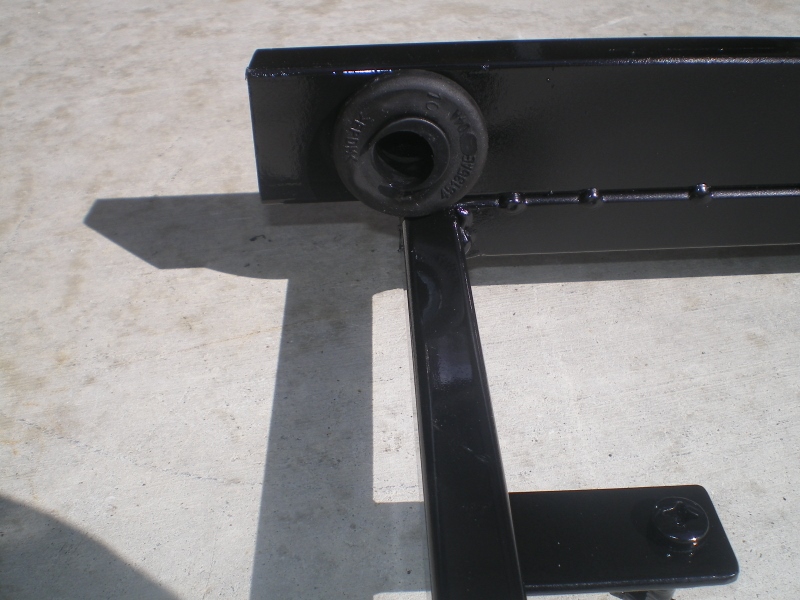 Next the frame is welded at the bottom to the trunk floor. At this stage the frame is semi-ridged as it is attached only at the bottom. The top will be supported by a re-enforced lid. Note the foam tape in place to serve as a seal. 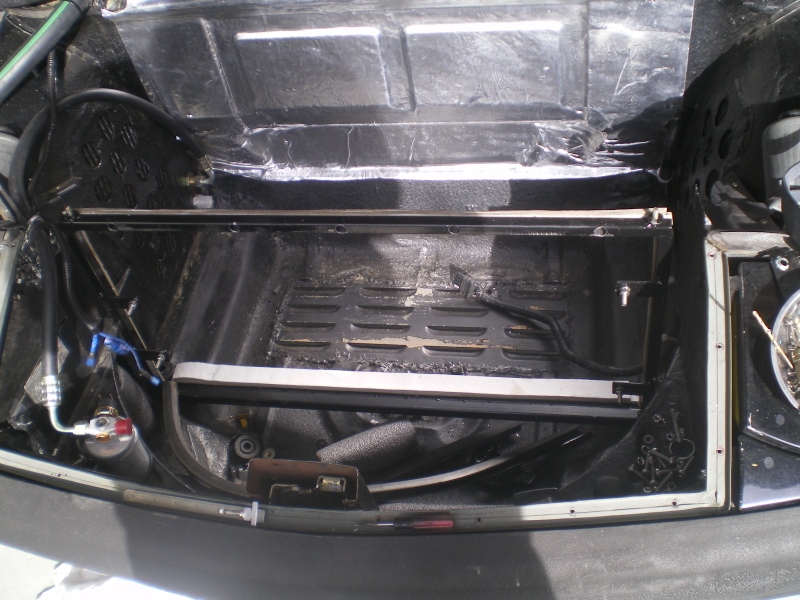 Now the radiator is fitted onto the frame and sits upon the lower rubber shocks. The upper rubber shocks have been added at this point as well. Again, these were removed from the donor car and the OEM bracket was cut to fit and painted. 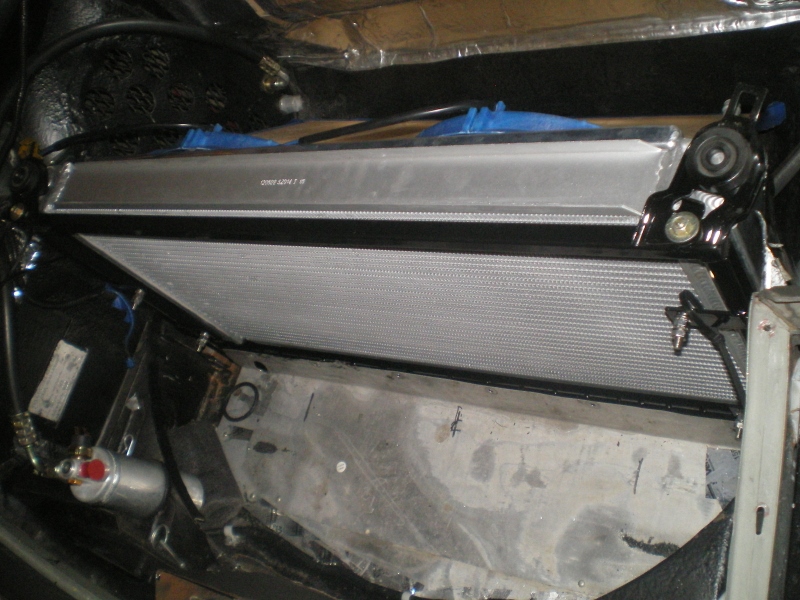 The condenser is test fitted and the C shaped stand-offs are added to the top. These will have plate nuts for the lid to screw into and hold the radiator firmly in place and more importantly, to hold the radiator tightly against the seal on the frame. 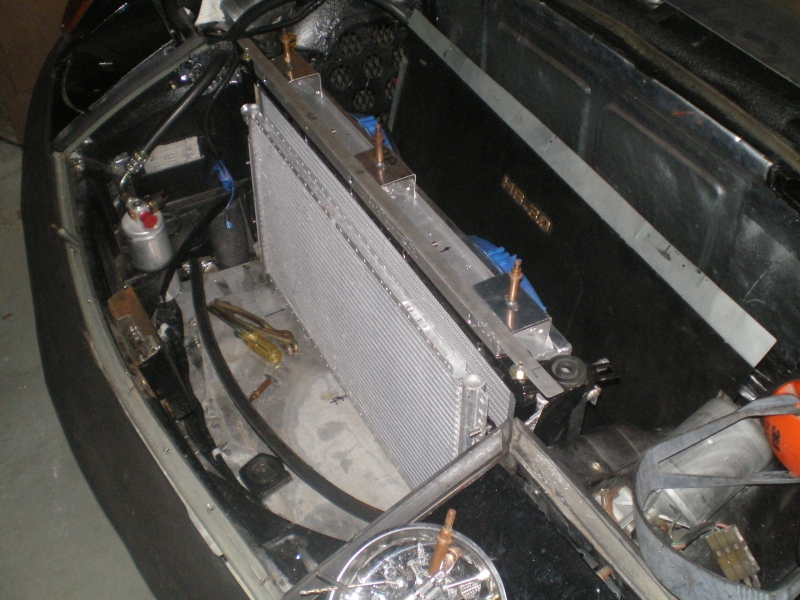 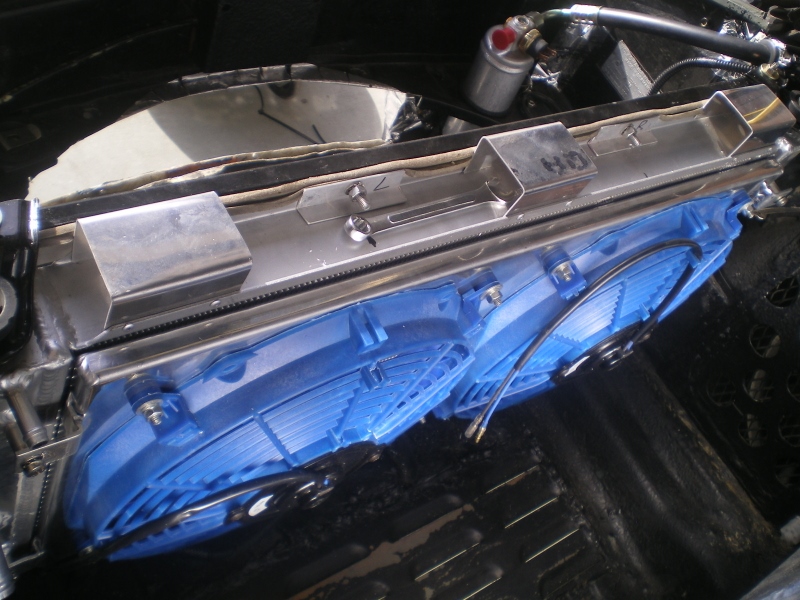 The 3/4" square tube is added, next to the stand-offs, that will have a rubber seal strip and complete the seal from lid to radiator. (It's also shown 2 pic's back.) 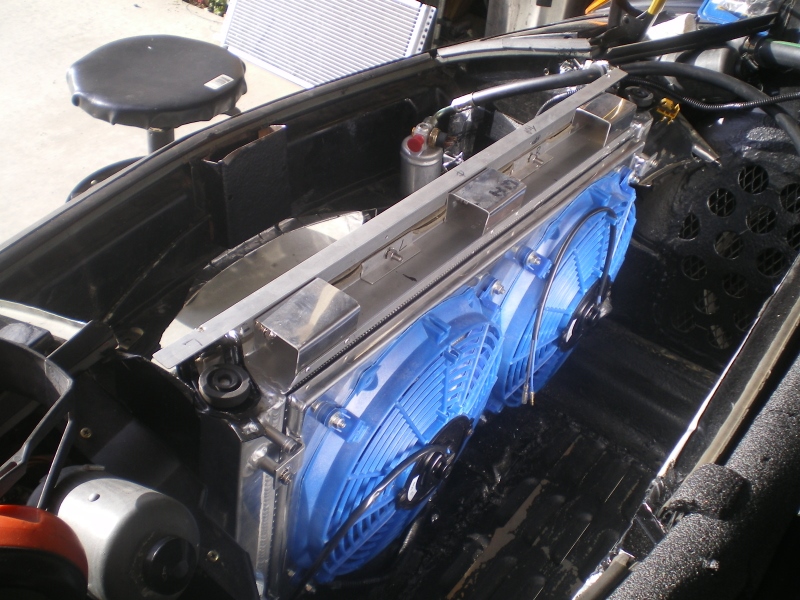 And as it looks once buttoned up. I'm going to run this set up a few weeks w/o the condenser then re-install it to see how temps will vary. More later. (IMG:style_emoticons/default/beerchug.gif) 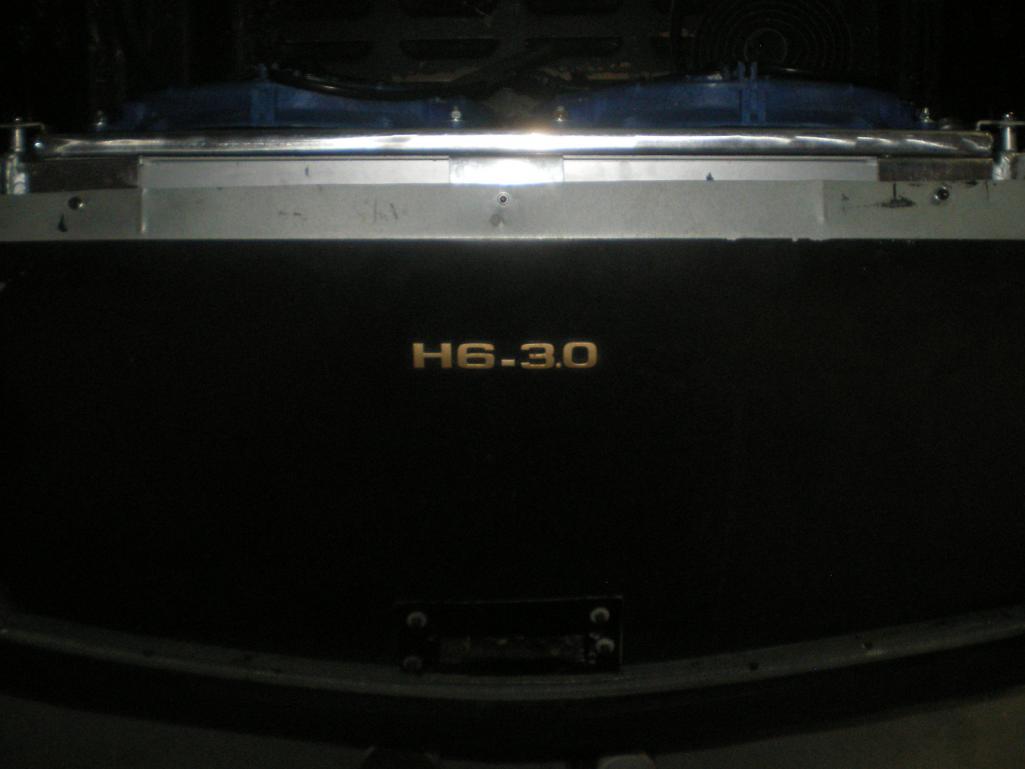 |
  |
2 User(s) are reading this topic (2 Guests and 0 Anonymous Users)
0 Members:

|
Lo-Fi Version | Time is now: 23rd November 2024 - 06:59 PM |
Invision Power Board
v9.1.4 © 2024 IPS, Inc.


