|
|
|
Porsche, and the Porsche crest are registered trademarks of Dr. Ing. h.c. F. Porsche AG.
This site is not affiliated with Porsche in any way. Its only purpose is to provide an online forum for car enthusiasts. All other trademarks are property of their respective owners. |
|
|

  |

| Curbandgutter |
 Jul 21 2016, 10:31 PM Jul 21 2016, 10:31 PM
Post
#121
|
|
Senior Member  Group: Members Posts: 565 Joined: 8-March 13 From: Murrieta CA Member No.: 15,637 Region Association: Southern California |
Well the 996 is up on the chassis table. I was surprised to find that it had a twist of 1" in the frame. Wow I wonder how this thing handled? I wonder how it got that twist? I don't see evidence of a major wreck? (IMG:style_emoticons/default/confused24.gif) (IMG:style_emoticons/default/confused24.gif)
Attached thumbnail(s) 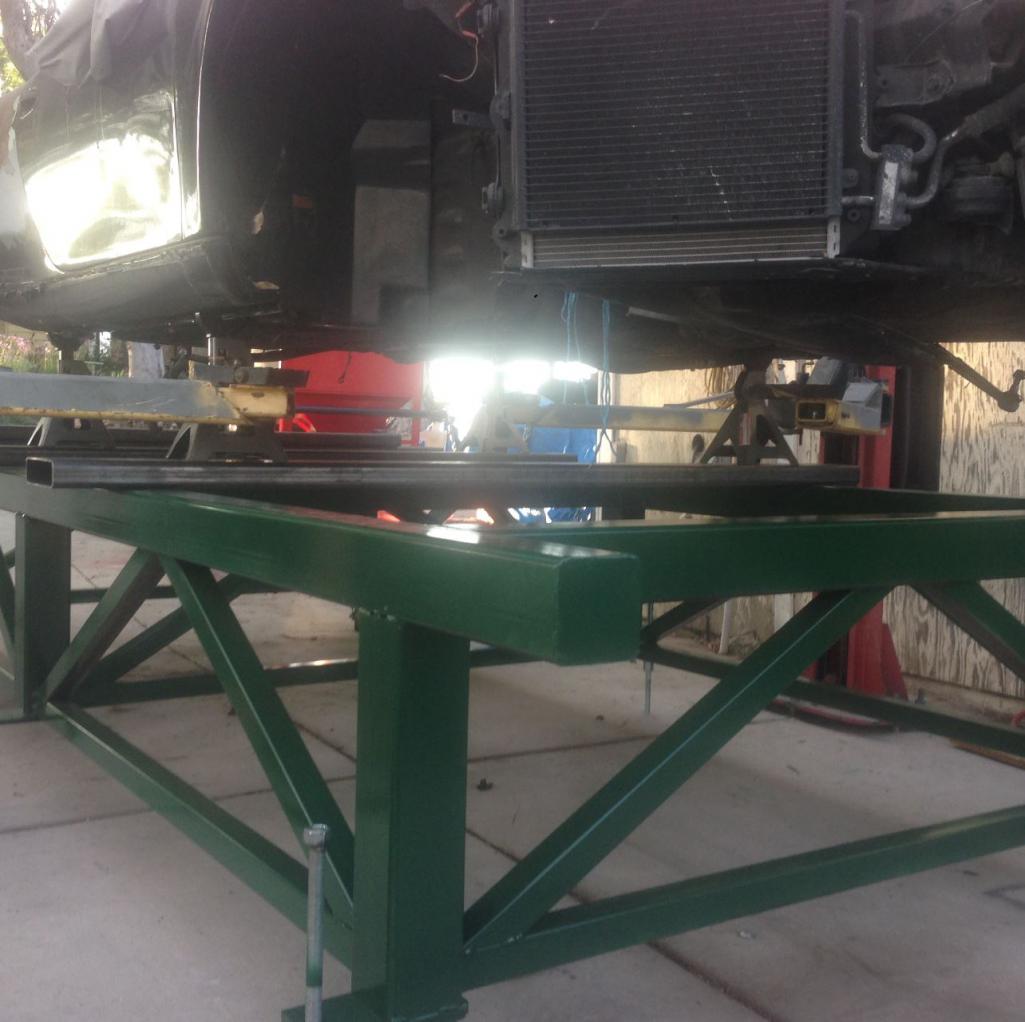 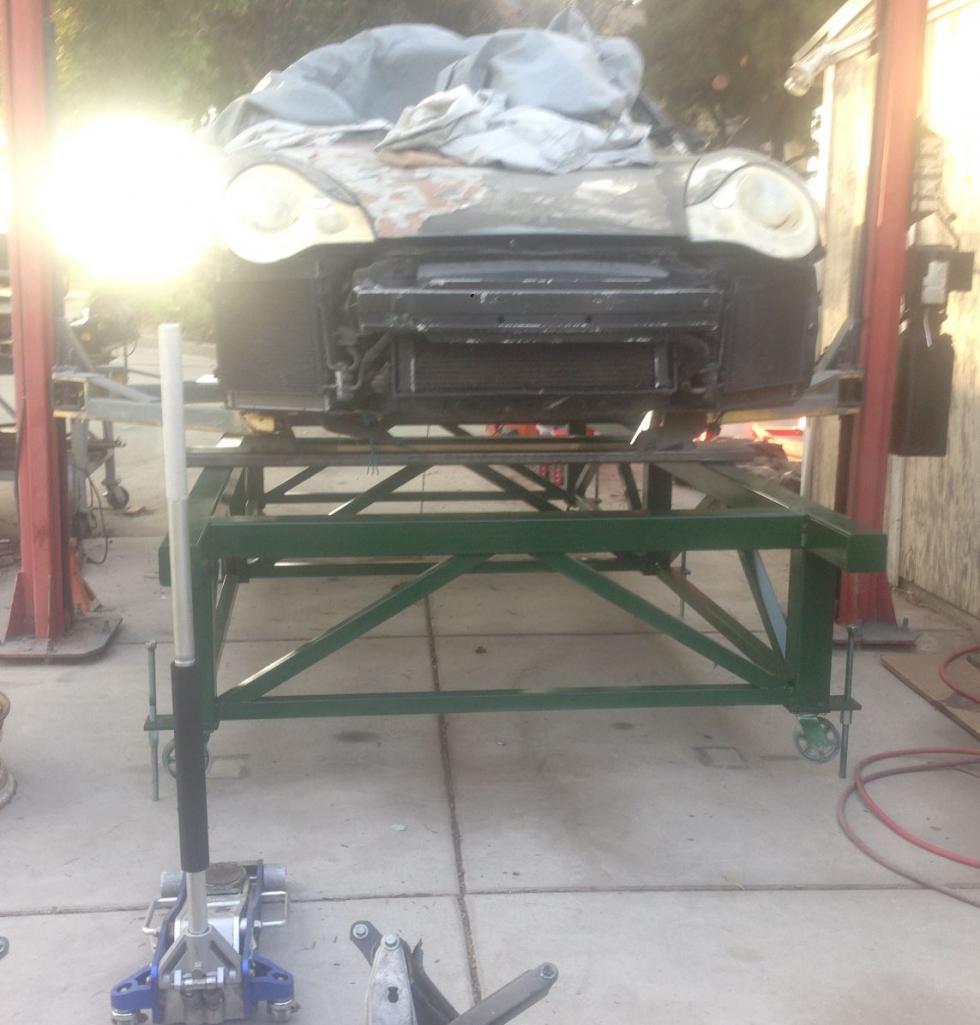 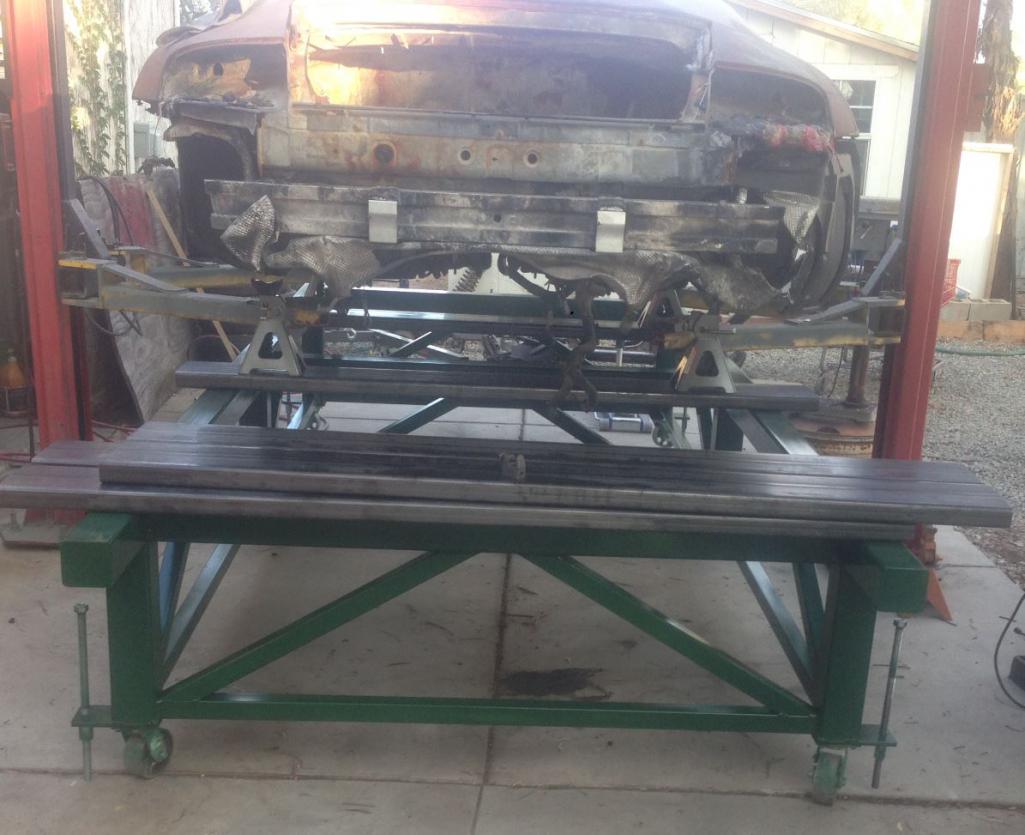 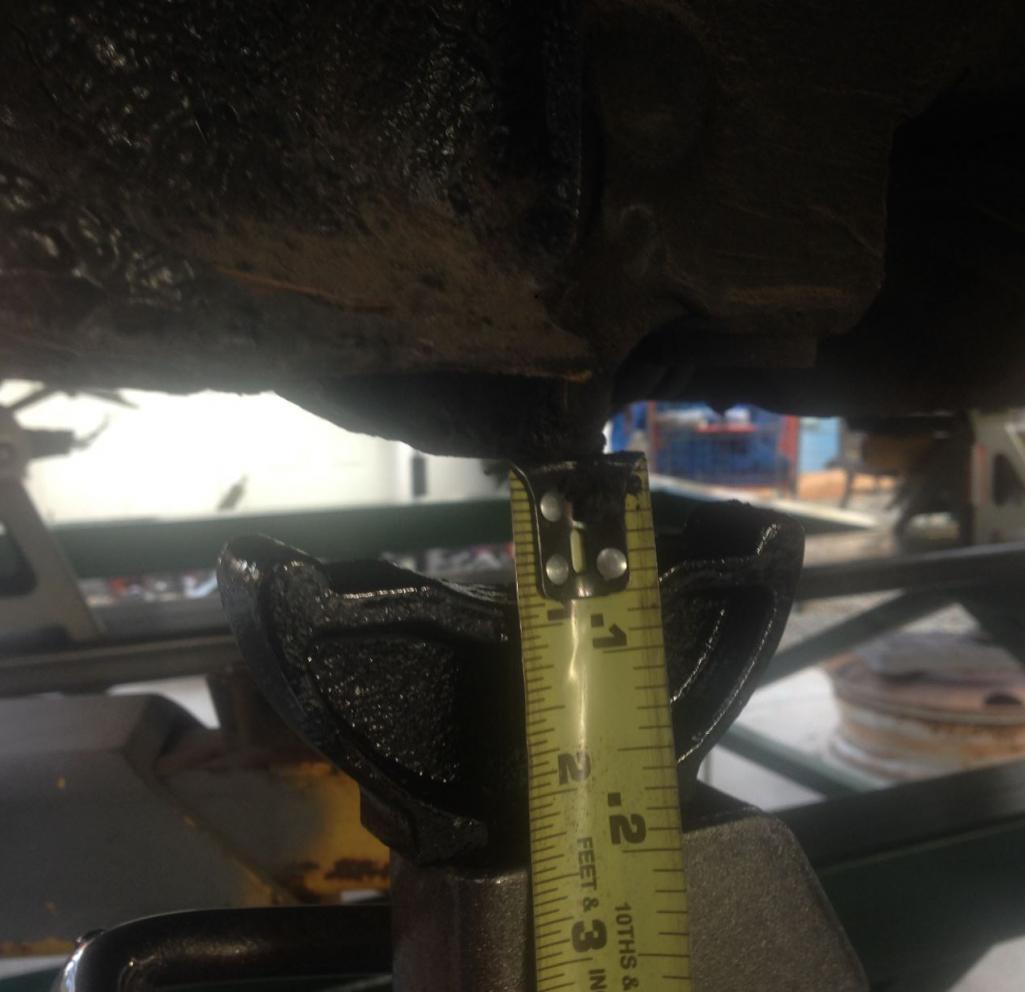
|
   |

 
|
| 76-914 |
Jul 22 2016, 08:52 AM
Post
#122
|
|
Repeat Offender & Resident Subaru Antagonist Group: Members Posts: 13,698 Joined: 23-January 09 From: Temecula, CA Member No.: 9,964 Region Association: Southern California |
Heat?
|
|
|
|
| Chris H. |
Jul 22 2016, 09:07 AM
Post
#123
|
|
Senior Member Group: Members Posts: 4,054 Joined: 2-January 03 From: Chicago 'burbs Member No.: 73 Region Association: Upper MidWest |
Could be...that's a lot of twist. Check that German engineering on the radiator setup (IMG:style_emoticons/default/thumb3d.gif) . Every square inch used and you'd never know with the panels on.
|
|
|
|
| Curbandgutter |
Jul 22 2016, 10:06 AM
Post
#124
|
|
Senior Member Group: Members Posts: 565 Joined: 8-March 13 From: Murrieta CA Member No.: 15,637 Region Association: Southern California |
76-914 That has to be it. The fire was centered at the left rear corner and that's where the twist is. And here I am asking the stupid questions to the obvious answer.
Chris H. Yes I love the way they did it. Interesting to note that they are set up to exhaust UNDER THE CAR. I figured out a way to use all three in my design. I want the front trunk to be completely useful. |
|
|
|
| jd74914 |
Jul 22 2016, 10:13 AM
Post
#125
|
|
Its alive Group: Members Posts: 4,841 Joined: 16-February 04 From: CT Member No.: 1,659 Region Association: North East States |
QUOTE(Curbandgutter @ Jul 21 2016, 11:31 PM)  Well the 996 is up on the chassis table. I was surprised to find that it had a twist of 1" in the frame...I wonder how it got that twist? Frames do some pretty weird things when highly heated, especially if they haven't been previously stress relieved. Moving that far is pretty shocking. QUOTE(Curbandgutter @ Jul 20 2016, 02:42 PM) However, what I am trying to do is to get a chassis stiffness so that I know how to set up the springs...As you may already know, a rule of thumb is that if your suspension stiffness is more than 10% of the chassis stiffness, then a portion of the chassis will be flexing and absorbing the loads instead of it going into the springs and dampeners. This condition will give a horrible ride and will cause premature cracks in the chassis. I suspect that this happens quite often when people put a really stiff spring on a stock 914 chassis. As would be my case if I just used the springs off of a car that weighs 3274 lbs and placed them in a car that weighs 2100 lbs. Glad my comments are helpful in some way. (IMG:style_emoticons/default/smile.gif) The 10% rule is good, you figure it keeps your chassis an order of magnitude stiffer so the end effect of its flexing is second order on the overall system. That said, I wouldn't base spring setup off chassis stiffness. What people normally do is decide on a suspension stiffness (say 1 deg/g) and then back out the wheel rate then spring rate, and then make sure their chassis is a stiff enough spring to be ignored. Ride and handling doesn't have to be poor with a flexy chassis; think about how well some superkarts perform. From what I've read, some of the current F1000 cars also use the chassis stiffness as a tuning knob as well. In a 914 with stiff springs the flexible chassis is definitely bad because of fatigue failures like you noted. QUOTE(Curbandgutter @ Jul 20 2016, 02:42 PM) My intent is to help other teener's so that they can see if stiffening the longs truly works. And if so, how well? It will be very interesting to me and to others, I suspect. I'm very interested to see as well. In a rust-free car I'm not sure there is actually much benefit to long-stiffening with the Engman/Maddog doublers since the area moment of inertia increase is fairly low. On my car I made the longs deeper (well, on the side I'm finished with at least haha) to gain the h^3 advantage in bending stiffness. QUOTE(Curbandgutter @ Jul 20 2016, 02:42 PM) I've been reading that a typical torsional stiffness for a sports car is somewhere between 1000 and 2000 ft-lbs/degree. Also, F1 cars can be as high as 20,000 ft-lbs/degree. I believe these numbers are a little low. We always shot for at least 1500-2000 ft-lbs/deg on our lightly spring formula cars. Just to provide a Porsche comparison, here is some stiffness information I saved from somewhere a few years ago: Porsche 996 Turbo (early): 9,957 ft-lbs/deg or 13,500 Nm/deg Porsche 959: 9,515 ft-lbs/deg or 12,900 Nm/deg Porsche Carrera GT: 19,177 ft-lbs/deg or 26,000Nm/degree The Lotus Esprit is known for being pretty flexy and is said to be about 4315 ft-lbs/deg. Current F1 cars I believe are currently much stiffer, though some may also be using their chassis as sprung members; the modeling you can do with $100M+ is pretty crazy. (IMG:style_emoticons/default/laugh.gif) The numbers above might not be correct since I can't remember the source, but give a little perspective. It should be really interesting to see what your 996 looks like! |
|
|
|
| cwpeden |
Jul 22 2016, 10:38 AM
Post
#126
|
|
Great White North, huh? Group: Members Posts: 916 Joined: 20-August 06 From: Victoria BC Member No.: 6,693 Region Association: Canada |
QUOTE(Curbandgutter @ Jul 13 2016, 09:41 AM) Well look at what came it today. The parts look to be first rate. Everything is USA made with the exception of a wand piece that is made in Germany. The company told me that they stand by their product and that if I'm not happy with the results that they will take it back. We will see. Supposedly they were able to do 1 sf per 1 min and 15 secs. Not bad at all. Just make sure you keep the suction tube on top of the wand and dont point it up. Once I got water in the media suction tube it was a bitch to get clean. And the Pressure ratings for the washer to use is minimum. Mine was adequate ate 3500 psi and 4 gpm |
|
|
|
| jd74914 |
Jul 22 2016, 11:58 AM
Post
#127
|
|
Its alive Group: Members Posts: 4,841 Joined: 16-February 04 From: CT Member No.: 1,659 Region Association: North East States |
Bet the twist was from when the fire hose quenched the fire; the sudden temperature change probably sucked it in like you would use a torch and rag to suck in a body panel.
|
|
|
|
| Curbandgutter |
Jul 22 2016, 03:58 PM
Post
#128
|
|
Senior Member Group: Members Posts: 565 Joined: 8-March 13 From: Murrieta CA Member No.: 15,637 Region Association: Southern California |
The mystery twist has been discovered. Note to self make sure all jack stands are set to the same height. (IMG:style_emoticons/default/headbang.gif) (IMG:style_emoticons/default/headbang.gif) (IMG:style_emoticons/default/headbang.gif) Frame is straight. This is great news since I need to measure the suspension cradle points on the 996 to transfer them to the 914.
|
|
|
|
| Curbandgutter |
Jul 22 2016, 04:15 PM
Post
#129
|
|
Senior Member Group: Members Posts: 565 Joined: 8-March 13 From: Murrieta CA Member No.: 15,637 Region Association: Southern California |
cwpeden Yes thanks for the heads up.
jd74914 i'm wondering how much benefit it would be to use the Engman and then add a strip of 1/8" flat stock on the top and bottom flange. That would add quite a bit more to the moment of inertia. The section modulus would be much better than the metal along the sides of the stiffener kit. I suspect that the Engman kit gives more rotational stiffness than bending stiffness though. We will see. |
|
|
|
| Curbandgutter |
Jul 22 2016, 07:12 PM
Post
#130
|
|
Senior Member Group: Members Posts: 565 Joined: 8-March 13 From: Murrieta CA Member No.: 15,637 Region Association: Southern California |
Well I finished measuring the 996 suspension cradle points. Here is how I did it.
First I laser plummet the bolt 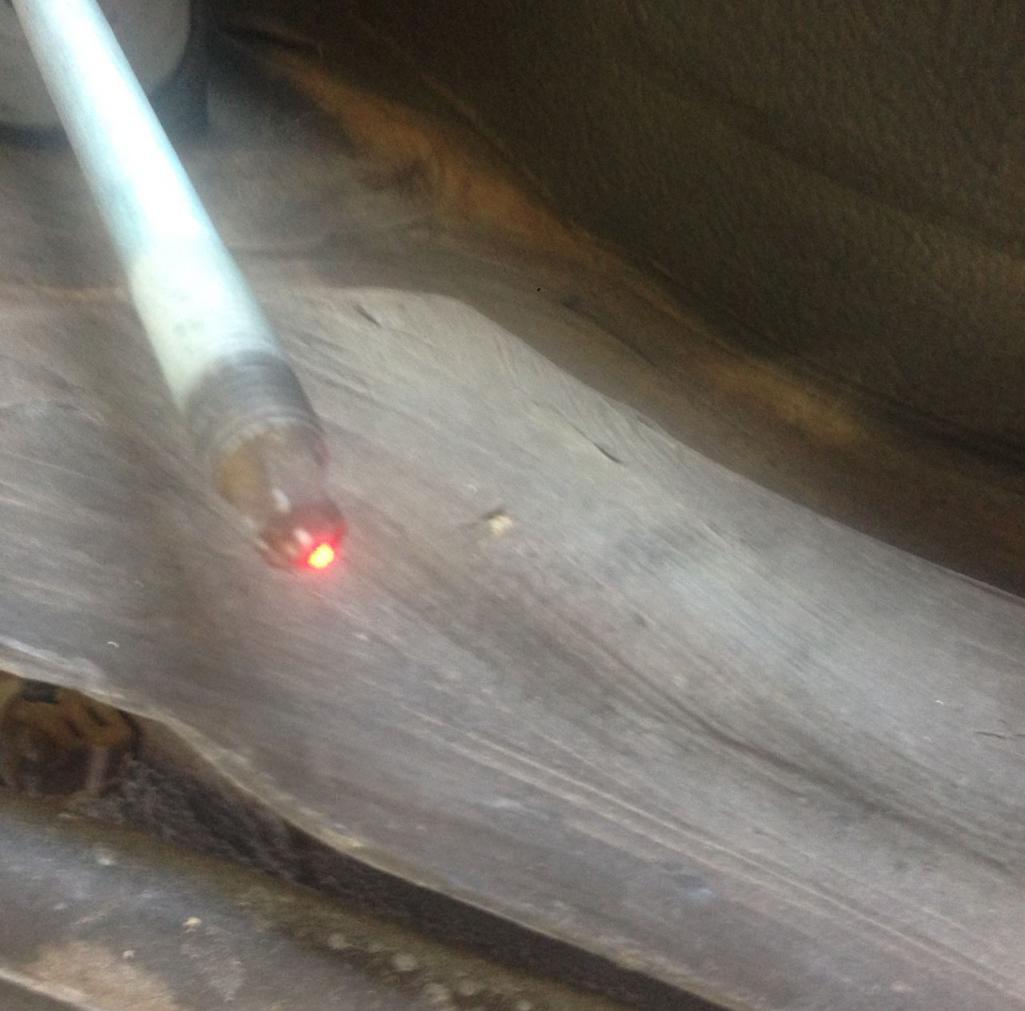 Then I transfer that mark to the ground floor like this 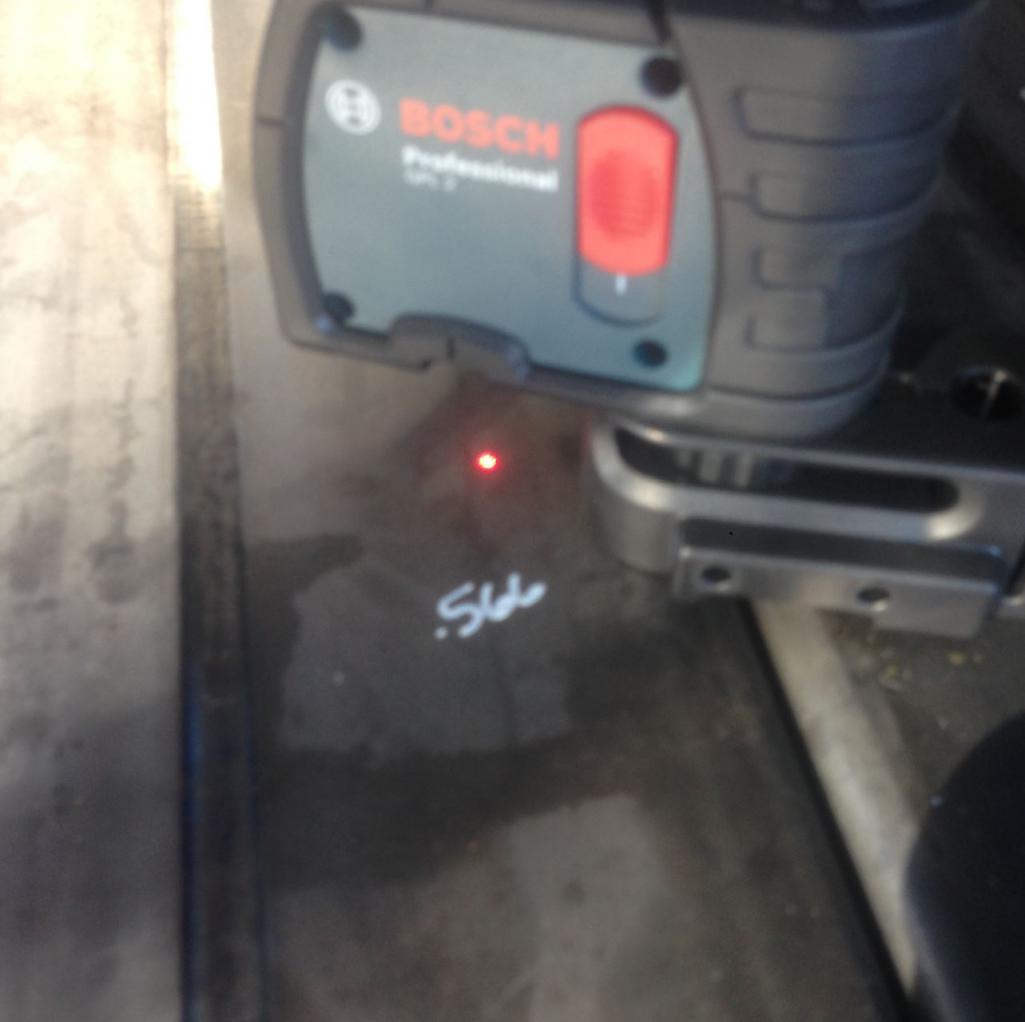 Then I measure horizontally like this 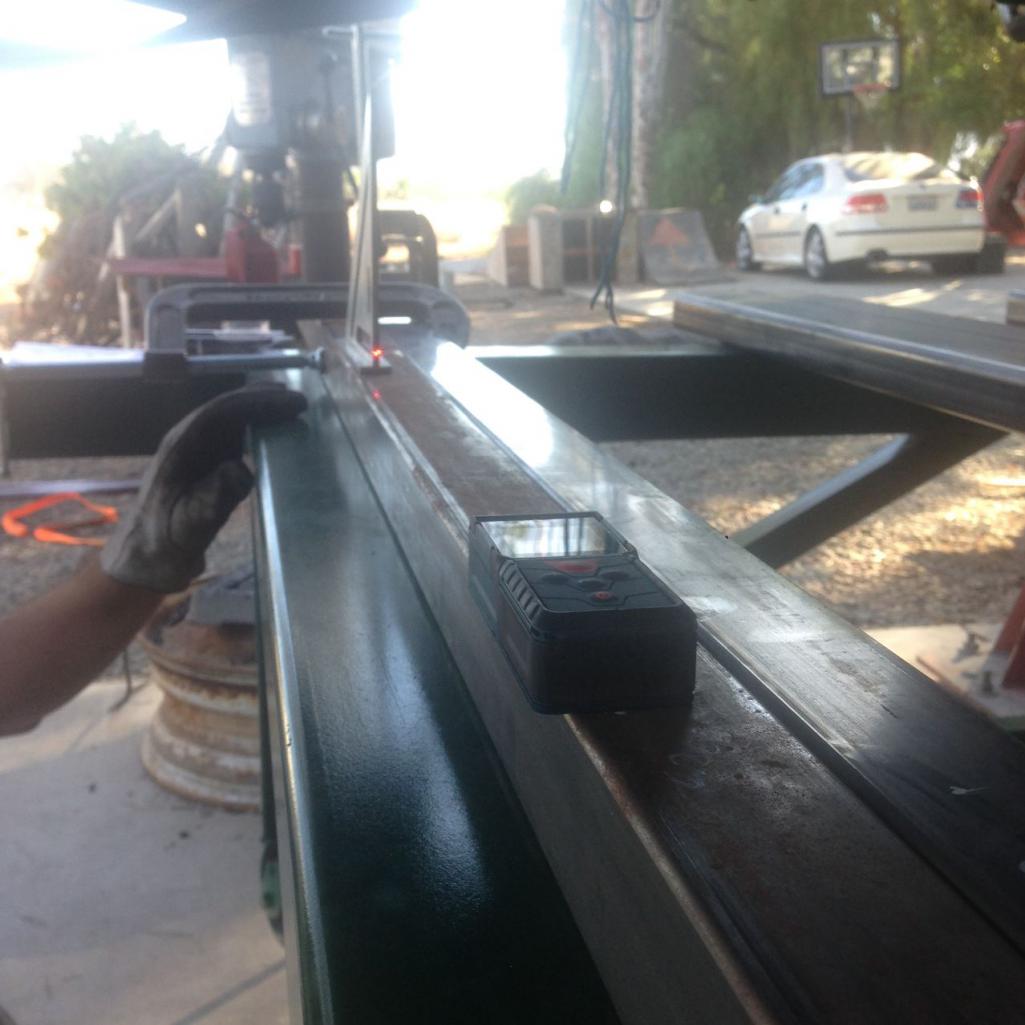 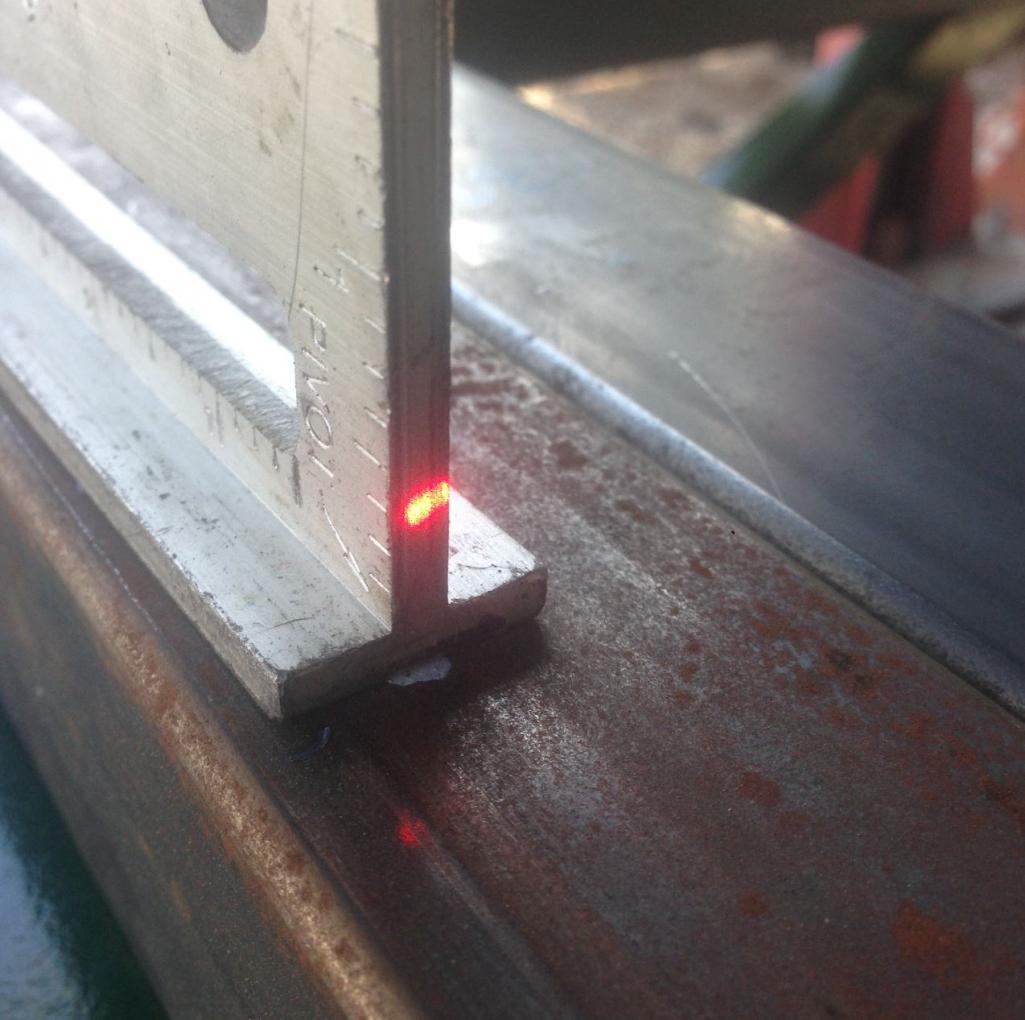 Then I measure vertically like this 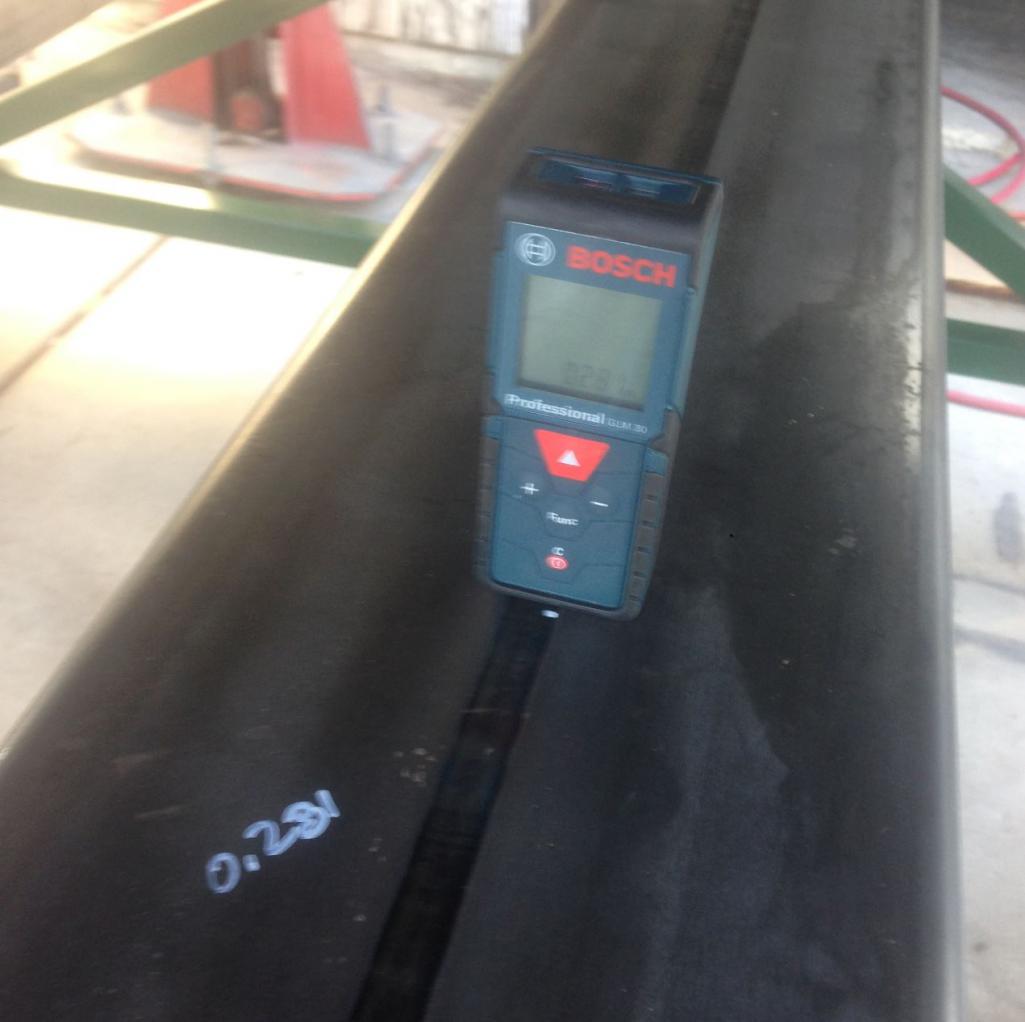 I also measure all of the diagonals and there you have it. All of the measurements needed to transfer to the 914. Next step is twist test on 996. I'm out for a week camping so that will have to wait. |
|
|
|
| My 914 |
Jul 22 2016, 07:34 PM
Post
#131
|
|
Casual Member Group: Members Posts: 560 Joined: 23-April 16 From: Massachusetts Member No.: 19,928 Region Association: North East States |
Have fun. Looking forward to your next update!
|
|
|
|
| Curbandgutter |
Aug 5 2016, 01:35 PM
Post
#132
|
|
Senior Member Group: Members Posts: 565 Joined: 8-March 13 From: Murrieta CA Member No.: 15,637 Region Association: Southern California |
OK back on it. I'm out one week and I can't even find my project on the boards. It was soemthing like 6 pages deep. Anyway, got back from Sequoia and got to twisting the frame on the 996. Here are pictures of my contraption
This is the digital dial indicator that I used 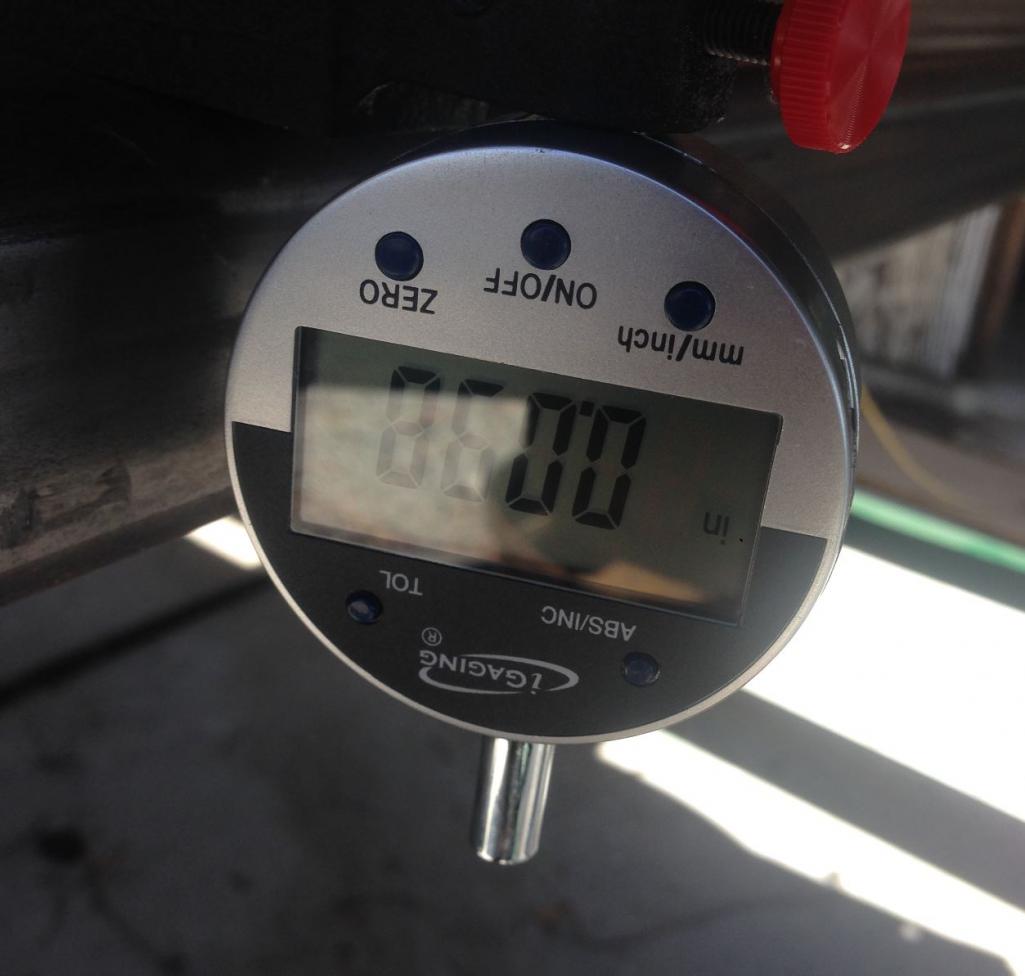 Here is how it triggers the dial indicator  I added 100 lbs (2 -45's and a 10) at a distance of 11.375' This created 1137.5'-lbs of torque. Crazy deflection in the 2x2 but it was still only 50% stressed. 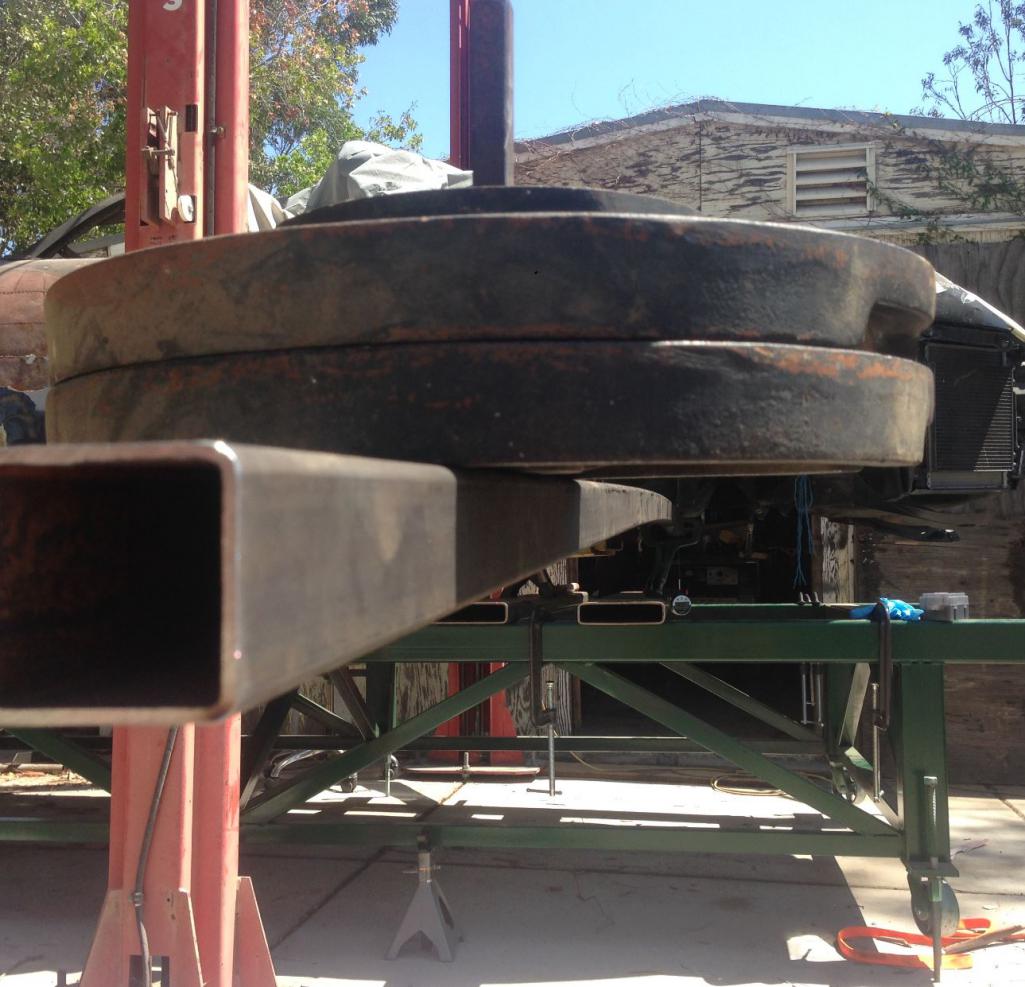 The final number for the convertible 996C4 is......4,568'#/Degree. Seems to be pretty flexible. |
|
|
|
| Curbandgutter |
Aug 10 2016, 02:09 PM
Post
#133
|
|
Senior Member Group: Members Posts: 565 Joined: 8-March 13 From: Murrieta CA Member No.: 15,637 Region Association: Southern California |
Well this weekend member CSDILLIGAF and I will be making the nest for the suspension cradle. He's doing the same project so we'll work on the suspension and frame portions, and who knows what else? It's very helpful to have someone such as him working along side with me. According to my count this will be his 3rd successful Frankenstein transplant. He's the one that did a full 993 suspension on a tube chassis 914. From what I understand his 914 currently races in a very famous race and does very well. I love these 914's they are an incredible platform to work with.
|
|
|
|
| Curbandgutter |
Aug 13 2016, 07:57 PM
Post
#134
|
|
Senior Member Group: Members Posts: 565 Joined: 8-March 13 From: Murrieta CA Member No.: 15,637 Region Association: Southern California |
Well here is the suspension nest or fixture as some call it. CSDilligaf came over and we hit it for 8 hours straight. Only stopped of for a carnitas burrito, with rice and beans and all the fixins. Couldn't have done it so fast without CSFilligaf. It was nice to bounce ideas off each other as we put this thing together. Thank you for the input, work and the sweet bushings that you machined. Really pleased with the way it's coming out. It is almost complete as we only need to add the strut tower locations and finish welding a couple of more beads and cross bracing. After this, I can start building the frame for the 914 with this suspension nest centered and elevated within the shell of the 914. Enjoy the pics.
Attached thumbnail(s) 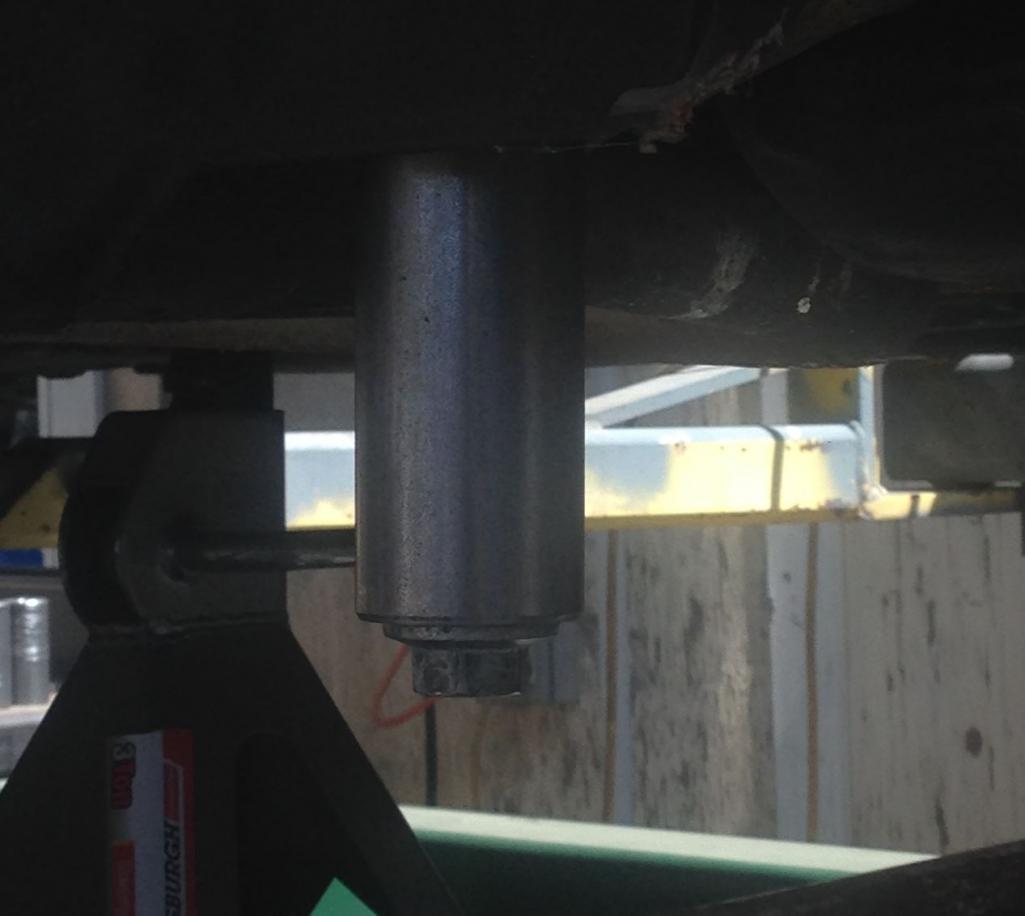 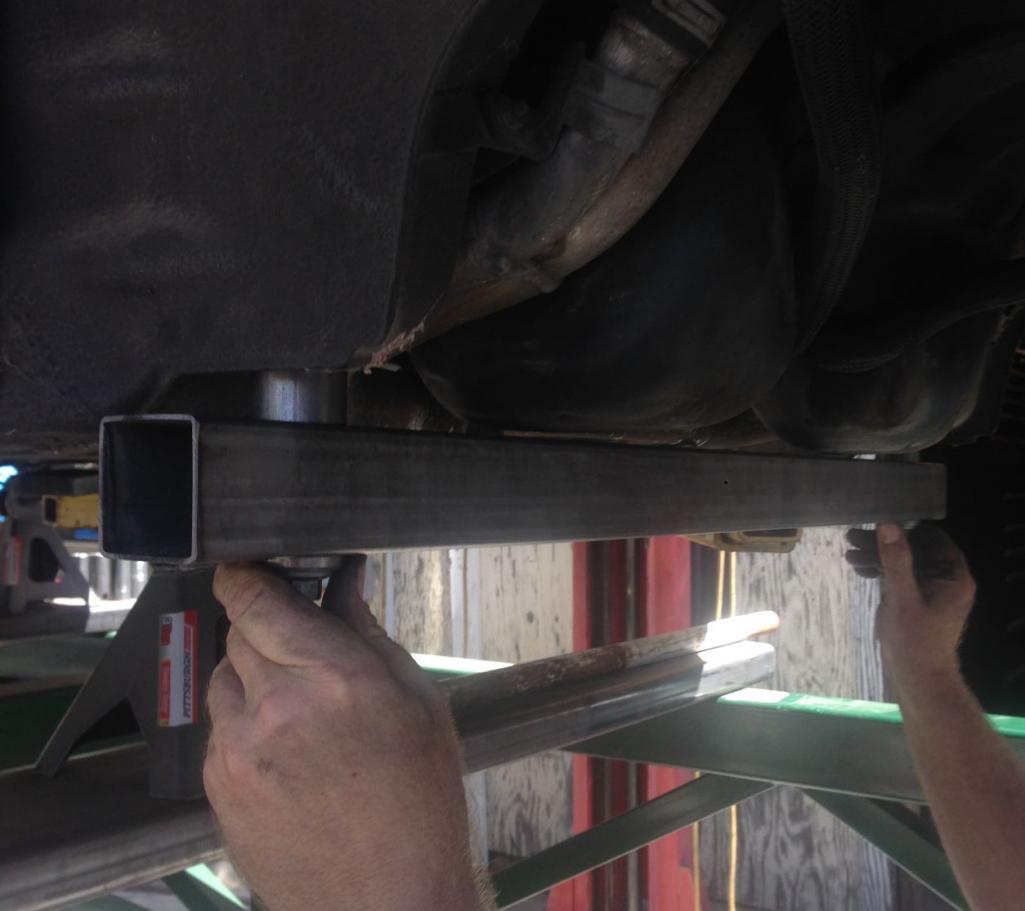 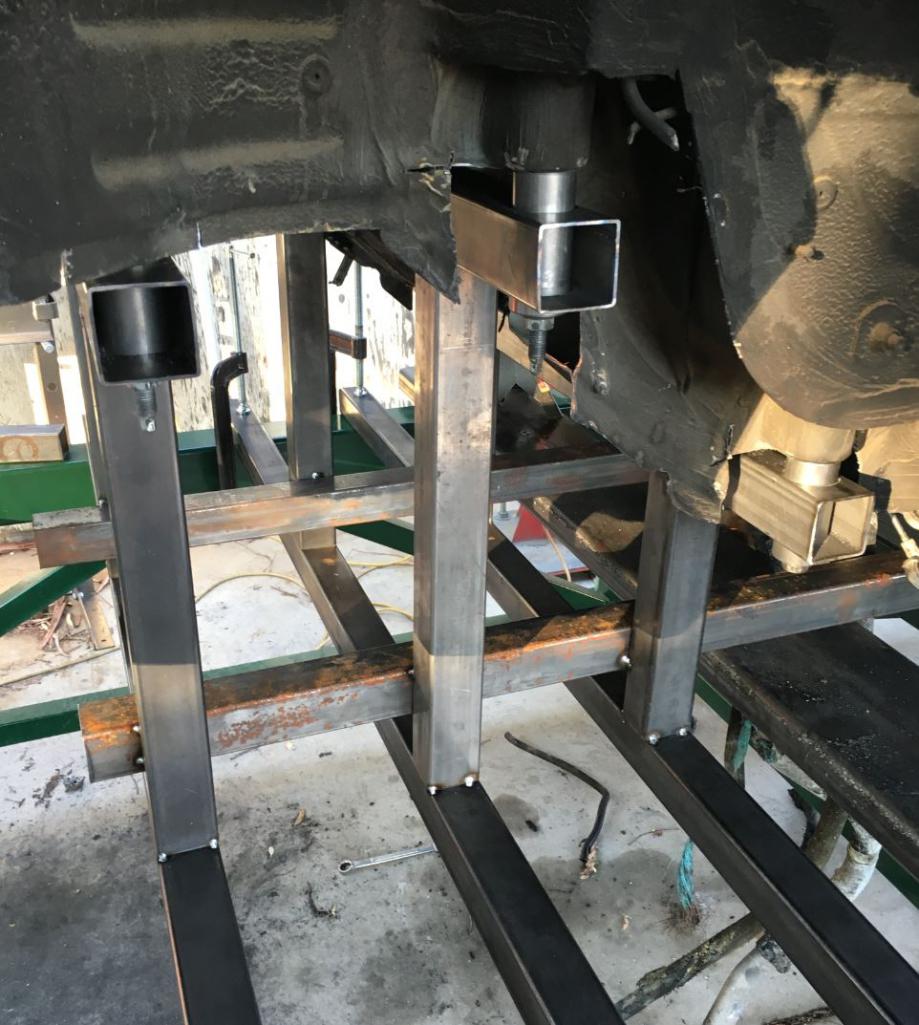 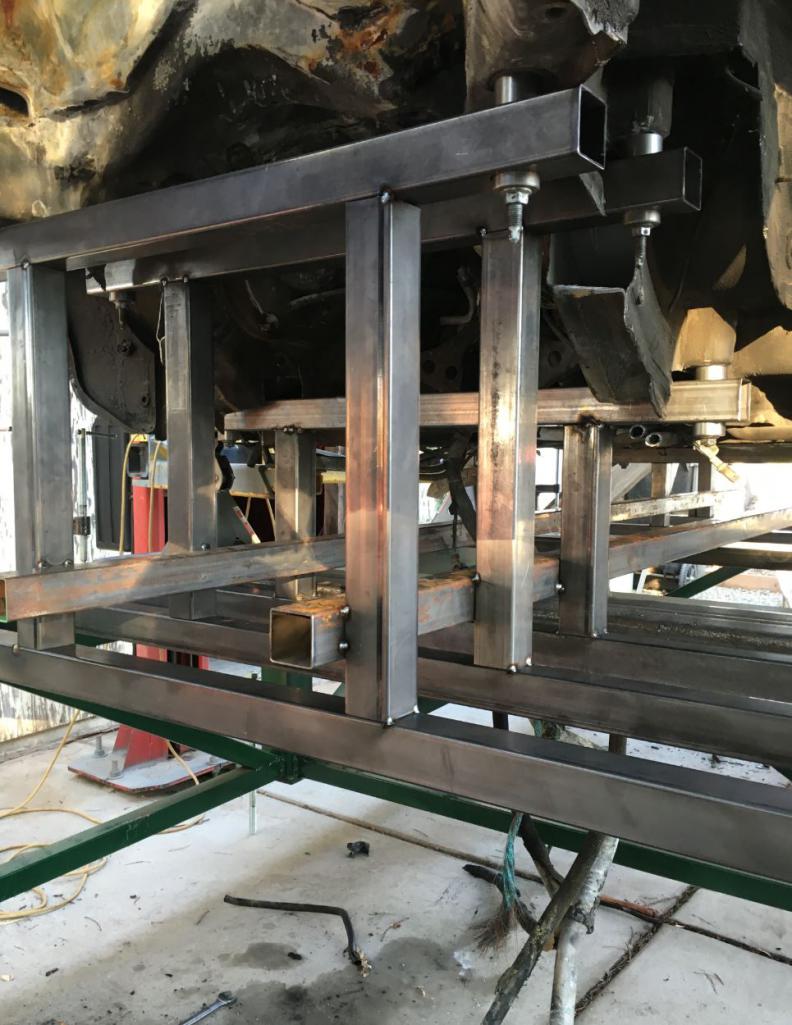 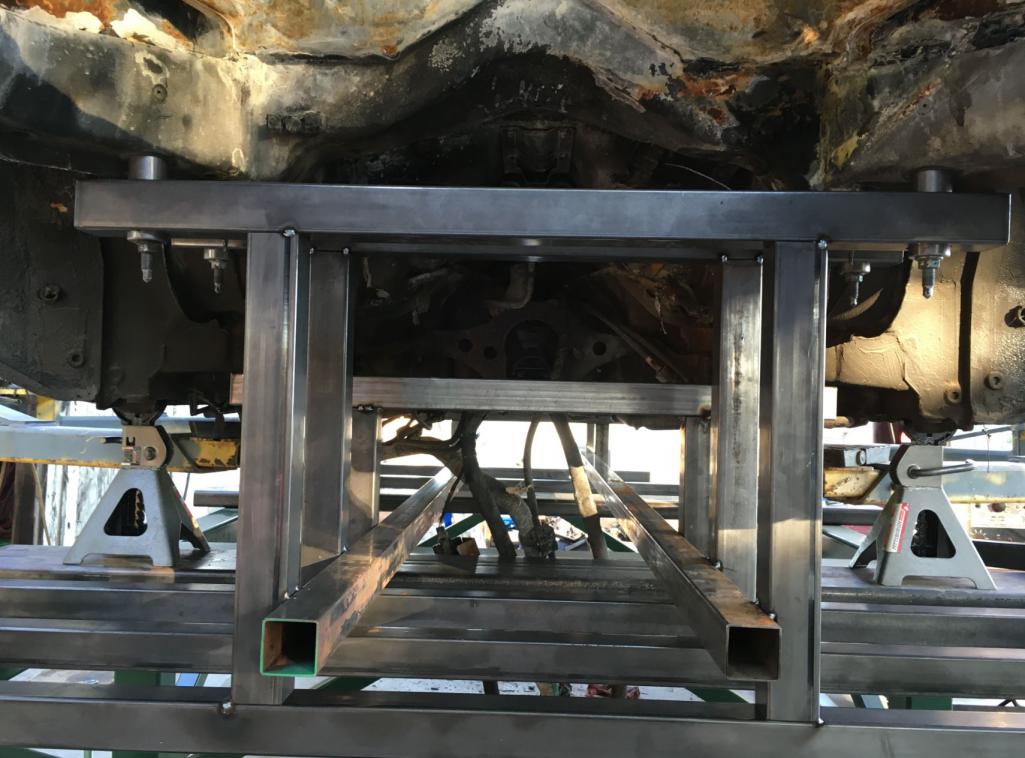 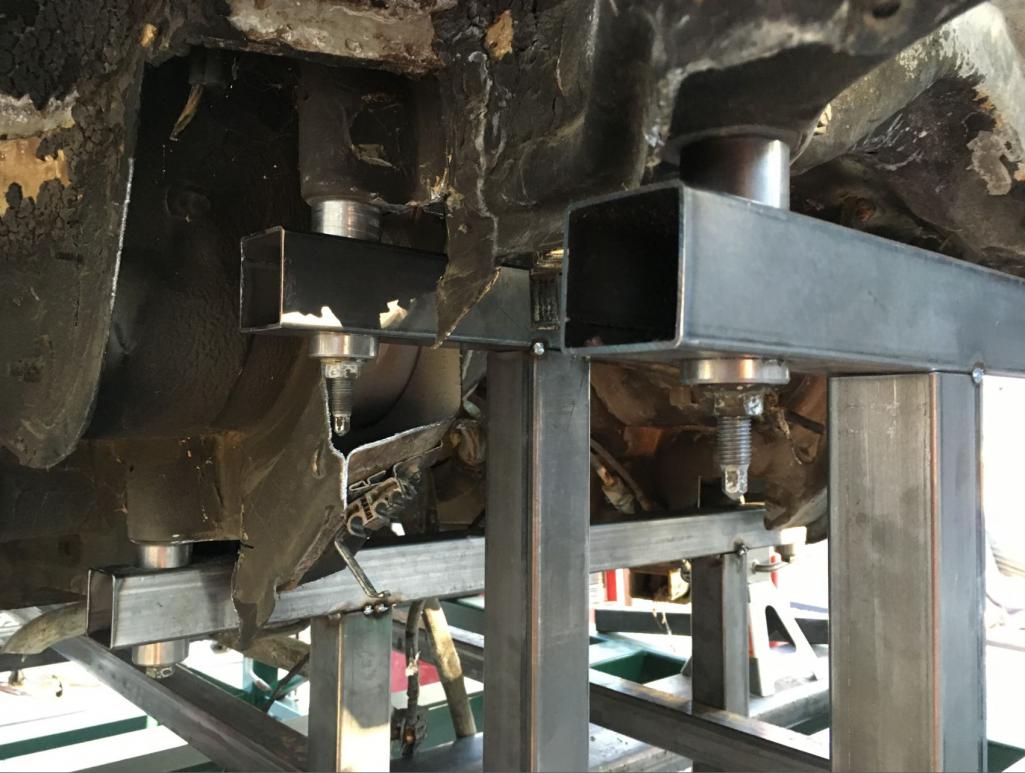 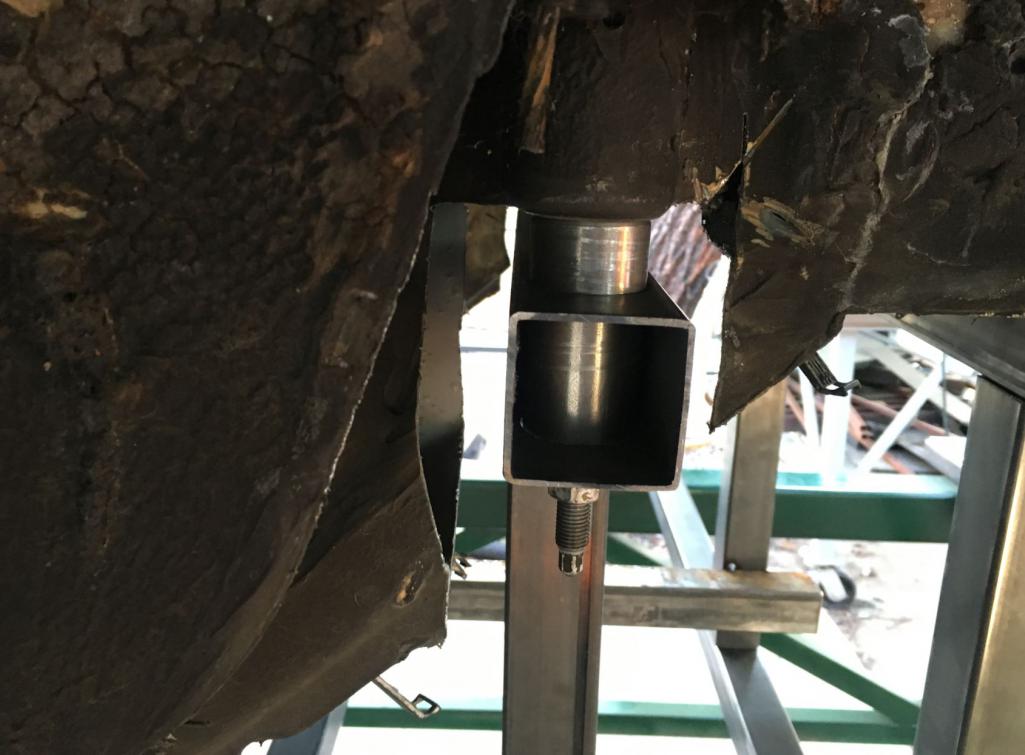 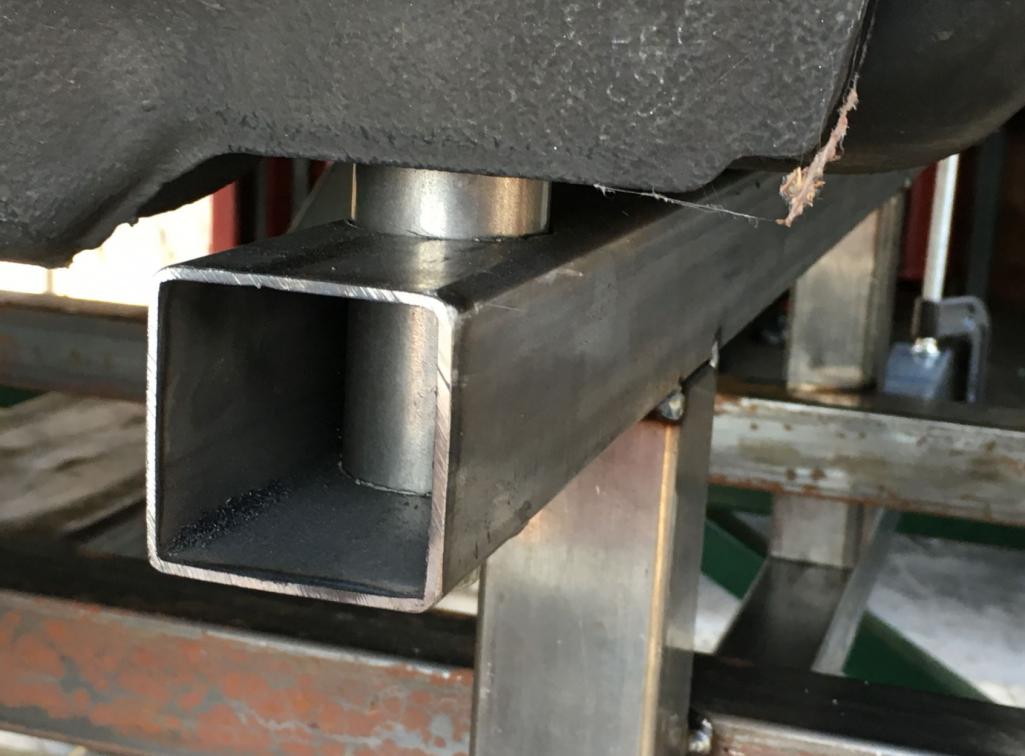 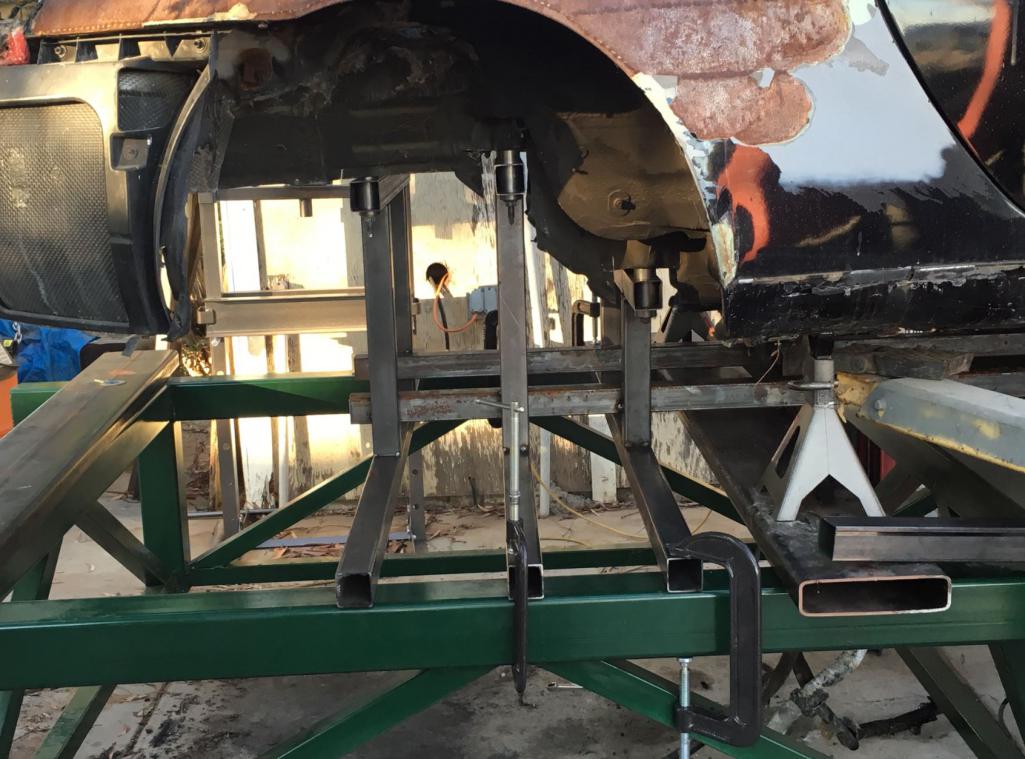 Attached image(s) 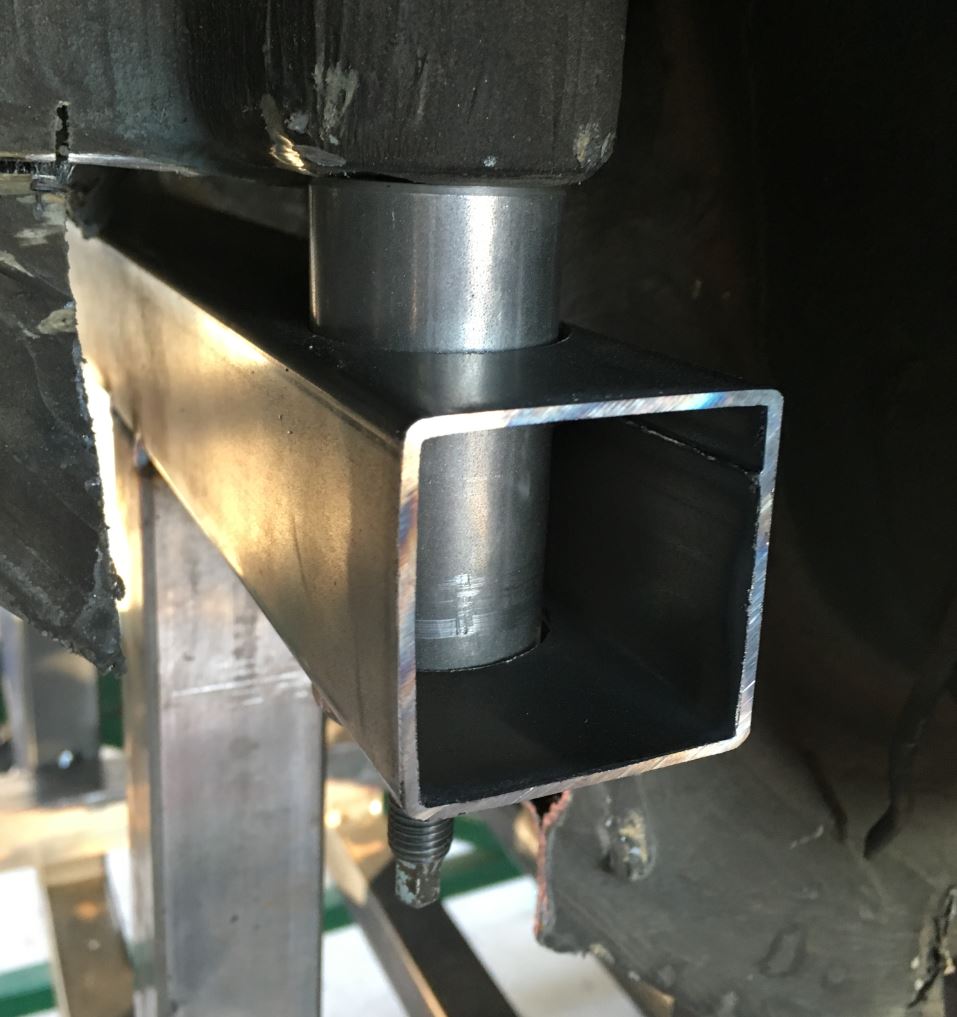
|
|
|
|
| 914forme |
Aug 14 2016, 07:35 AM
Post
#135
|
|
Times a wastin', get wrenchin'! Group: Members Posts: 3,896 Joined: 24-July 04 From: Dayton, Ohio Member No.: 2,388 Region Association: None |
|
|
|
|
| csdilligaf |
Aug 14 2016, 08:00 AM
Post
#136
|
|
Member Group: Members Posts: 106 Joined: 18-April 12 From: San Diego CA Member No.: 14,397 Region Association: None |
Rudy, I really enjoyed myself working at your place. A little on the hot side and sweat my butt off but we sure hung in there. We got a lot of work done. Cant wait until the next stage of the build.
|
|
|
|
| NS914 |
Aug 15 2016, 10:16 AM
Post
#137
|
|
Member Group: Members Posts: 198 Joined: 9-June 09 From: Dartmouth, Nova Scotia Member No.: 10,455 Region Association: Canada |
Subscribed and really enjoying this build....truthfully, I can read some of this but I sure as heck don't understand it...amazing work though and really interesting to see what someone (who clearly has an amazing background) can do with a car in their backyard...speechless actually and thanks for posting. Grant
|
|
|
|
| Curbandgutter |
Aug 16 2016, 11:49 AM
Post
#138
|
|
Senior Member Group: Members Posts: 565 Joined: 8-March 13 From: Murrieta CA Member No.: 15,637 Region Association: Southern California |
NS914 Thank you for your kind words. This build would have been very difficult 20 years ago due to knowledge being bottled up in some guru's head and not being able to be shared with no more than those within physical proximity. However, now with the "information superhighway", all we have to do is to research online and fill in our void areas with the specialized knowledge of others. This truly is a great time to be doing projects such as this since one can pull from the collective knowledge of the online community. Trust me we all learn from each other.
Back to the project now. I'm tying in the strut towers today and will have pictures up later. After that....the suspension fixture will be complete. Next step will be to strip the 914 and epoxy primer. I'm using the epoxy primer from a company called SPI. Then pull the 996 of the chassis table and insert 914 onto suspension fixture. Then the fun will start. The rotisserie, the chassis table and suspension fixture was only preparation to work the on the 914. |
|
|
|
| dakotaewing |
Aug 16 2016, 01:28 PM
Post
#139
|
|
Senior Member Group: Members Posts: 1,163 Joined: 8-July 03 From: DeSoto, Tx Member No.: 897 Region Association: Southwest Region |
QUOTE(Curbandgutter @ Aug 16 2016, 12:49 PM) NS914 Thank you for your kind words. This build would have been very difficult 20 years ago due to knowledge being bottled up in some guru's head and not being able to be shared with no more than those within physical proximity. However, now with the "information superhighway", all we have to do is to research online and fill in our void areas with the specialized knowledge of others. This truly is a great time to be doing projects such as this since one can pull from the collective knowledge of the online community. Trust me we all learn from each other. Back to the project now. I'm tying in the strut towers today and will have pictures up later. After that....the suspension fixture will be complete. Next step will be to strip the 914 and epoxy primer. I'm using the epoxy primer from a company called SPI. Then pull the 996 of the chassis table and insert 914 onto suspension fixture. Then the fun will start. The rotisserie, the chassis table and suspension fixture was only preparation to work the on the 914. The SPI epoxy is good stuff ! My project was sprayed in 2009 with it and has served me well. The project is still in the garage, waiting for me to finish the paint job - (IMG:style_emoticons/default/hissyfit.gif) Are you going to use their base and clears as well? |
|
|
|
| csdilligaf |
Aug 17 2016, 07:20 AM
Post
#140
|
|
Member Group: Members Posts: 106 Joined: 18-April 12 From: San Diego CA Member No.: 14,397 Region Association: None |
It will be awesome to see the 914 up on the table and start the whole process of joining the 996 suspension into a 914 chassis. I will make another trip up to help. Be sure to post about how the blasting of the 914 goes.
|
|
|
|
|
1 User(s) are reading this topic (1 Guests and 0 Anonymous Users)
0 Members:

|
Lo-Fi Version | Time is now: 19th April 2025 - 07:47 AM |
Invision Power Board
v9.1.4 © 2025 IPS, Inc.