|
|

|
Porsche, and the Porsche crest are registered trademarks of Dr. Ing. h.c. F. Porsche AG.
This site is not affiliated with Porsche in any way. Its only purpose is to provide an online forum for car enthusiasts. All other trademarks are property of their respective owners. |
|
|
  |
| cary |
 May 5 2017, 09:22 PM May 5 2017, 09:22 PM
Post
#201
|
|
Advanced Member     Group: Members Posts: 3,900 Joined: 26-January 04 From: Sherwood Oregon Member No.: 1,608 Region Association: Pacific Northwest 
|
Friday 5/5/17 Short Day
Trimming up and in the right side seat belt retractor pocket. Second time around is going very quickly. Lessons learned on round one are paying rewards. 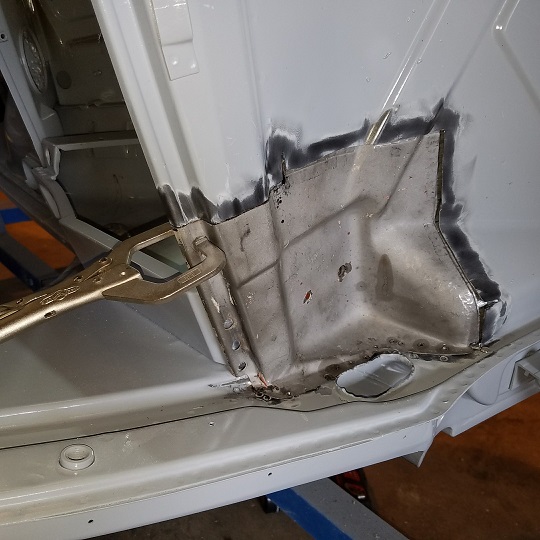 Epoxy primer pealed back on both sides, ready for the weld in. 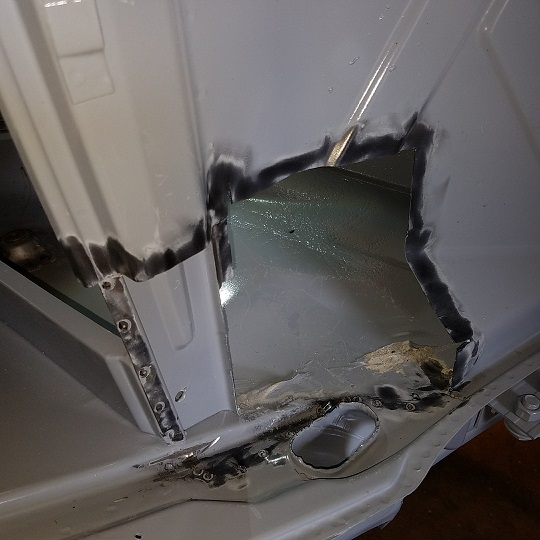 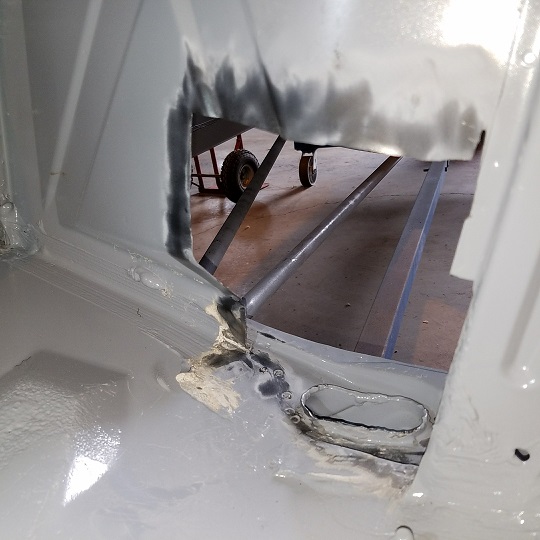 |
| raynekat |
 May 8 2017, 11:31 PM May 8 2017, 11:31 PM
Post
#202
|
|
Advanced Member     Group: Members Posts: 2,162 Joined: 30-December 14 From: Coeur d'Alene, Idaho Member No.: 18,263 Region Association: Pacific Northwest 
|
|
| raynekat |
 May 8 2017, 11:42 PM May 8 2017, 11:42 PM
Post
#203
|
|
Advanced Member     Group: Members Posts: 2,162 Joined: 30-December 14 From: Coeur d'Alene, Idaho Member No.: 18,263 Region Association: Pacific Northwest 
|
Also just received my gauges back from North Hollywood Speedometer.
This took some time....nearly 10 months, but the wait was worth it as they always do a great job. Not inexpensive, but I wanted a few special touches, so they were my choice. Converted the 911 multi-gauge to all metric or Euro? Druck (oil pressure) in bars and the oil temp in C. The speedo was given the later 914 look as the early 914 speedos just have too many numbers for my taste and look too busy. Finally the tach was rearranged with the addition of the fuel gauge as well. All new bezels, glass, pointers, center buttons, etc. Gauges look flawless. 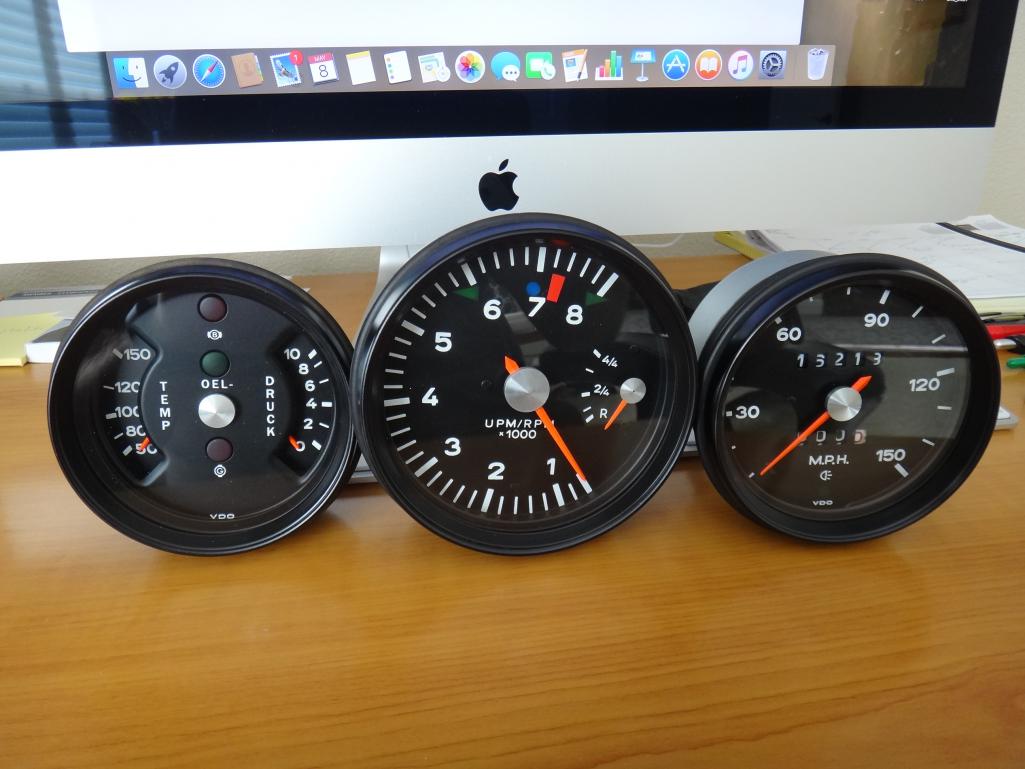 |
| Cairo94507 |
 May 9 2017, 06:41 AM May 9 2017, 06:41 AM
Post
#204
|
|
Michael           Group: Members Posts: 10,095 Joined: 1-November 08 From: Auburn, CA Member No.: 9,712 Region Association: Northern California 
|
I love your gas burners.
Your instruments look beautiful. (IMG:style_emoticons/default/smilie_pokal.gif) I spent some coin on mine to have them done; you look at them the whole time you are in the car. Well worth the time and money. |
| raynekat |
 May 12 2017, 07:54 PM May 12 2017, 07:54 PM
Post
#205
|
|
Advanced Member     Group: Members Posts: 2,162 Joined: 30-December 14 From: Coeur d'Alene, Idaho Member No.: 18,263 Region Association: Pacific Northwest 
|
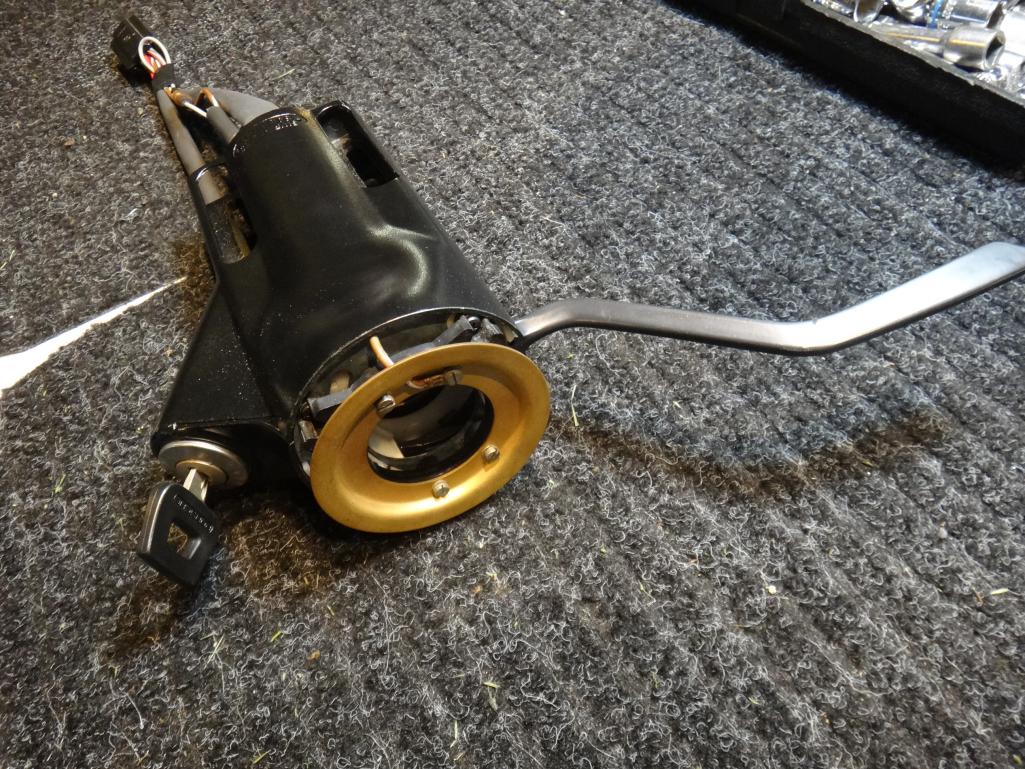
Rebuilt the steering column today.
Repainted the housing, installed a new turn signal switch, new ignition switch, rekeyed ignition lock all with new shrink tubing and a 12 pin connector. Talk about a fiddly job. Routing the wires so you can get the whole mess through the very tight opening in the housing, soldering new male pins on all the wires, checking and rechecking wiring diagrams from various sources to make sure I understood what every wire was and where it was supposed to go. It was a total hack job when I disassembled after purchase. The previous owner(s) had been naughty and lazy folks in replacing the ignition in the past. 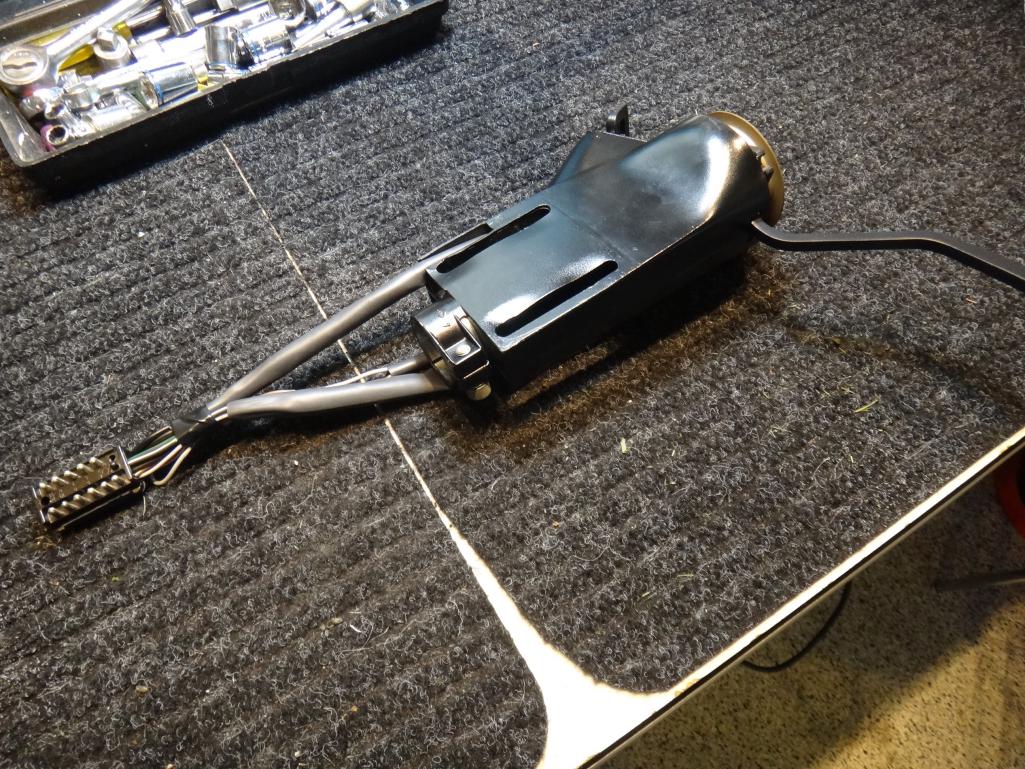 |
| raynekat |
 May 12 2017, 07:55 PM May 12 2017, 07:55 PM
Post
#206
|
|
Advanced Member     Group: Members Posts: 2,162 Joined: 30-December 14 From: Coeur d'Alene, Idaho Member No.: 18,263 Region Association: Pacific Northwest 
|
|
| cary |
 May 13 2017, 06:36 AM May 13 2017, 06:36 AM
Post
#207
|
|
Advanced Member     Group: Members Posts: 3,900 Joined: 26-January 04 From: Sherwood Oregon Member No.: 1,608 Region Association: Pacific Northwest 
|
Friday 5/12/17
The right seat belt retractor pocket went in lickety split after all the engineering on the left side. Positioned and attached with self tappers. 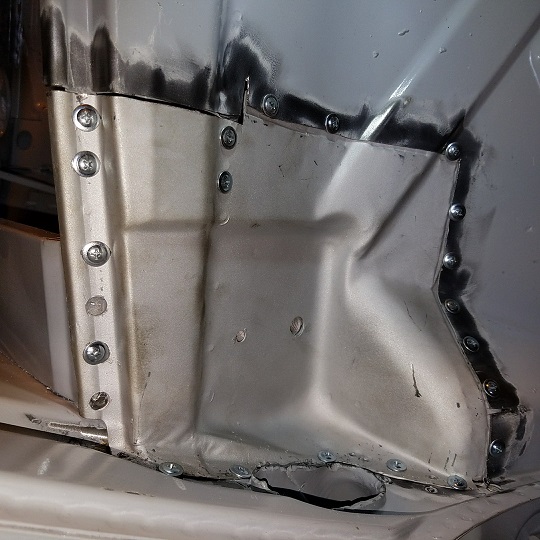 Self tappers removed and the outer hole enlarged to 3/16 for a larger rosette. Rosettes welded up/in. 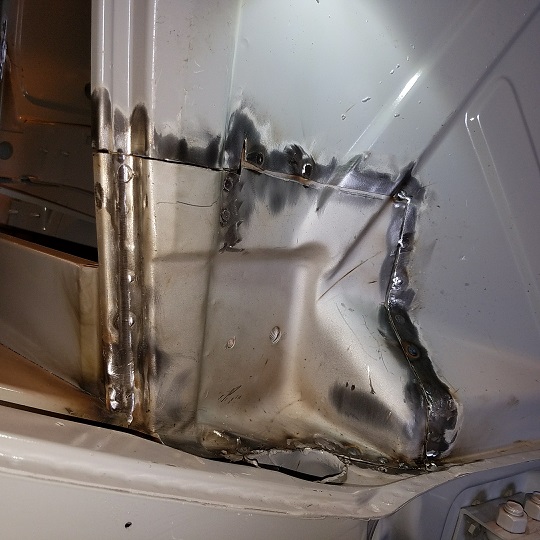 Seam (stitched) welded and wire brushed. 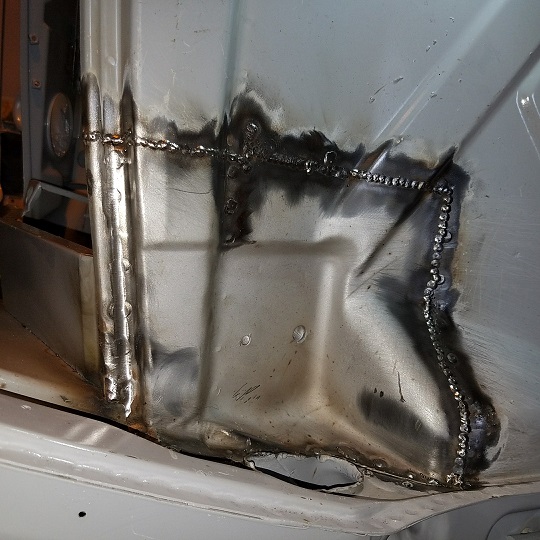 Welds smoothed up a bit. 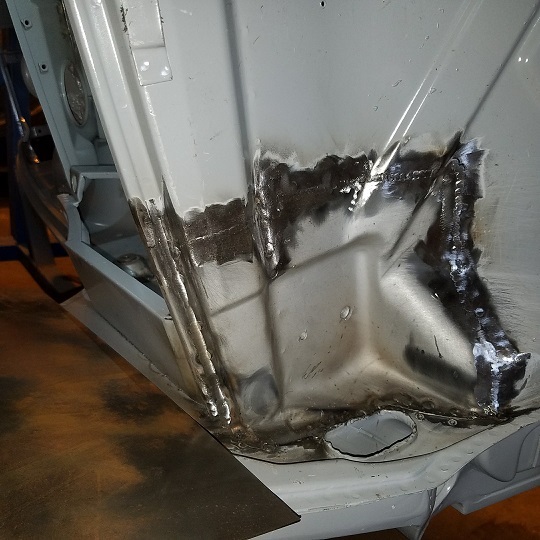 Back side ready for some stitches when I get to welding in the engine compartment. 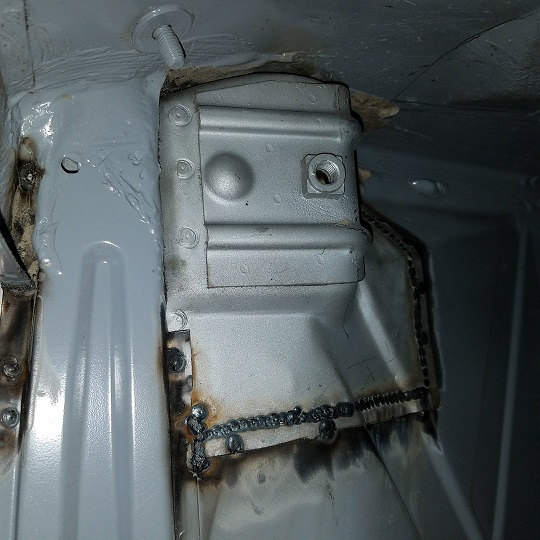 |
| cary |
 May 13 2017, 06:49 AM May 13 2017, 06:49 AM
Post
#208
|
|
Advanced Member     Group: Members Posts: 3,900 Joined: 26-January 04 From: Sherwood Oregon Member No.: 1,608 Region Association: Pacific Northwest 
|
Next ......................... on to the Hell Hole.
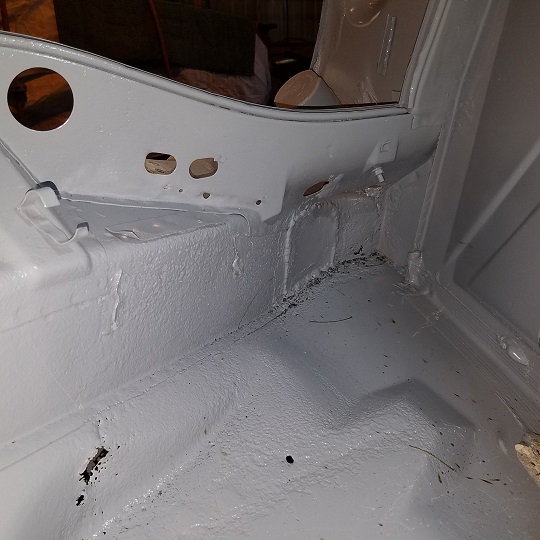 Doug has provided me the Mad Dog Major kit for the work. Picking up a little flash rust so I gave them a rub down with OSPHO before I headed home. 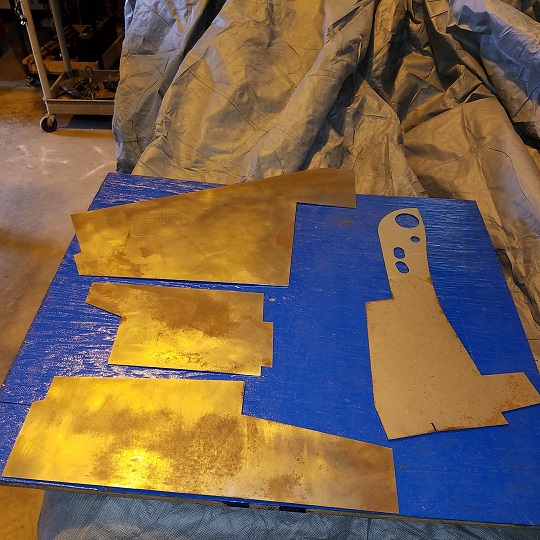 Let the fun begin. Cut off/out the ramp without damaging the inner layer from the inner long. 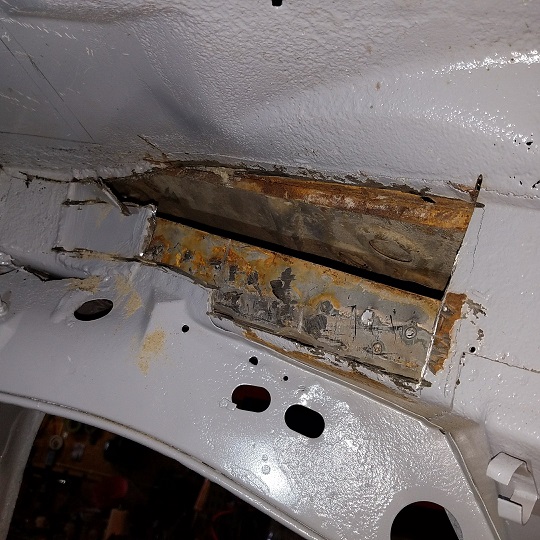 Once I get the ramp removed I'll cut out the inner wheelhouse so Super In Law can recreate the formed areas the best we can. (IMG:style_emoticons/default/smash.gif) 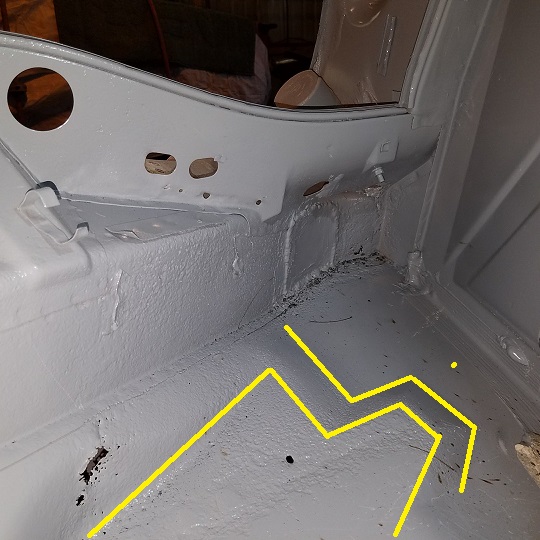 Then I'll move on to the engine shelf and end panel. I'd kind of like to not have to remove the engine seal channel, it's in great shape. And that extra stud is kind of cool. 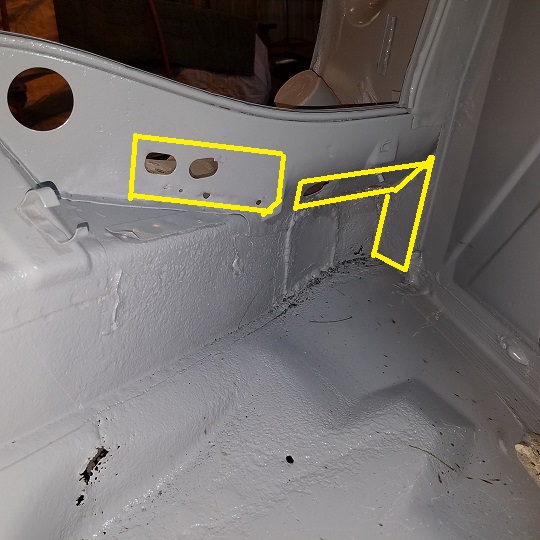 |
| cary |
 May 14 2017, 10:22 AM May 14 2017, 10:22 AM
Post
#209
|
|
Advanced Member     Group: Members Posts: 3,900 Joined: 26-January 04 From: Sherwood Oregon Member No.: 1,608 Region Association: Pacific Northwest 
|
Saturday 5/12/17
Back to cutting out the hell hole. While I'm cutting out the hell hole Super In Law went to work on the front valence. 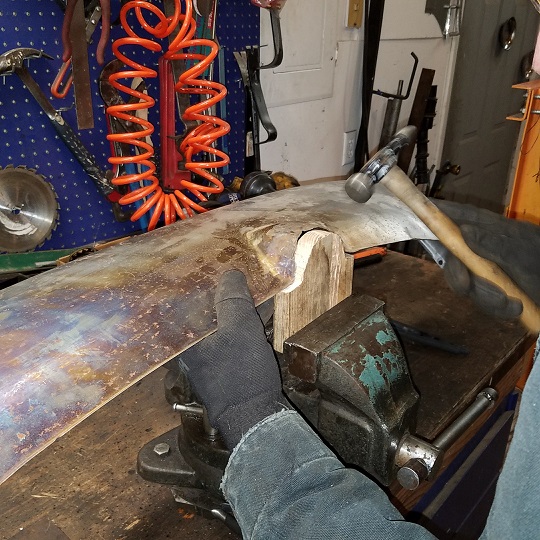 Not a lot to work with. These have been so beat up running into and over parking curb/stops over the years that the sheet metal is pretty thin. First attempt will be adding the front edge back on. I'll need to remove the one off my 74 to get the correct radius. It has an odd cut out. Out came the inner wheelhouse/battery tray mounting area sheet metal. 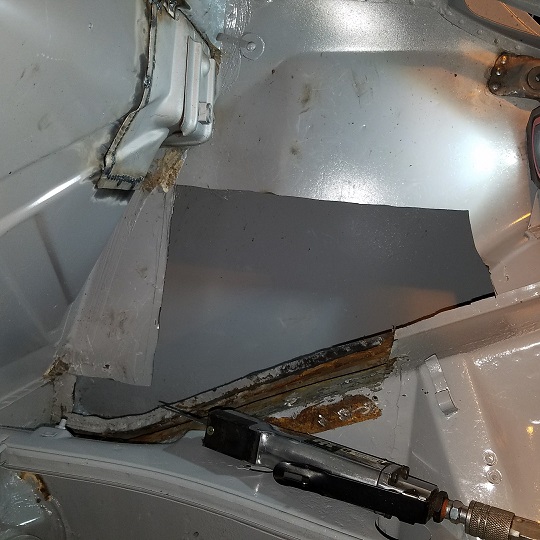 Replacement piece underneath, Super In Law's next project. We'll see what he comes up with. His first thought is a couple different bucks and being made in two pieces. Reminder : I don't charge for Super In Laws time. We're all paying his Federal retirement. He's now been retired longer than he worked (32 years). 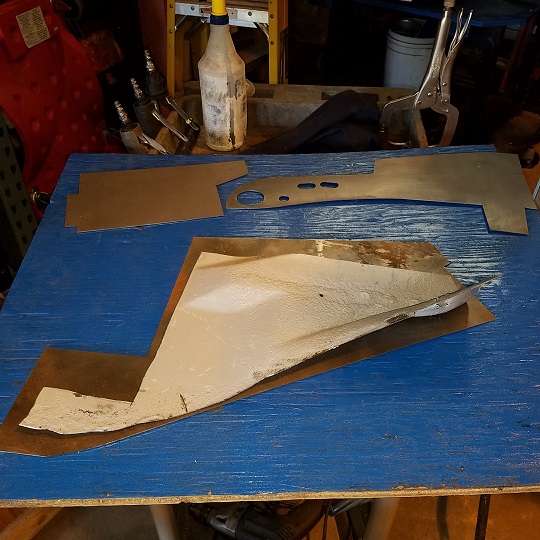 It takes a pile of tools to get this done . LOL. 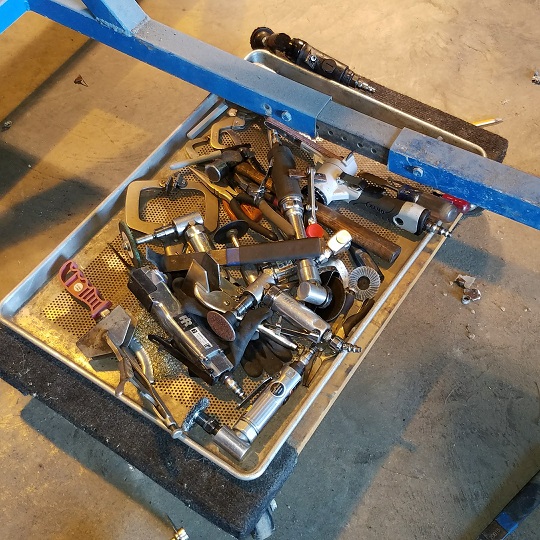 Ready to start cutting the patch panels. 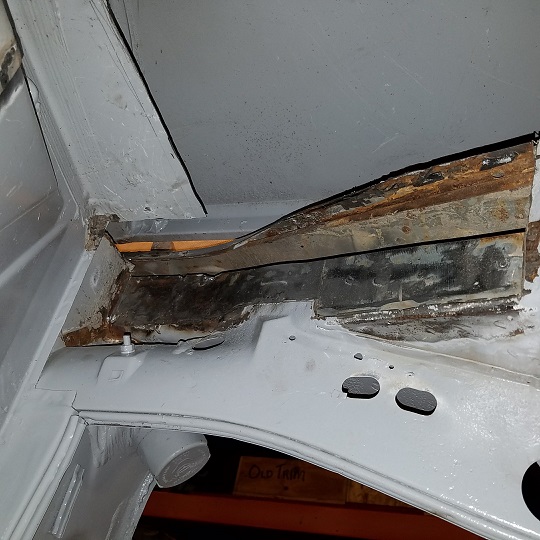 I think I'll leave the end panel. It has a little degradation on the hell hole side. The interior side looks beautiful. 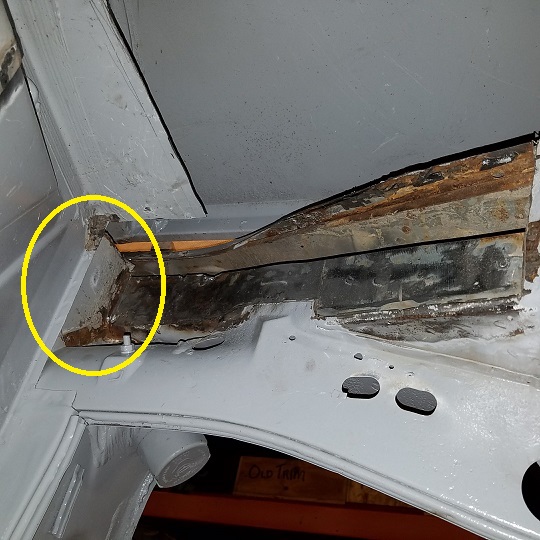 |
| raynekat |
 May 15 2017, 01:25 AM May 15 2017, 01:25 AM
Post
#210
|
|
Advanced Member     Group: Members Posts: 2,162 Joined: 30-December 14 From: Coeur d'Alene, Idaho Member No.: 18,263 Region Association: Pacific Northwest 
|
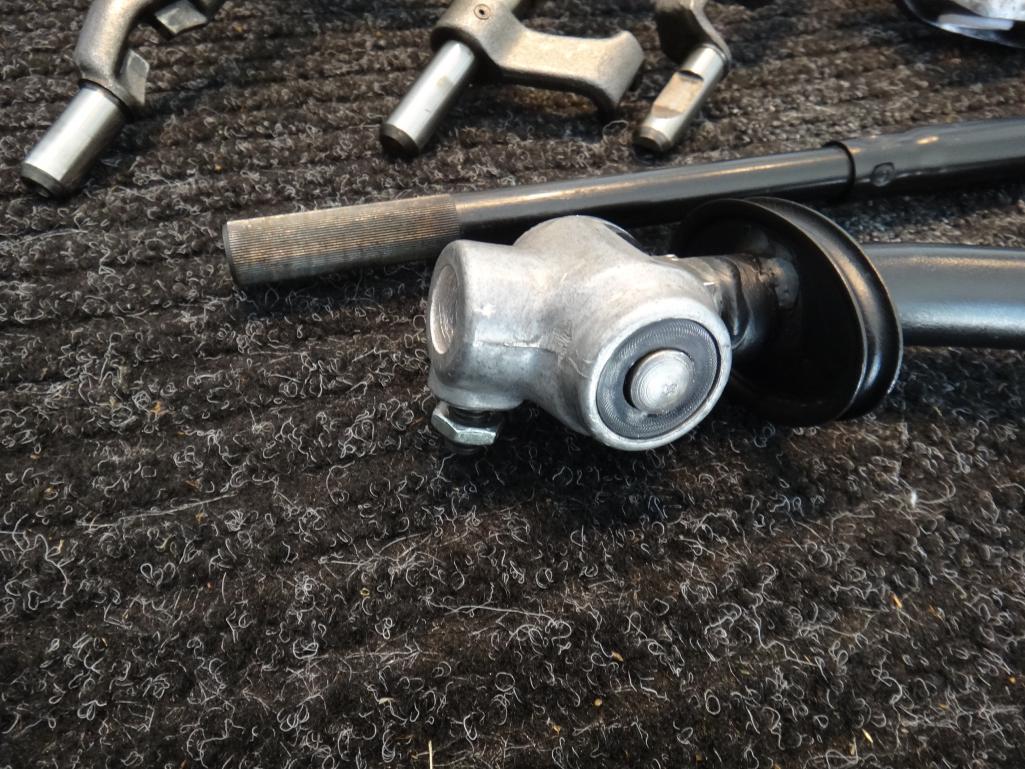
Obtaining/reconditioning parts for the side shift conversion.
Purchased the shift forks, rear console, rods and shifter from a couple of 914 World members. All the parts were in great shape. Just needed some cleaning and new bushings for the most part. Cleaned and repainted the two shift rods. The rod bushings on the rear rod had turned to the consistency of candle wax. Completely shot. So replaced those with a set from 914 Rubber. Also purchased a new rear console cover with band from 914 Rubber as well. 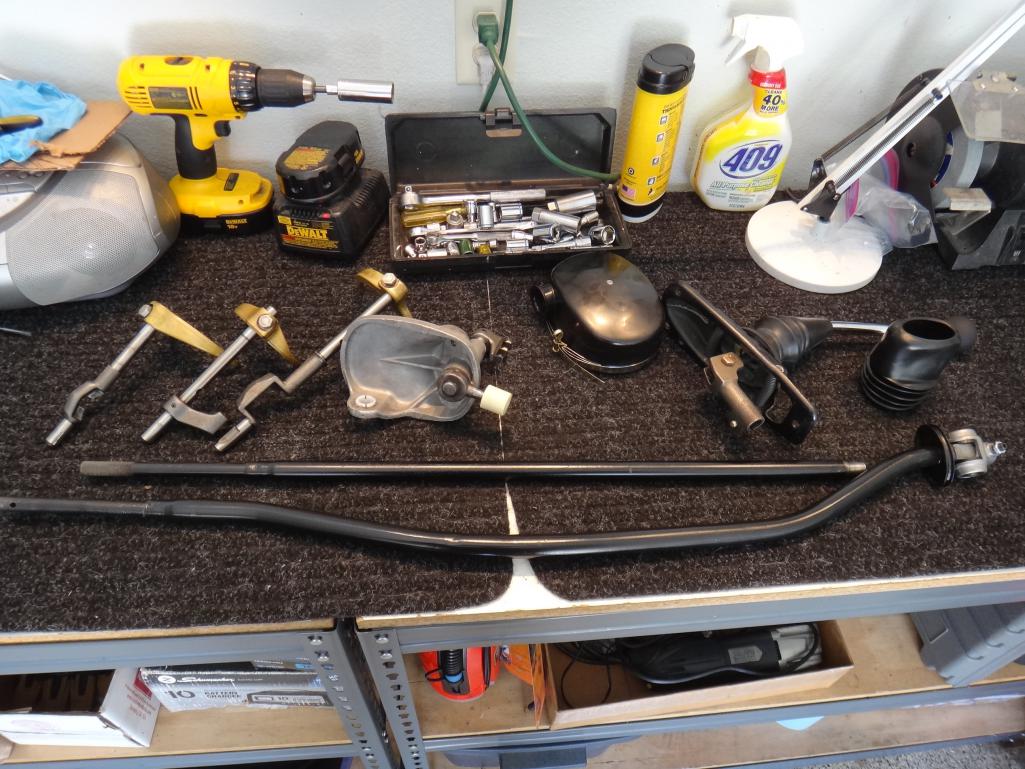 |
| raynekat |
 May 15 2017, 01:30 AM May 15 2017, 01:30 AM
Post
#211
|
|
Advanced Member     Group: Members Posts: 2,162 Joined: 30-December 14 From: Coeur d'Alene, Idaho Member No.: 18,263 Region Association: Pacific Northwest 
|
|
| raynekat |
 May 15 2017, 01:34 AM May 15 2017, 01:34 AM
Post
#212
|
|
Advanced Member     Group: Members Posts: 2,162 Joined: 30-December 14 From: Coeur d'Alene, Idaho Member No.: 18,263 Region Association: Pacific Northwest 
|
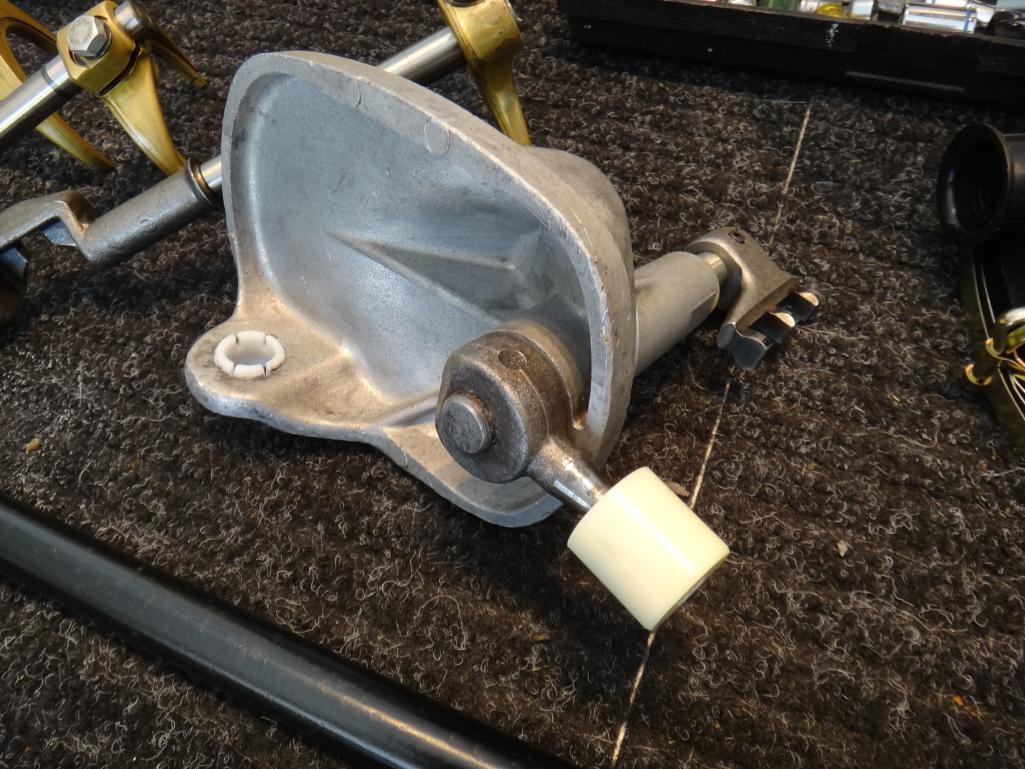
Pulled the shifter apart to clean it, paint it, inspect the components.
Everything looked great including the two plastic pieces on either side of the spring up inside the housing. A new coat of paint and reassembly was all that was needed. Getting those two long springs back in place was a minor battle, but I won in the end. Some new hardware, boot and shift knob...and this job was complete. 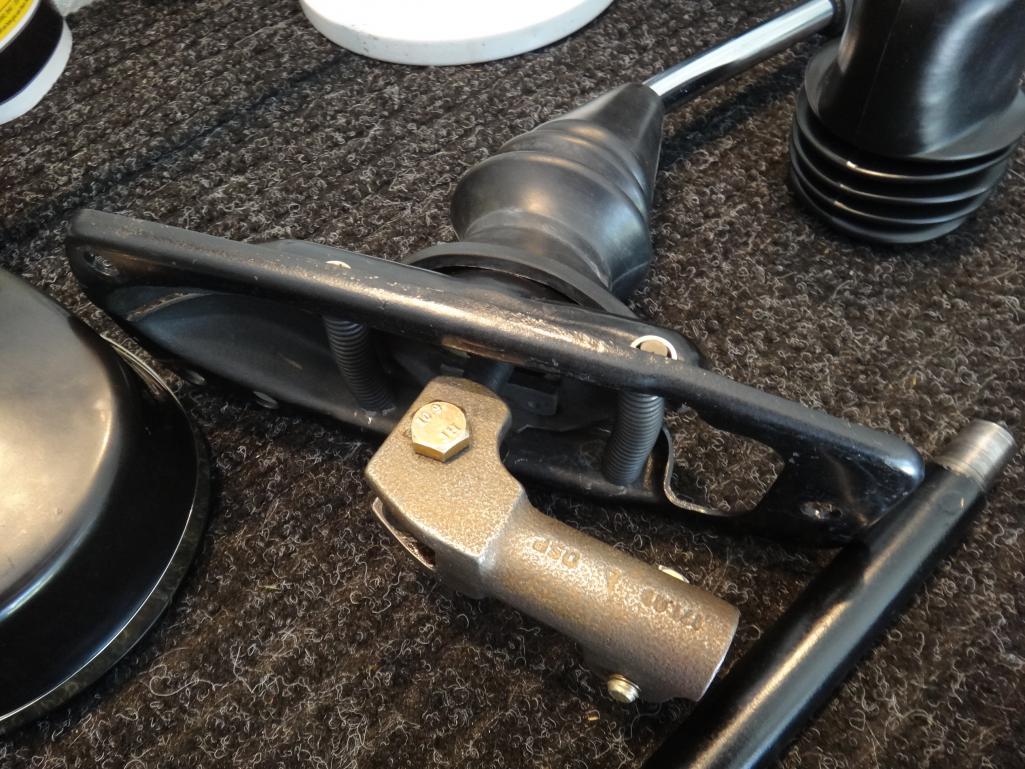 |
| raynekat |
 May 15 2017, 01:35 AM May 15 2017, 01:35 AM
Post
#213
|
|
Advanced Member     Group: Members Posts: 2,162 Joined: 30-December 14 From: Coeur d'Alene, Idaho Member No.: 18,263 Region Association: Pacific Northwest 
|
|
| raynekat |
 May 18 2017, 03:58 PM May 18 2017, 03:58 PM
Post
#214
|
|
Advanced Member     Group: Members Posts: 2,162 Joined: 30-December 14 From: Coeur d'Alene, Idaho Member No.: 18,263 Region Association: Pacific Northwest 
|
Now for a break in my restoration activities.....
My new twins today, Sadie and Derek. Healthy girl, boy and wife. What a trip this has been. Obviously from the bottom side of the world. (IMG:style_emoticons/default/biggrin.gif) 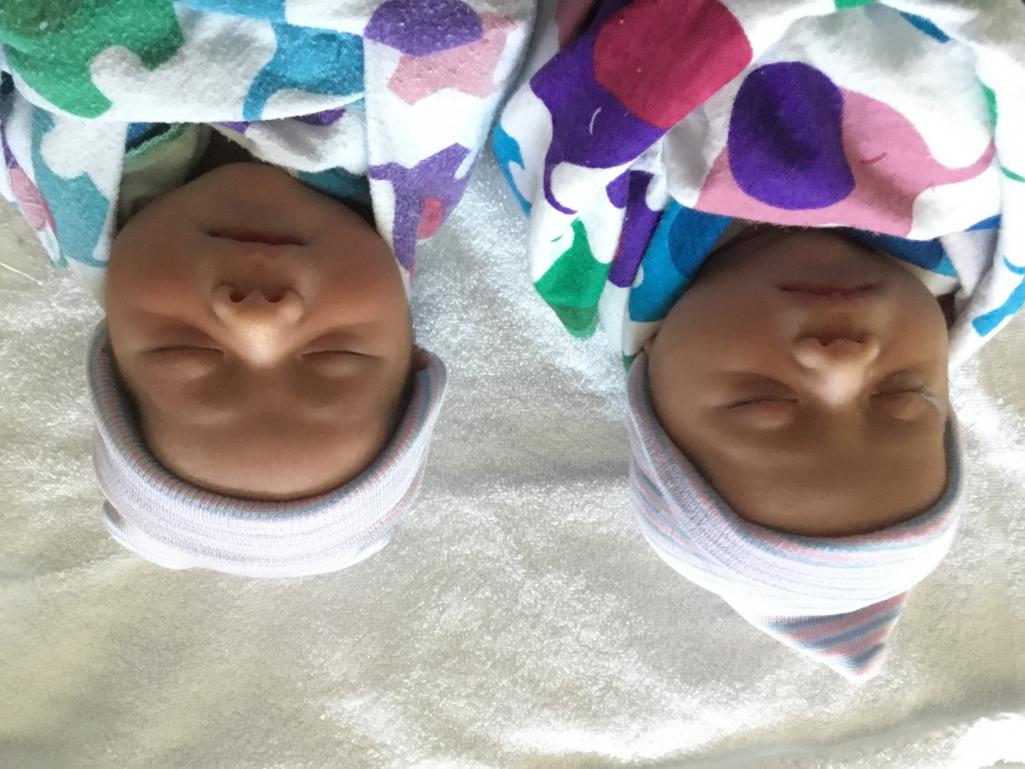 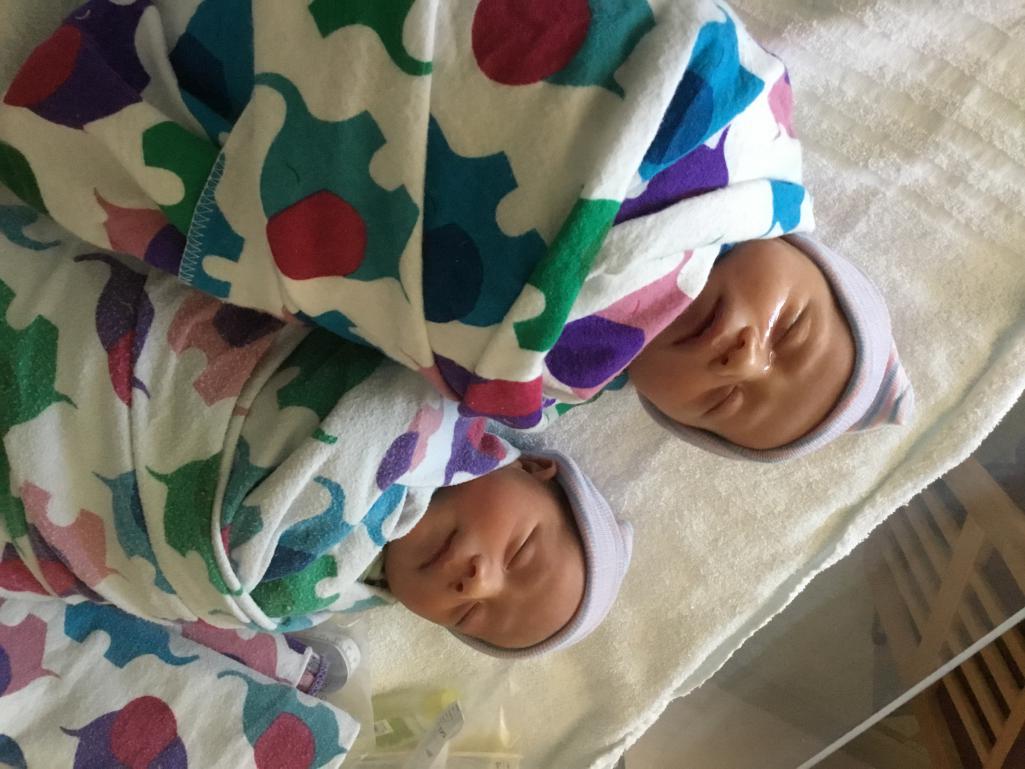 |
| cary |
 May 18 2017, 05:06 PM May 18 2017, 05:06 PM
Post
#215
|
|
Advanced Member     Group: Members Posts: 3,900 Joined: 26-January 04 From: Sherwood Oregon Member No.: 1,608 Region Association: Pacific Northwest 
|
Congrats from Julie, I and Super In Law.
They're beautiful. |
| altitude411 |
 May 18 2017, 05:11 PM May 18 2017, 05:11 PM
Post
#216
|
|
I drove my 6 into a tree    Group: Members Posts: 1,306 Joined: 21-September 14 From: montana Member No.: 17,932 Region Association: Rocky Mountains 
|
Wow, how blessed, beautiful little angels. Congratulations!
|
| raynekat |
 May 18 2017, 05:21 PM May 18 2017, 05:21 PM
Post
#217
|
|
Advanced Member     Group: Members Posts: 2,162 Joined: 30-December 14 From: Coeur d'Alene, Idaho Member No.: 18,263 Region Association: Pacific Northwest 
|
Future Porsche pilots /mechanics.
|
| cary |
 May 18 2017, 10:45 PM May 18 2017, 10:45 PM
Post
#218
|
|
Advanced Member     Group: Members Posts: 3,900 Joined: 26-January 04 From: Sherwood Oregon Member No.: 1,608 Region Association: Pacific Northwest 
|
Friday 5/18/17
Start the day with pulling the front valence of the 74 Appearance Group I have in inventory. To become my oldest son's car (Robert, custom made kid). Need to recreate the control arm cups. The part that gets ground off. 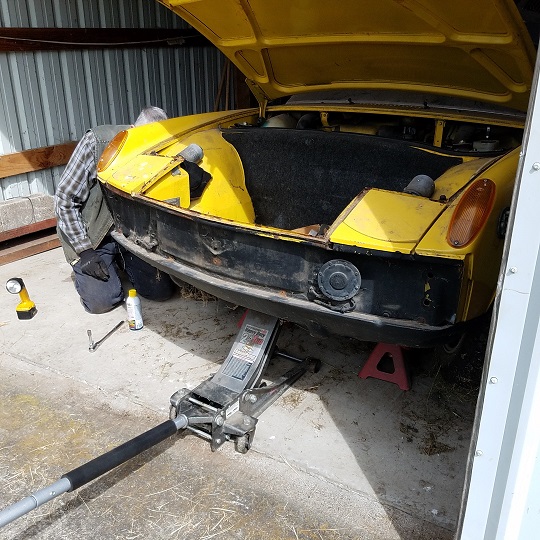 Next weld in the McMark 914-6 oil line hook. 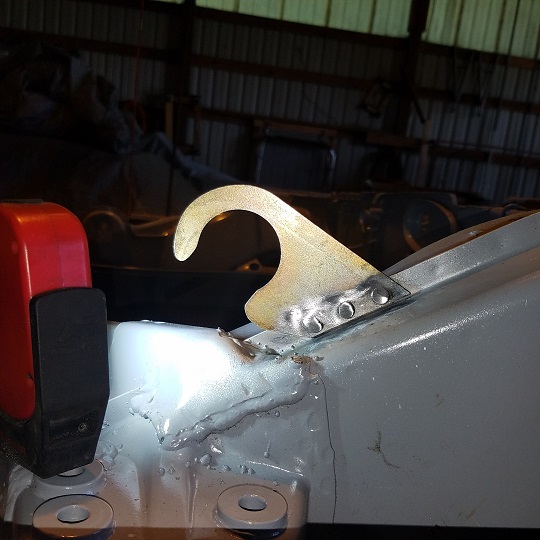 Then Doug asked me to cut out the rear fender lips like the later cars. Allows for a little wider tire. 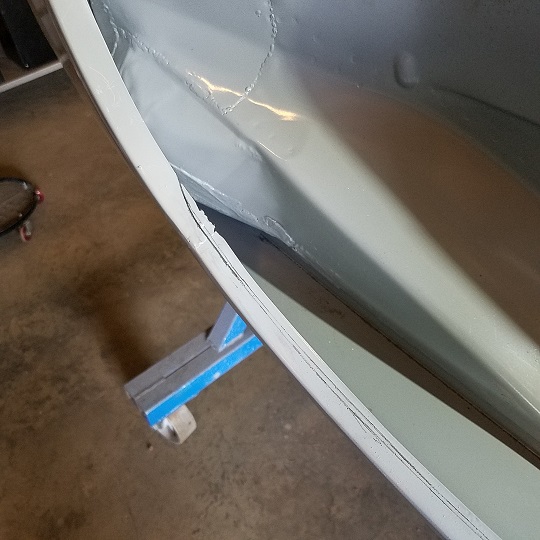 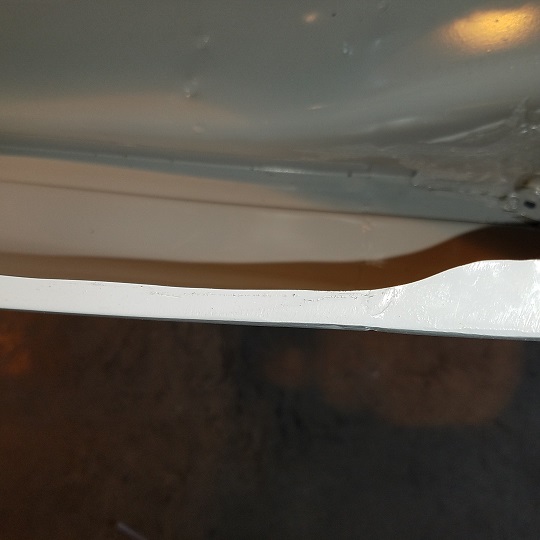 We'll create a wooden buck so I can hammer roll the inside of the lip just a smidgen. |
| cary |
 May 18 2017, 11:09 PM May 18 2017, 11:09 PM
Post
#219
|
|
Advanced Member     Group: Members Posts: 3,900 Joined: 26-January 04 From: Sherwood Oregon Member No.: 1,608 Region Association: Pacific Northwest 
|
While I'm welding, Super In Law started the work on the inner wheelhouse/ battery tray panel.
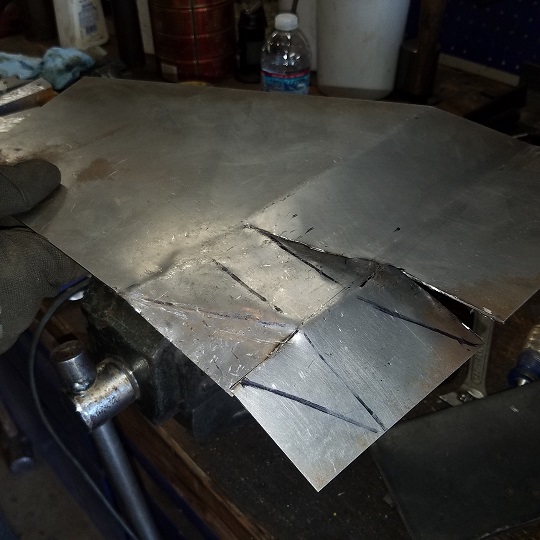 Then I took a couple minutes to go thru the inventory of parts that will be going on the new floor pan. 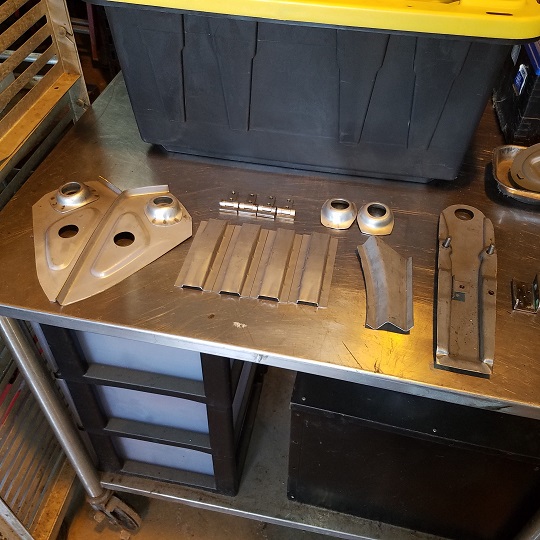 Next its time to weld in the Tangerine Racing suspension console stiffeners. Lots of clamping and hammer work. 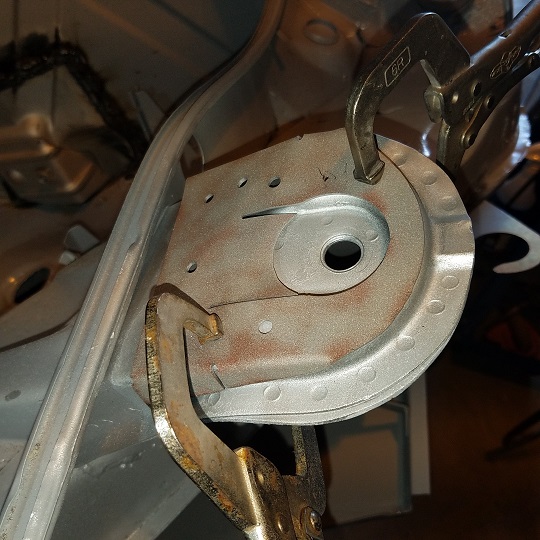 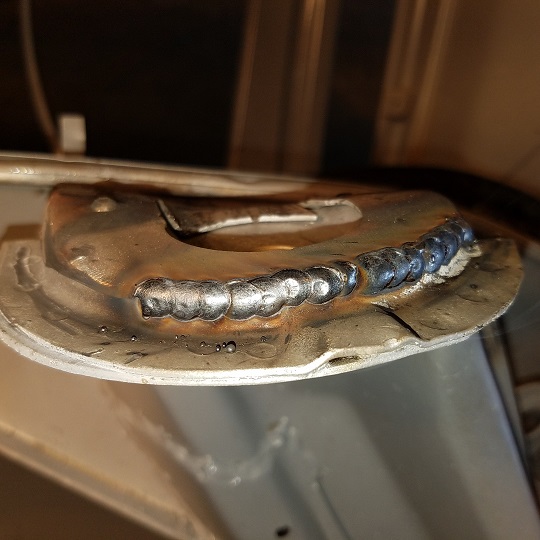 One side sprayed with cold galvanizing. One shined up with a wire brush. 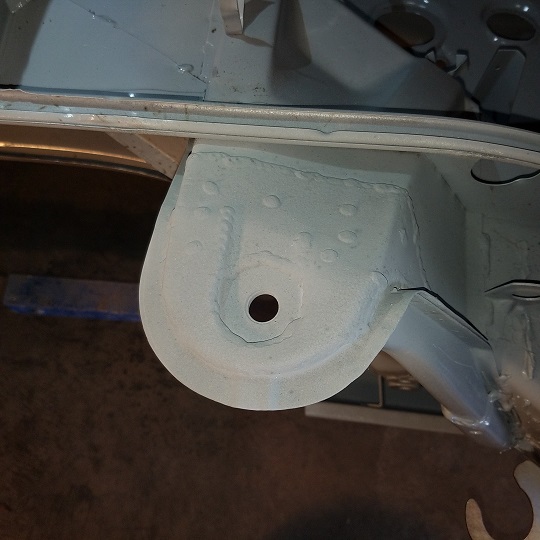 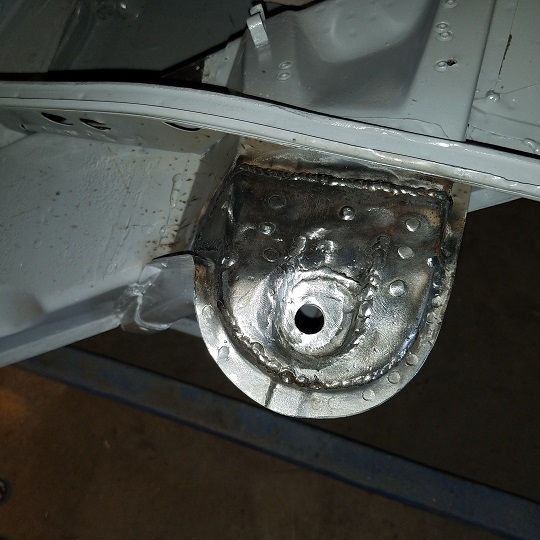 Ended the day prepping the right engine lid hinge bracket. Welded in the holes that were ripped out when the hinge came loose. 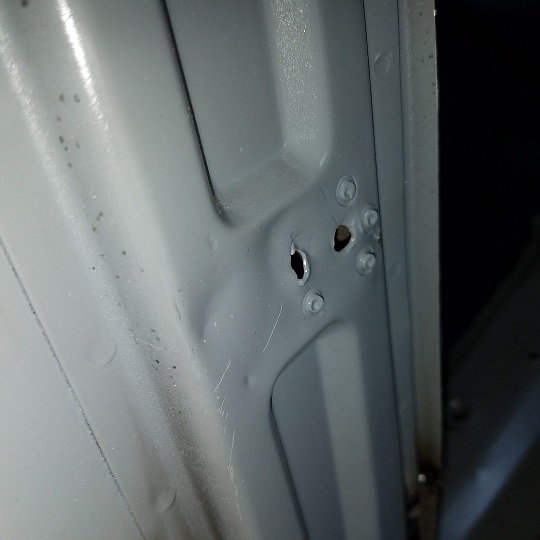 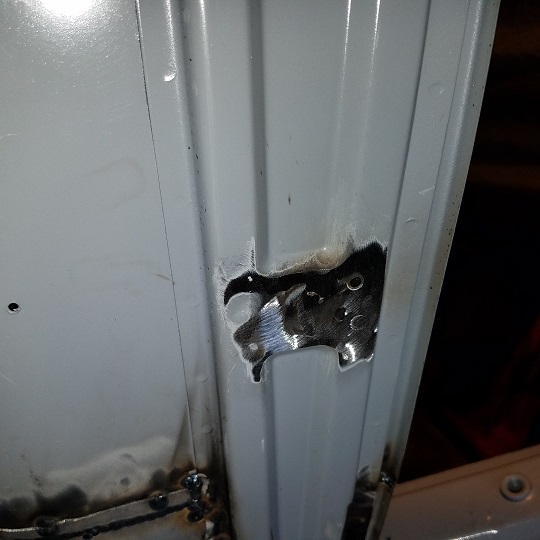 |
| cary |
 May 20 2017, 10:14 AM May 20 2017, 10:14 AM
Post
#220
|
|
Advanced Member     Group: Members Posts: 3,900 Joined: 26-January 04 From: Sherwood Oregon Member No.: 1,608 Region Association: Pacific Northwest 
|
Friday 5/19/17
Short day on Doug's car. Rebuilt the front brake master cylinder on the 4 wheeler for starters. Good-er as new............. Grabbed the welder and welded in the engine lid bracket before Super In Law needed it on the wheelhouse back wall. Being that welding is a major portion of the work we do, another Miller welder is on the wish list. A 115v unit to be used primarily for sheet metal. 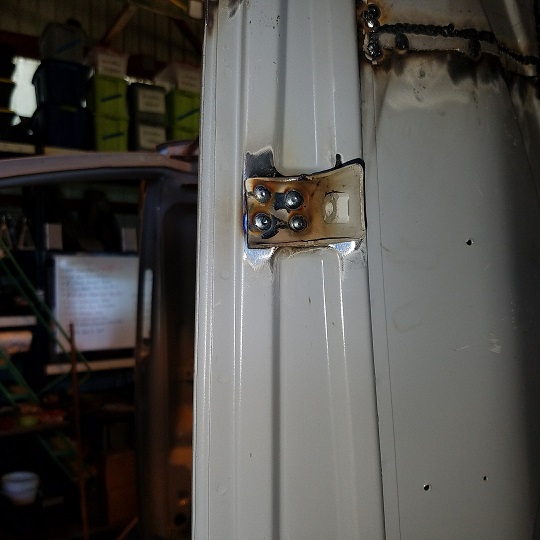 While Super In Law is working the wheelhouse piece I started to look at the outside front sway bar reinforcement pieces. Not exactly plug and play on a 914. 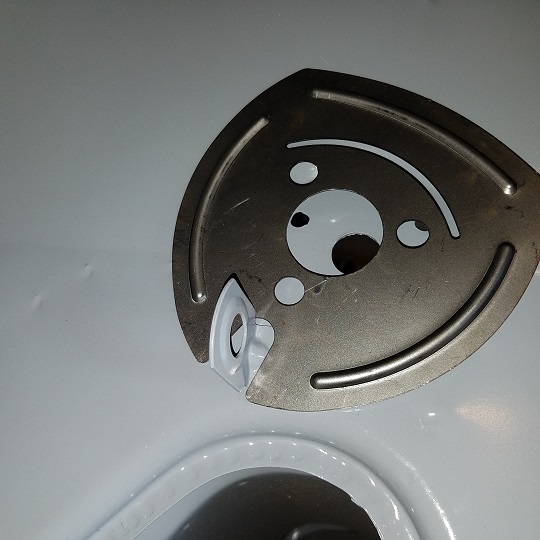 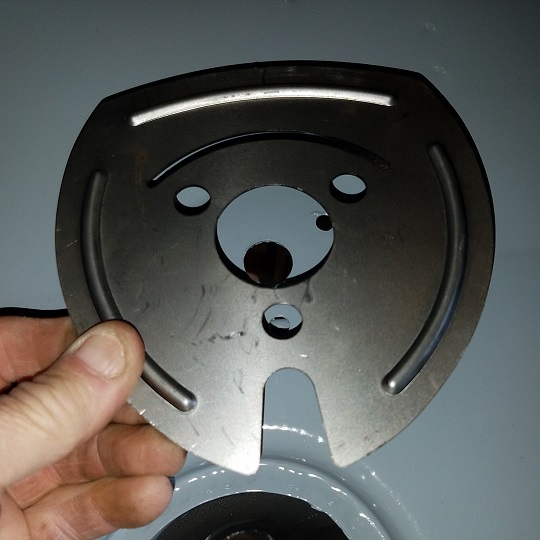 The Mad Dog piece is a little more than we need for a street car. So Doug and I decided that modifying the ER piece was in order. Beings that I've always looked over the horizon. I wanted the brake line support to be repair and replaceable. I think SOP is to weld over it. Here's mock up #1. Pretty simple pattern making. Push a pencil in the bolt hole. Then fill with a #8 bolt. Then cut a slit for the brake support with a Exact-o knife. 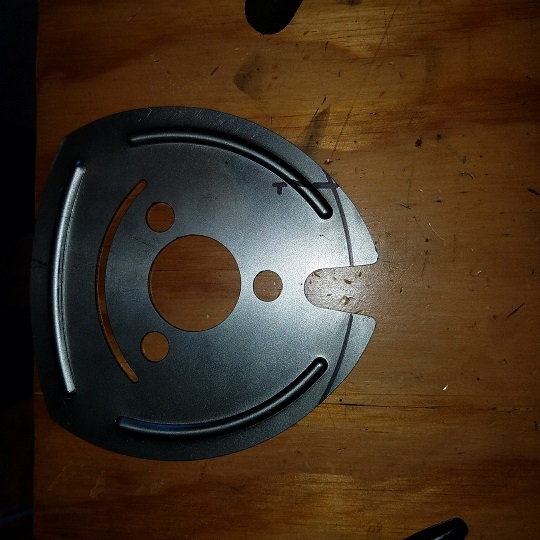 Final version. Gave the brake support enough space so that the welds wouldn't touch it. Used the inside plate to pull it into place. Again used self tapers to snug it down tight. But even with the screws, lots of hammer work to keep it nice and flat. 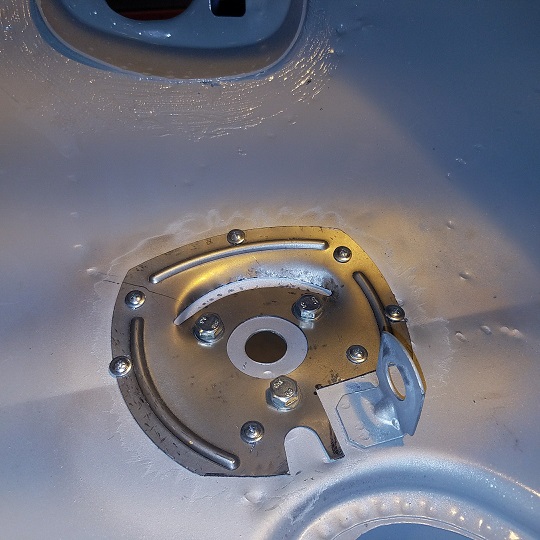 All glued down ................. 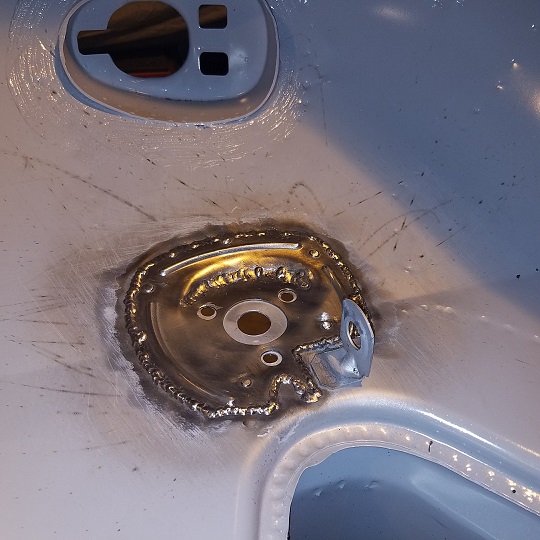 Looks like it moved about 1.5 mms counter clockwise after I snugged it down. No real issue other then bugging me. I'll pull one of Mark's sway bar bushing cups out of his plating stash to check for welding clearance. 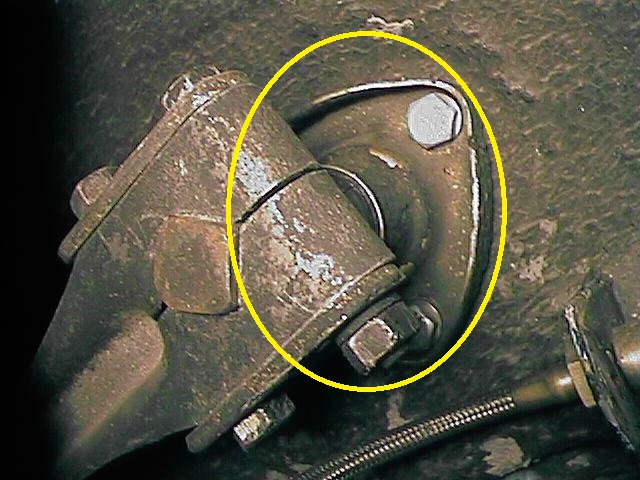 Based on this shot there shouldn't be any issues. But I don't want it to be an issue after paint when Doug's putting it back together. (IMG:style_emoticons/default/sad.gif) |
  |
2 User(s) are reading this topic (2 Guests and 0 Anonymous Users)
0 Members:

|
Lo-Fi Version | Time is now: 25th November 2024 - 11:53 AM |
Invision Power Board
v9.1.4 © 2024 IPS, Inc.


